
本文实例为大家分享了Unity Shader实现素描风格的具体代码,供大家参考,具体内容如下
原理
使用6张素描纹理进行渲染,在渲染阶段,在顶点着色阶段计算逐顶点的光照,根据光照结果决定6张纹理的混合权重,并传递给片元着色器。在片元着色器中根据这些权重来混合6张纹理的采样结果
Shader实现
Shader "Hatching"
{
 Properties {
 _Color ("Color Tint", Color) = (1, 1, 1, 1)//颜色
 _TileFactor ("Tile Factor", Float) = 1//纹理的平铺系数,数值越大素描线条越密
 _Outline ("Outline", Range(0, 1)) = 0.1
 _Hatch0 ("Hatch 0", 2D) = "white" {}
 _Hatch1 ("Hatch 1", 2D) = "white" {}
 _Hatch2 ("Hatch 2", 2D) = "white" {}
 _Hatch3 ("Hatch 3", 2D) = "white" {}
 _Hatch4 ("Hatch 4", 2D) = "white" {}
 _Hatch5 ("Hatch 5", 2D) = "white" {}//对应的6张素描纹理
 }

 SubShader {
 Tags { "RenderType"="Opaque" "Queue"="Geometry"}


 Pass {
 Tags { "LightMode"="ForwardBase" }

 CGPROGRAM

 #pragma vertex vert
 #pragma fragment frag

 #pragma multi_compile_fwdbase

 #include "UnityCG.cginc"
 #include "Lighting.cginc"
 #include "AutoLight.cginc"
 #include "UnityShaderVariables.cginc"

 fixed4 _Color;
 float _TileFactor;
 sampler2D _Hatch0;
 sampler2D _Hatch1;
 sampler2D _Hatch2;
 sampler2D _Hatch3;
 sampler2D _Hatch4;
 sampler2D _Hatch5;

 struct a2v {
 float4 vertex : POSITION;
 float4 tangent : TANGENT;
 float3 normal : NORMAL;
 float2 texcoord : TEXCOORD0;
 };

 struct v2f {
 float4 pos : SV_POSITION;
 float2 uv : TEXCOORD0;
 fixed3 hatchWeights0 : TEXCOORD1;//
 fixed3 hatchWeights1 : TEXCOORD2;// 6个混合权重,存在两个fixed3变量中
 float3 worldPos : TEXCOORD3;
 SHADOW_COORDS(4)
 };

 v2f vert(a2v v) {
 v2f o;

 o.pos = UnityObjectToClipPos(v.vertex);

 o.uv = v.texcoord.xy * _TileFactor;

 fixed3 worldLightDir = normalize(WorldSpaceLightDir(v.vertex));
 fixed3 worldNormal = UnityObjectToWorldNormal(v.normal);
 fixed diff = max(0, dot(worldLightDir, worldNormal));//漫反射系数

 o.hatchWeights0 = fixed3(0, 0, 0);
 o.hatchWeights1 = fixed3(0, 0, 0);

 float hatchFactor = diff * 7.0;//把diff缩放到[0,7]范围

 //纯白
 if (hatchFactor > 6.0)
 {

 } else if (hatchFactor > 5.0) {
  o.hatchWeights0.x = hatchFactor - 5.0;
 } else if (hatchFactor > 4.0) {
  o.hatchWeights0.x = hatchFactor - 4.0;
  o.hatchWeights0.y = 1.0 - o.hatchWeights0.x;
 } else if (hatchFactor > 3.0) {
  o.hatchWeights0.y = hatchFactor - 3.0;
  o.hatchWeights0.z = 1.0 - o.hatchWeights0.y;
 } else if (hatchFactor > 2.0) {
  o.hatchWeights0.z = hatchFactor - 2.0;
  o.hatchWeights1.x = 1.0 - o.hatchWeights0.z;
 } else if (hatchFactor > 1.0) {
  o.hatchWeights1.x = hatchFactor - 1.0;
  o.hatchWeights1.y = 1.0 - o.hatchWeights1.x;
 } else {
  o.hatchWeights1.y = hatchFactor;
  o.hatchWeights1.z = 1.0 - o.hatchWeights1.y;
 }

 o.worldPos = mul(unity_ObjectToWorld, v.vertex).xyz;

 TRANSFER_SHADOW(o);

 return o;
 }

 fixed4 frag(v2f i) : SV_Target
 { //根据相应的权重进行采样
 fixed4 hatchTex0 = tex2D(_Hatch0, i.uv) * i.hatchWeights0.x;
 fixed4 hatchTex1 = tex2D(_Hatch1, i.uv) * i.hatchWeights0.y;
 fixed4 hatchTex2 = tex2D(_Hatch2, i.uv) * i.hatchWeights0.z;
 fixed4 hatchTex3 = tex2D(_Hatch3, i.uv) * i.hatchWeights1.x;
 fixed4 hatchTex4 = tex2D(_Hatch4, i.uv) * i.hatchWeights1.y;
 fixed4 hatchTex5 = tex2D(_Hatch5, i.uv) * i.hatchWeights1.z;
 fixed4 whiteColor = fixed4(1, 1, 1, 1) * (1 - i.hatchWeights0.x - i.hatchWeights0.y - i.hatchWeights0.z -
  i.hatchWeights1.x - i.hatchWeights1.y - i.hatchWeights1.z);

 fixed4 hatchColor = hatchTex0 + hatchTex1 + hatchTex2 + hatchTex3 + hatchTex4 + hatchTex5 + whiteColor;

 UNITY_LIGHT_ATTENUATION(atten, i, i.worldPos);

 return fixed4(hatchColor.rgb * _Color.rgb * atten, 1.0);
 }

 ENDCG
 }
 }
 FallBack "Diffuse"
}
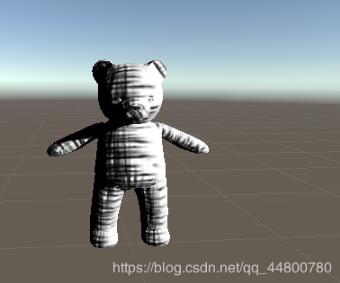
效果如下:
以上就是本文的全部内容,希望对大家的学习有所帮助,也希望大家多多支持自学编程网。

- 本文固定链接: https://zxbcw.cn/post/185718/
- 转载请注明:必须在正文中标注并保留原文链接
- QQ群: PHP高手阵营官方总群(344148542)
- QQ群: Yii2.0开发(304864863)