
主要是重写attemptAuthentication方法
导入依赖
<dependency>
<groupId>org.springframework.boot</groupId>
<artifactId>spring-boot-starter-security</artifactId>
</dependency>
<dependency>
<groupId>org.springframework.boot</groupId>
<artifactId>spring-boot-starter-web</artifactId>
</dependency>
相关配置和代码
application.properties配置密码
spring.security.user.name=admin
spring.security.user.password=123
创建自定义身份过滤类
写json登录之前先看一下源码,了解一下它是如何表单登录的
在idea连按下shift键,搜索UsernamePasswordAuthenticationFilter类

进入后再按Ctrl+F12可以查看该类的所有方法

进入方法
我们只需要在request.getParameter()那里重写一下不就可以实现json登陆
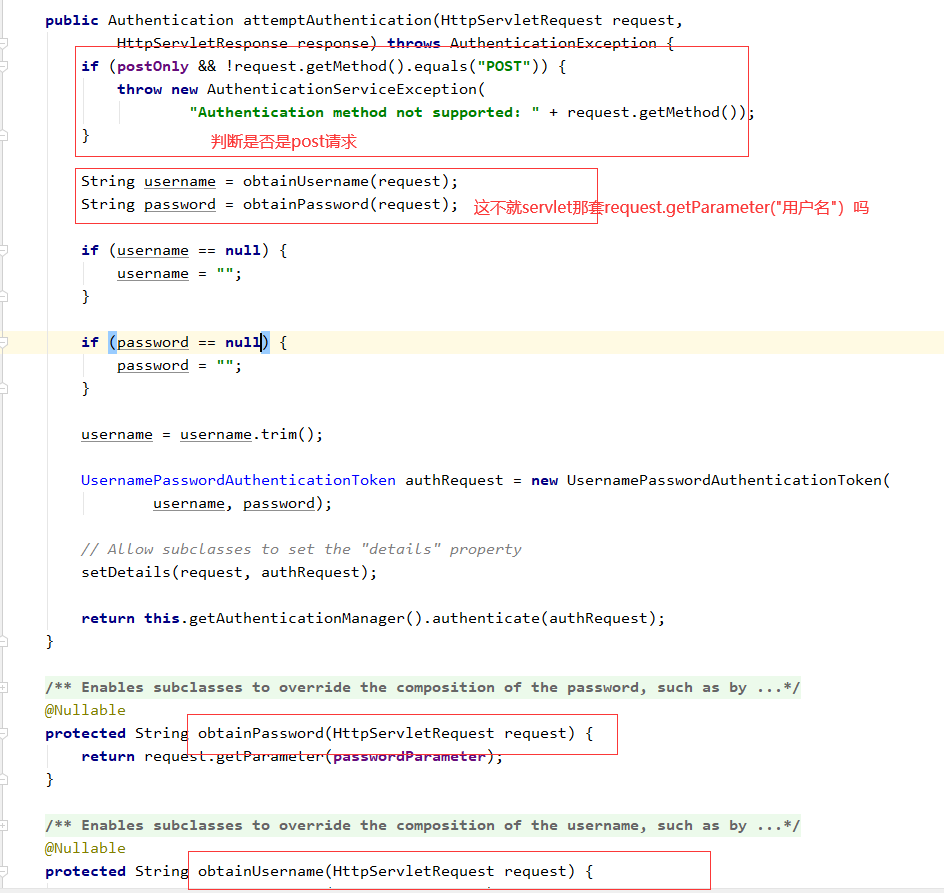
重写attemptAuthentication(HttpServletRequestrequest,HttpServletResponseresponse)方法
只需要复制父类的方法,多加一个判断json的方法。就能同时支持key-value形式可json形式的参数了

public class MyAuthenticationFilter extends UsernamePasswordAuthenticationFilter {
  @Override
  public Authentication attemptAuthentication(HttpServletRequest request, HttpServletResponse response) throws AuthenticationException {
    if(!request.getMethod().equals("POST")){
      throw new AuthenticationServiceException("Authentication method not supported" + request.getMethod());
    }
    //说明是以json的形式传递参数
    if (request.getContentType().equals(MediaType.APPLICATION_JSON_VALUE)) {
      String username = null;
      String password = null;
      //将传入的json数据转换成map再通过get("key")获得
      try {
        Map<String,String> map =new ObjectMapper().readValue(request.getInputStream(),
            Map.class);
        username = map.get("username");
        password = map.get("password");
      } catch (IOException e) {
        e.printStackTrace();
      }

      if (username == null) {

      }
      if (password == null) {

      }
      username = username.trim();
      UsernamePasswordAuthenticationToken authRequest =
          new UsernamePasswordAuthenticationToken(username, password);
      setDetails(request, authRequest);

      return this.getAuthenticationManager().authenticate(authRequest);
    }

    return super.attemptAuthentication(request, response);
  }
}
创建SecurityConfig配置类
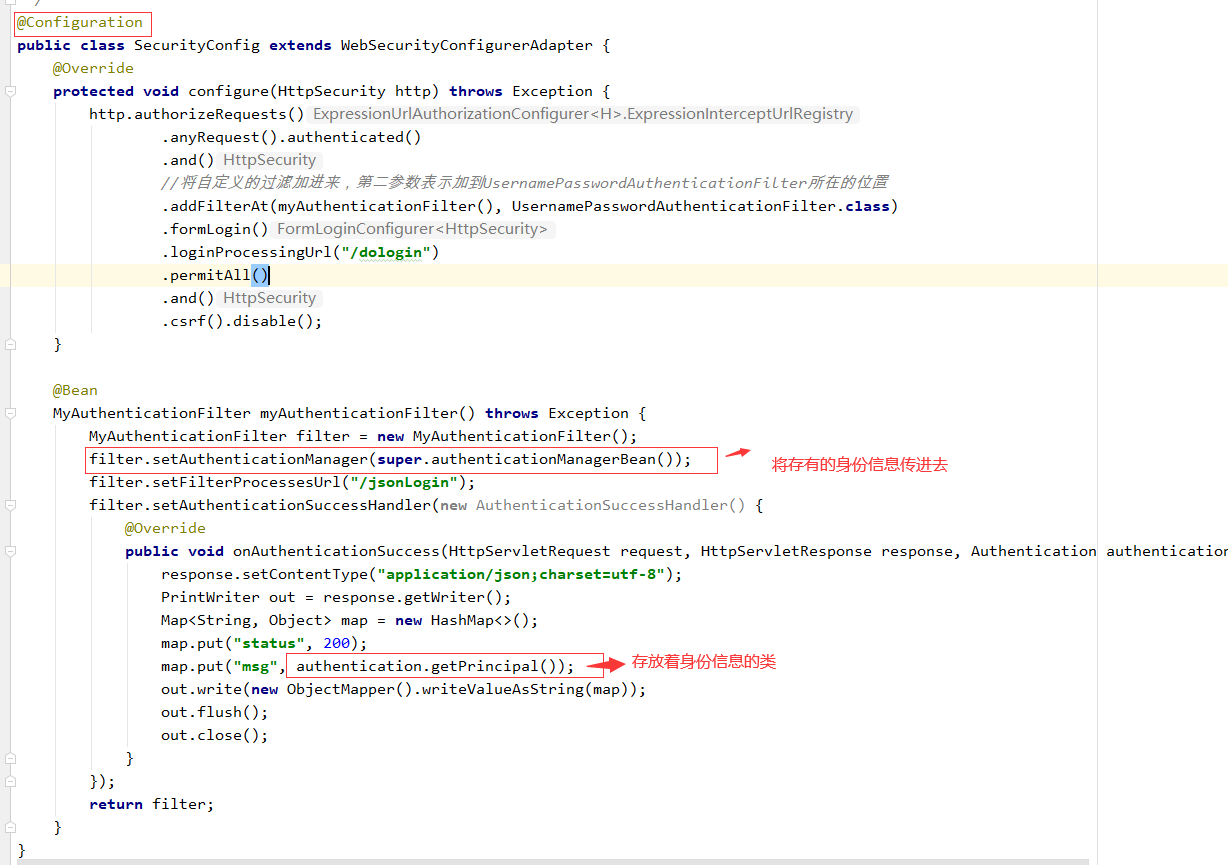
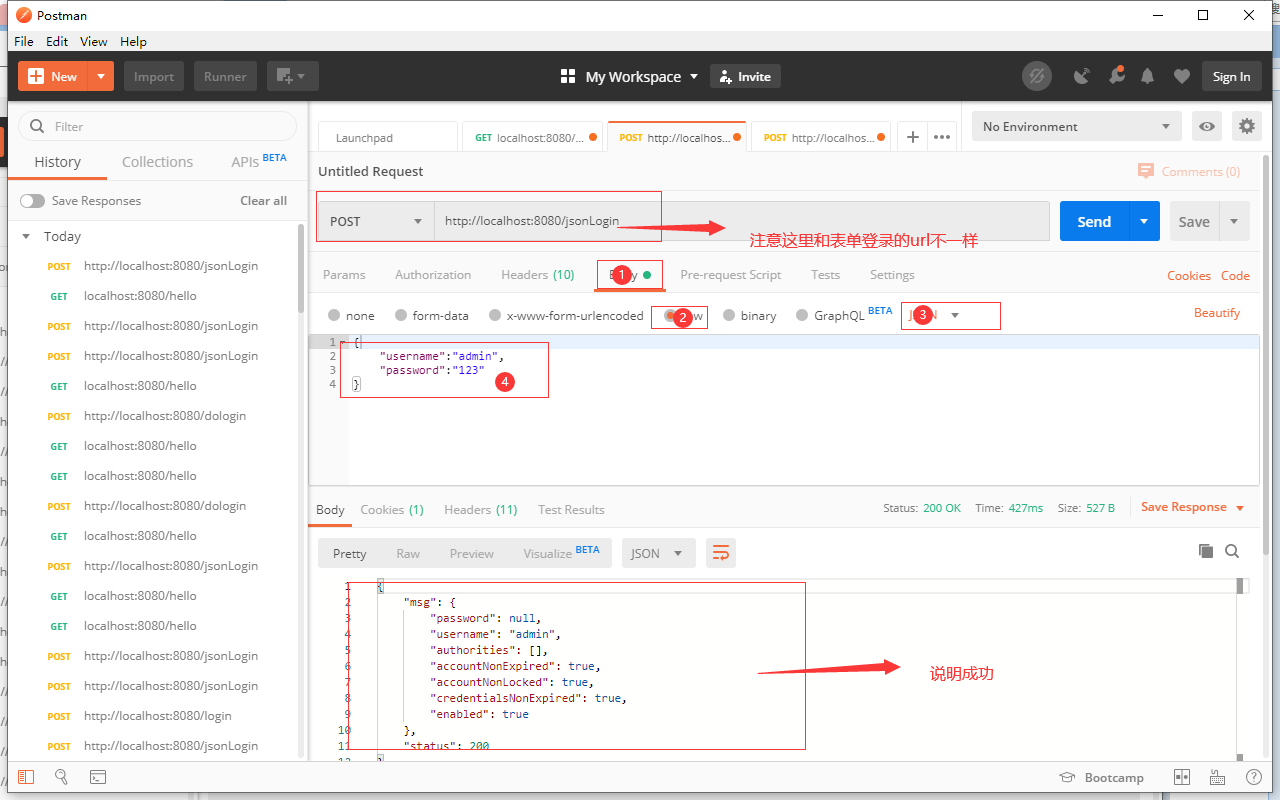
注:自定义的过滤类和security原来那个表单登陆过滤设置是分开的
体现在filter.setFilterProcessesUrl()和loginProcessingUrl
因此表单登陆和json登陆的,successHandler判断也要分开写,
一会下面有效果图也可以印证这一点
@Configuration
public class SecurityConfig extends WebSecurityConfigurerAdapter {
  @Override
  protected void configure(HttpSecurity http) throws Exception {
    http.authorizeRequests()
        .anyRequest().authenticated()
        .and()
        .formLogin()
        .loginProcessingUrl("/doLogin")
        .permitAll()
        .and()
        .csrf().disable();
    //将自定义的过滤器加进来,第二参数表示加到usernamePasswordAuthenticationFilter所在的位置
    http.addFilterAt(myAuthenticationFilter(), UsernamePasswordAuthenticationFilter.class);
  }

  @Bean
  MyAuthenticationFilter myAuthenticationFilter() throws Exception{
    MyAuthenticationFilter filter = new MyAuthenticationFilter();
    filter.setAuthenticationManager(authenticationManagerBean());
    return filter;

  }
}
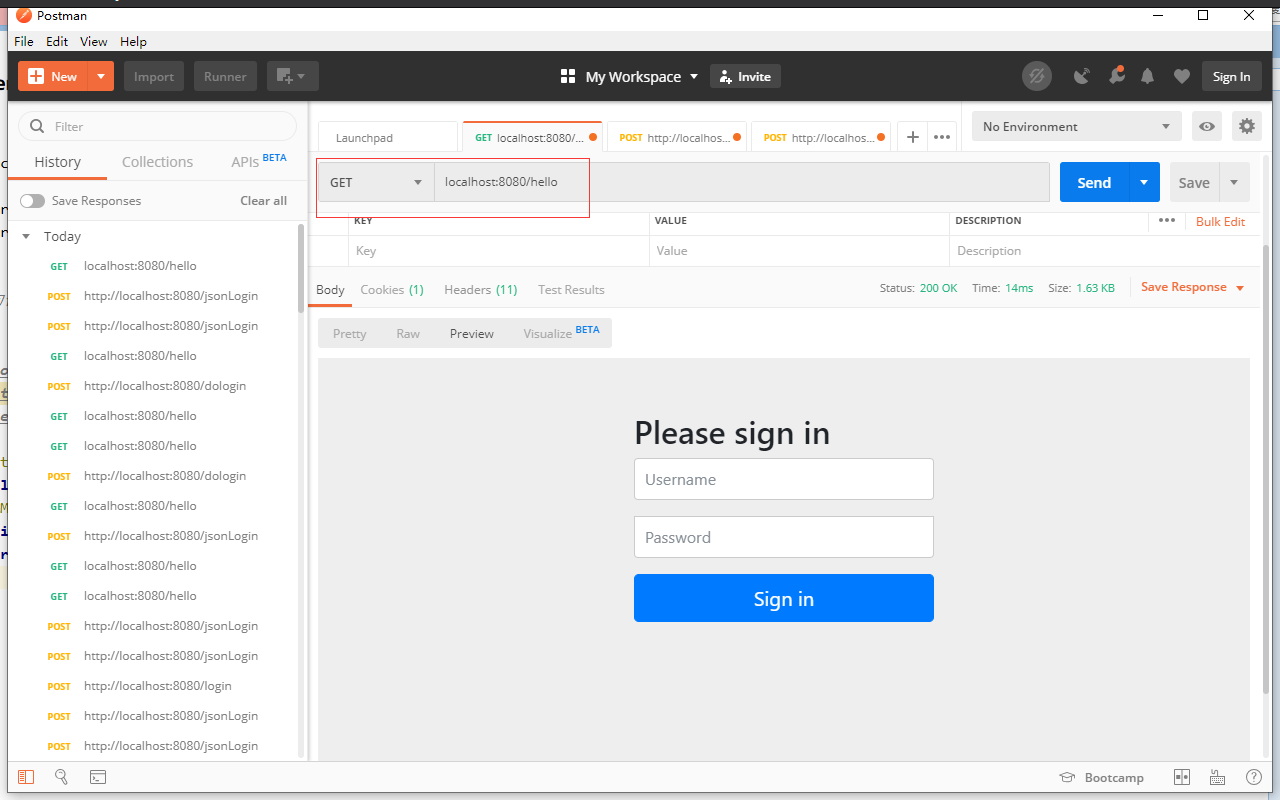
创建Controller
@RestController
public class HelloController {
  @GetMapping("/hello")
  public String hello(){
    return "hello security";
  }
}

以上就是本文的全部内容,希望对大家的学习有所帮助,也希望大家多多支持自学编程网。

- 本文固定链接: https://zxbcw.cn/post/193404/
- 转载请注明:必须在正文中标注并保留原文链接
- QQ群: PHP高手阵营官方总群(344148542)
- QQ群: Yii2.0开发(304864863)