博主使用的fastadmin 封装框架
实现功能:AXN隐私号绑定、解绑;
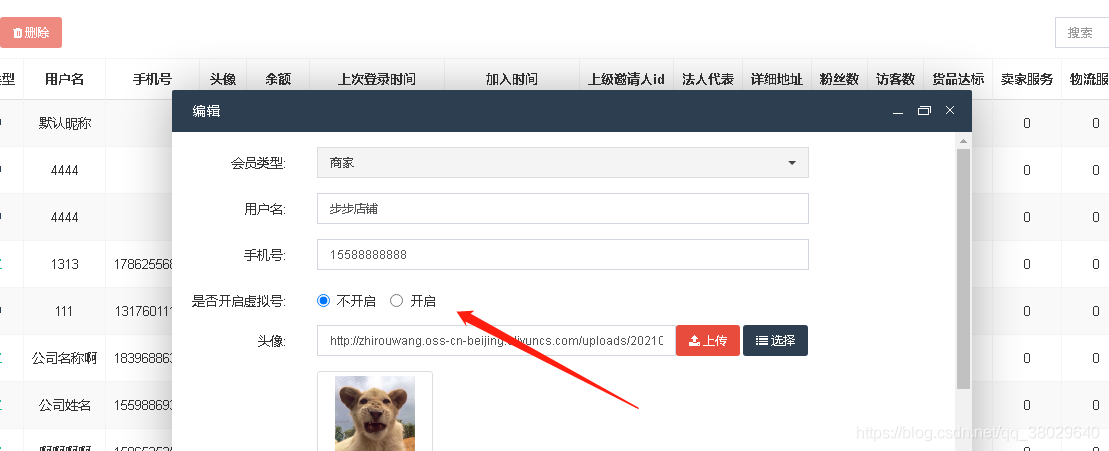
场景:为店铺手机号开通虚拟号,用户联系店铺展示虚拟号码;
官方开放文档地址:https://help.aliyun.com/document_detail/59655.html?spm=a2c4g.11174283.6.661.b8365d50CKM5Ma
效果如下:
参考官网开放文档,下载SDK;解压得到 aliyun-dypls-php-sdk 文件夹;
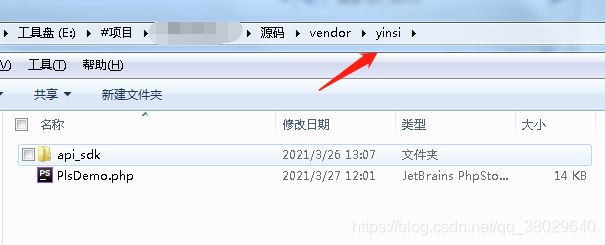
将解压的文件夹内的 api_sdk 文件夹与 api_demo 文件夹内的 PlsDemo.php,拷贝到项目 vendor 目录下,笔者这里是放在了yinsi文件夹
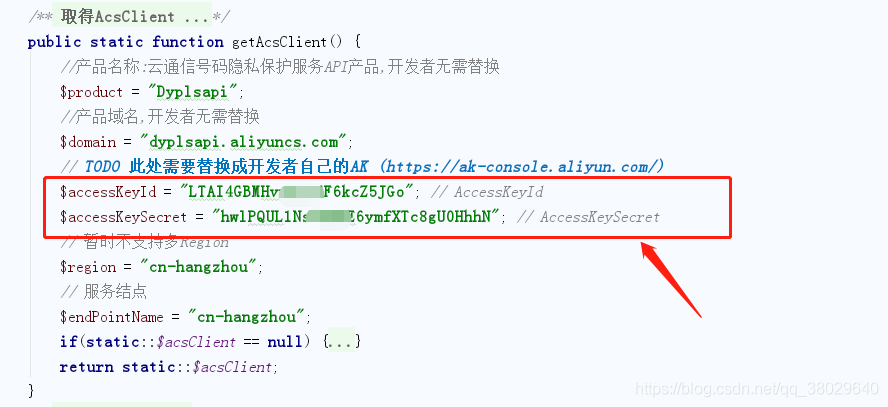
随后打开 PlsDemo.php文件,修改 getAcsClient 方法内对应的 AccessKeyId、AccessKeySecret
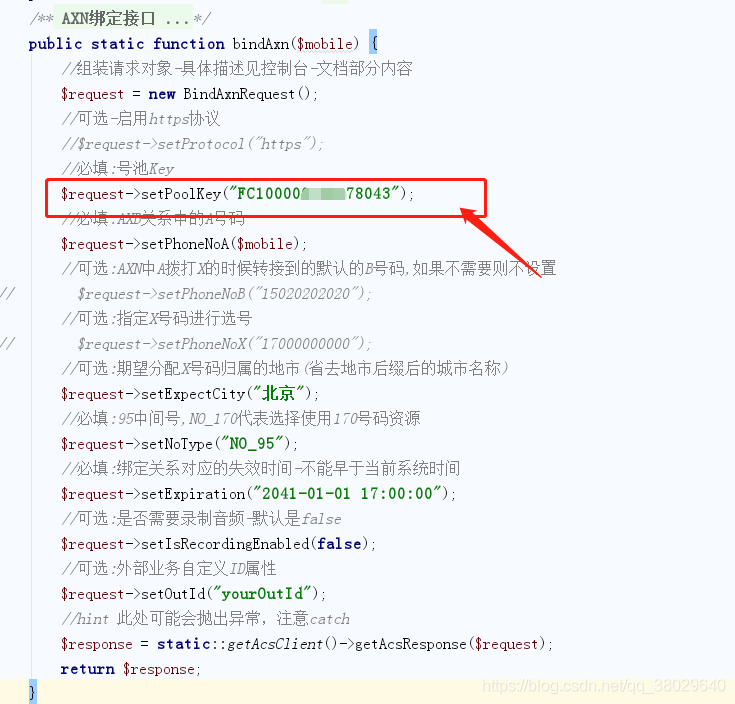
还是PlsDemo.php文件,修改绑定时的号码池
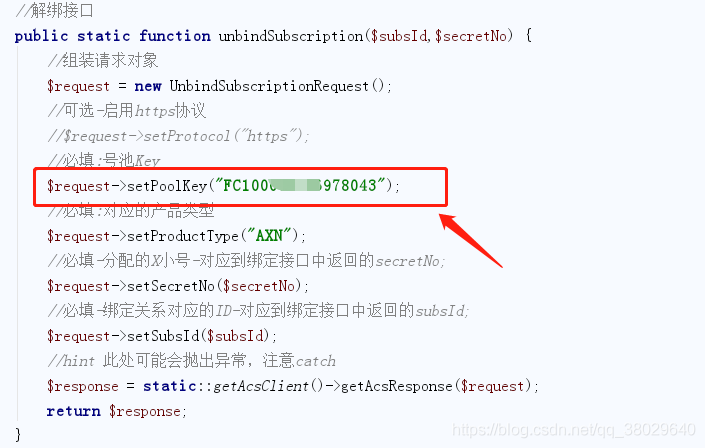
还是PlsDemo.php文件,修改解绑时的号码池
最后在用户列表控制器内,添加以下代码:
/**
   * 编辑
   */
  public function edit($ids = null)
  {
    $row = $this->model->get($ids);
    if (!$row) {
      $this->error(__('No Results were found'));
    }
    $adminIds = $this->getDataLimitAdminIds();
    if (is_array($adminIds)) {
      if (!in_array($row[$this->dataLimitField], $adminIds)) {
        $this->error(__('You have no permission'));
      }
    }
    if ($this->request->isPost()) {
      $params = $this->request->post("row/a");
      if ($params) {
//        print_r($params);exit;
        //开通虚拟号
        if ($params['privacydata'] == '2'){
          vendor("yinsi.PlsDemo");
          $response = \PlsDemo::bindAxn($params['mobile']) ;
          if ($response->Code == 'OK'){
            $params['privacy_tel'] = $response->SecretBindDTO->SecretNo;
            $params['subsid'] = $response->SecretBindDTO->SubsId;
          }else{
            $this->error($response->Message);
          }
        }else{
          vendor("yinsi.PlsDemo");
          $response = \PlsDemo::unbindSubscription($params['subsid'],$params['privacy_tel']) ;
          if ($response->Code == 'OK'){
            $params['privacy_tel'] = '';
            $params['subsid'] = '';
          }
        };

        $params = $this->preExcludeFields($params);
        $result = false;
        Db::startTrans();
        try {
          //是否采用模型验证
          if ($this->modelValidate) {
            $name = str_replace("\\model\\", "\\validate\\", get_class($this->model));
            $validate = is_bool($this->modelValidate) ? ($this->modelSceneValidate ? $name . '.edit' : $name) : $this->modelValidate;
            $row->validateFailException(true)->validate($validate);
          }
          $result = $row->allowField(true)->save($params);
          Db::commit();
        } catch (ValidateException $e) {
          Db::rollback();
          $this->error($e->getMessage());
        } catch (PDOException $e) {
          Db::rollback();
          $this->error($e->getMessage());
        } catch (Exception $e) {
          Db::rollback();
          $this->error($e->getMessage());
        }
        if ($result !== false) {
          $this->success();
        } else {
          $this->error(__('No rows were updated'));
        }
      }
      $this->error(__('Parameter %s can not be empty', ''));
    }
    $this->view->assign("row", $row);
    return $this->view->fetch();
  }
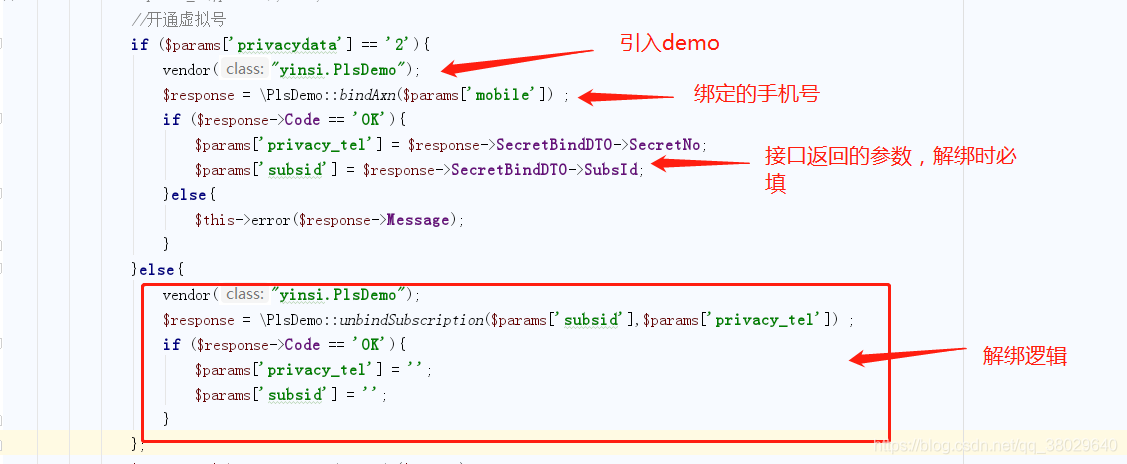
与原始的修改方法区别如下接口描述:
不需要后台管理的笔友,用以下代码:
简单的通过接口绑定、解绑虚拟号。
  //隐私号码绑定
  public function yinsi(){
    $type = $this->request->request('type');//1绑定2解绑
    $mobile = $this->request->request('mobile');//需要绑定的手机号
    vendor("yinsi.PlsDemo");
    $response = \PlsDemo::bindAxn($mobile) ;
    print_r($response);exit;//打印接口返回参数
  }
  //隐私号码解绑
  public function Unbundling(){
    $subsid = $this->request->request('subsid');//绑定接口中返回的subsId;
    $secretNo = $this->request->request('secretNo');//绑定接口中返回的secretNo;
    vendor("yinsi.PlsDemo");
    $response = \PlsDemo::unbindSubscription($subsid,$secretNo) ;
    print_r($response);exit;//打印接口返回参数
  }
到此这篇关于PHP对接阿里云虚拟号的实现(号码隐私保护)的文章就介绍到这了,更多相关PHP对接阿里云虚拟号内容请搜索自学编程网以前的文章或继续浏览下面的相关文章希望大家以后多多支持自学编程网!

- 本文固定链接: https://zxbcw.cn/post/208506/
- 转载请注明:必须在正文中标注并保留原文链接
- QQ群: PHP高手阵营官方总群(344148542)
- QQ群: Yii2.0开发(304864863)
