一、Android 项目当中设置明文传输
1、设置明文传输的xml

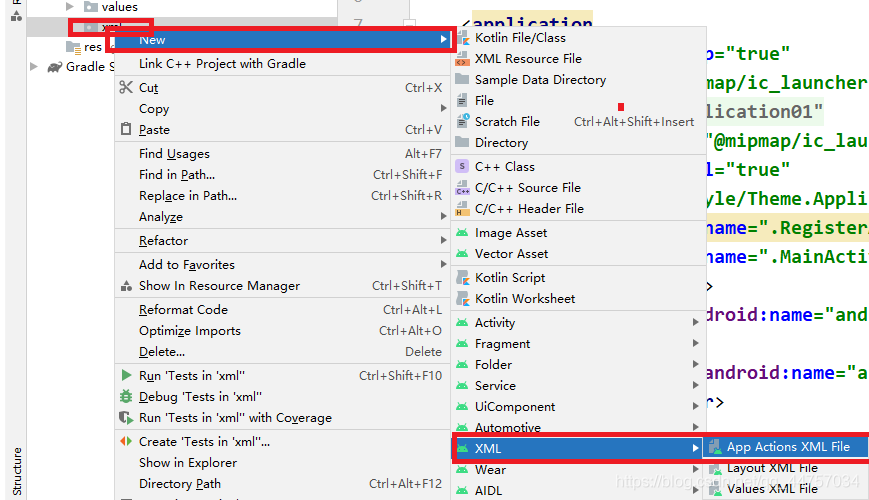
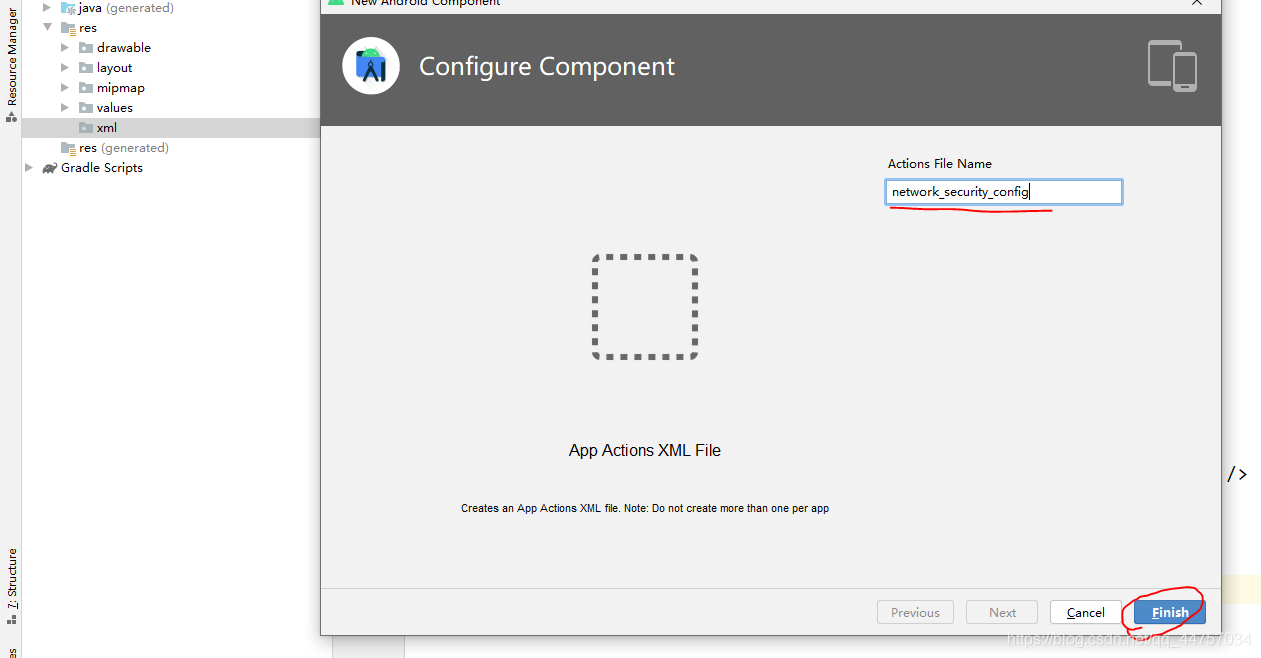
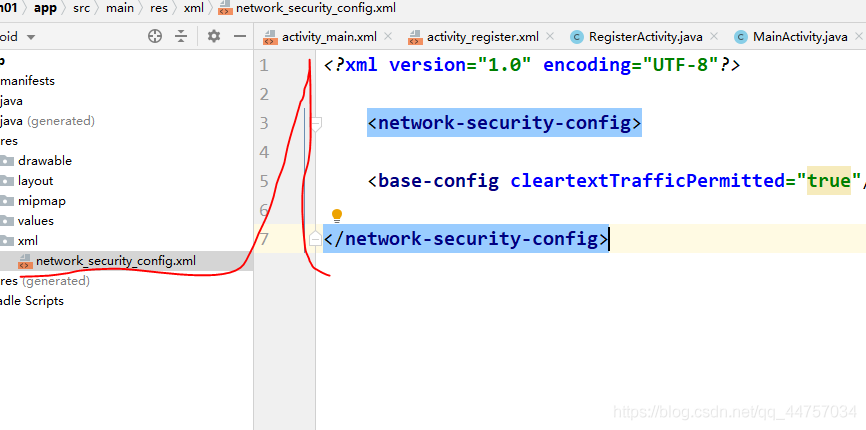
<?xml version="1.0" encoding="UTF-8"?>
<network-security-config>
    <base-config cleartextTrafficPermitted="true"/>
</network-security-config>
2、引入上述创建的xml

android:networkSecurityConfig="@xml/network_security_config"
二、在MyEclipse当中创建Web项目
1、创建项目

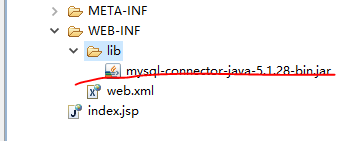
引入MySQL的驱动包
2、创建实体类User
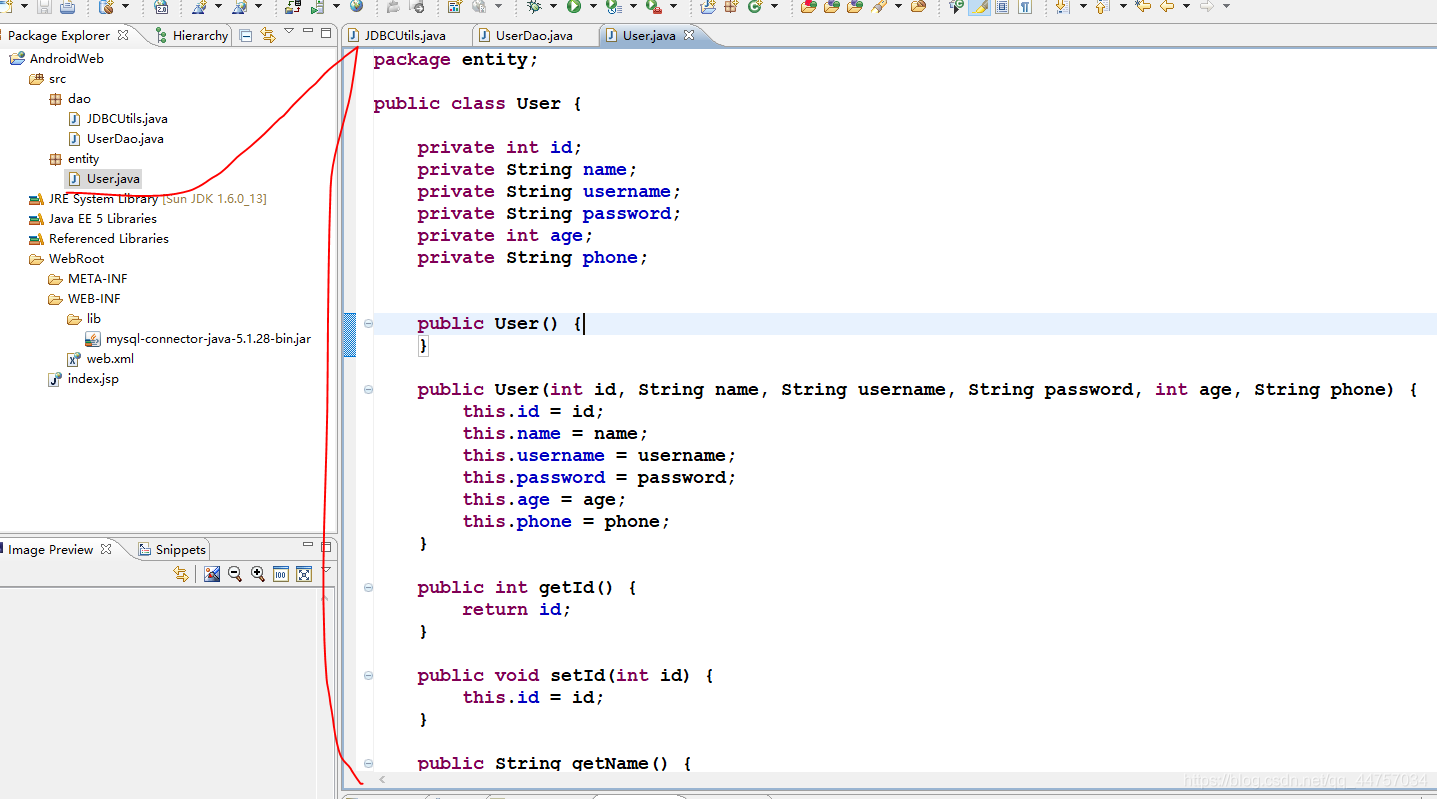
package entity;

public class User {

    private int id;
    private String name;
    private String username;
    private String password;
    private int age;
    private String phone;


    public User() {
    }

    public User(int id, String name, String username, String password, int age, String phone) {
        this.id = id;
        this.name = name;
        this.username = username;
        this.password = password;
        this.age = age;
        this.phone = phone;
    }

    public int getId() {
        return id;
    }

    public void setId(int id) {
        this.id = id;
    }

    public String getName() {
        return name;
    }

    public void setName(String name) {
        this.name = name;
    }

    public String getUsername() {
        return username;
    }

    public void setUsername(String username) {
        this.username = username;
    }

    public String getPassword() {
        return password;
    }

    public void setPassword(String password) {
        this.password = password;
    }

    public int getAge() {
        return age;
    }
    public void setAge(int age) {
        this.age = age;
    }
    public String getPhone() {
        return phone;
    }
    public void setPhone(String phone) {
        this.phone = phone;
    }
}
3、创建JDBCUtils工具类

package dao;
import java.sql.Connection;
import java.sql.DriverManager;
import java.sql.SQLException;

public class JDBCUtils {
    static {

        try {
            Class.forName("com.mysql.jdbc.Driver");
        } catch (ClassNotFoundException e) {
            e.printStackTrace();
        }
    }
    public static Connection getConn() {
        Connection  conn = null;
        try {
            conn=DriverManager.getConnection("jdbc:mysql://127.0.0.1:3306/test","root","root");
        }catch (Exception exception){
            exception.printStackTrace();
        }
        return conn;
    }

    public static void close(Connection conn){
        try {
            conn.close();
        } catch (SQLException throwables) {
            throwables.printStackTrace();
        }
    }
}
4、创建UserDao类
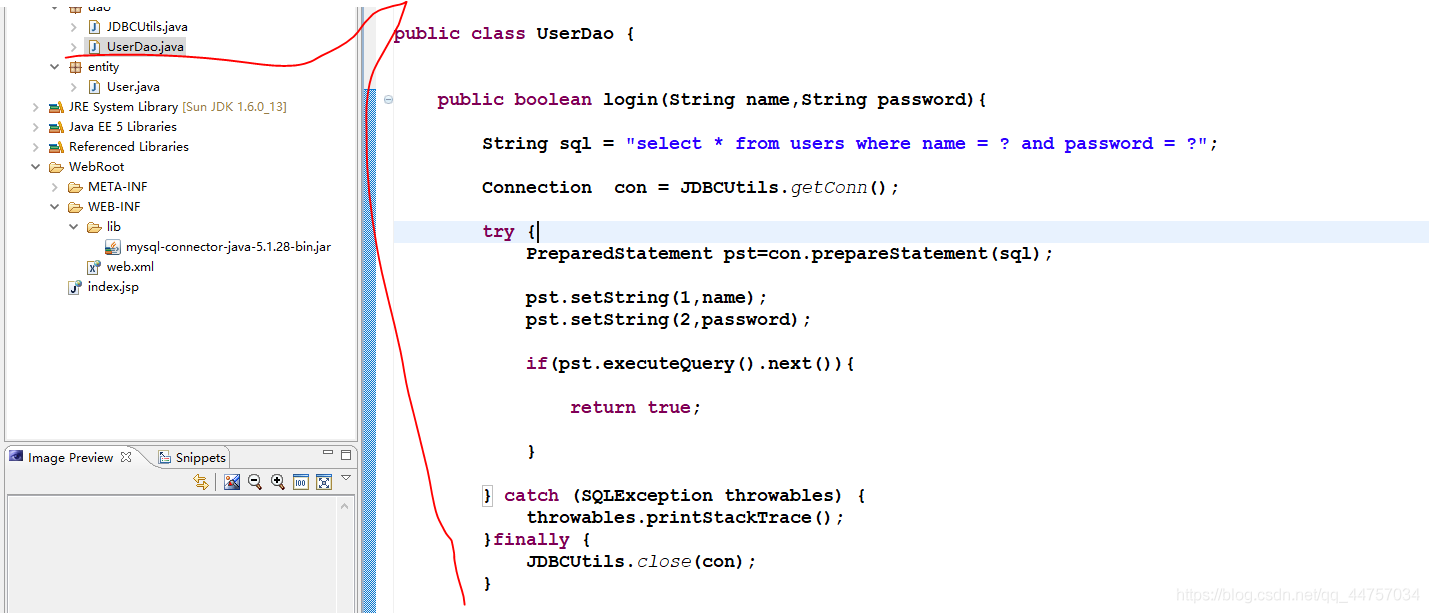
package dao;

import java.sql.Connection;
import java.sql.PreparedStatement;
import java.sql.ResultSet;
import java.sql.SQLException;

import entity.User;

public class UserDao {


    public boolean login(String name,String password){

        String sql = "select * from users where name = ? and password = ?";

        Connection  con = JDBCUtils.getConn();

        try {
            PreparedStatement pst=con.prepareStatement(sql);

            pst.setString(1,name);
            pst.setString(2,password);

            if(pst.executeQuery().next()){

                return true;

            }

        } catch (SQLException throwables) {
            throwables.printStackTrace();
        }finally {
            JDBCUtils.close(con);
        }

        return false;
    }

    public boolean register(User user){

        String sql = "insert into users(name,username,password,age,phone) values (?,?,?,?,?)";

        Connection  con = JDBCUtils.getConn();

        try {
            PreparedStatement pst=con.prepareStatement(sql);

            pst.setString(1,user.getName());
            pst.setString(2,user.getUsername());
            pst.setString(3,user.getPassword());
            pst.setInt(4,user.getAge());
            pst.setString(5,user.getPhone());

            int value = pst.executeUpdate();

            if(value>0){
                return true;
            }


        } catch (SQLException throwables) {
            throwables.printStackTrace();
        }finally {
            JDBCUtils.close(con);
        }
        return false;
    }

    public User findUser(String name){

        String sql = "select * from users where name = ?";

        Connection  con = JDBCUtils.getConn();
        User user = null;
        try {
            PreparedStatement pst=con.prepareStatement(sql);

            pst.setString(1,name);

            ResultSet rs = pst.executeQuery();

            while (rs.next()){

               int id = rs.getInt(1);
               String namedb = rs.getString(2);
               String username = rs.getString(3);
               String passworddb  = rs.getString(4);
               int age = rs.getInt(5);
                String phone = rs.getString(6);
               user = new User(id,namedb,username,passworddb,age,phone);
            }

        } catch (SQLException throwables) {
            throwables.printStackTrace();
        }finally {
            JDBCUtils.close(con);
        }

        return user;
    }
}
5、创建对应的LoginServlet
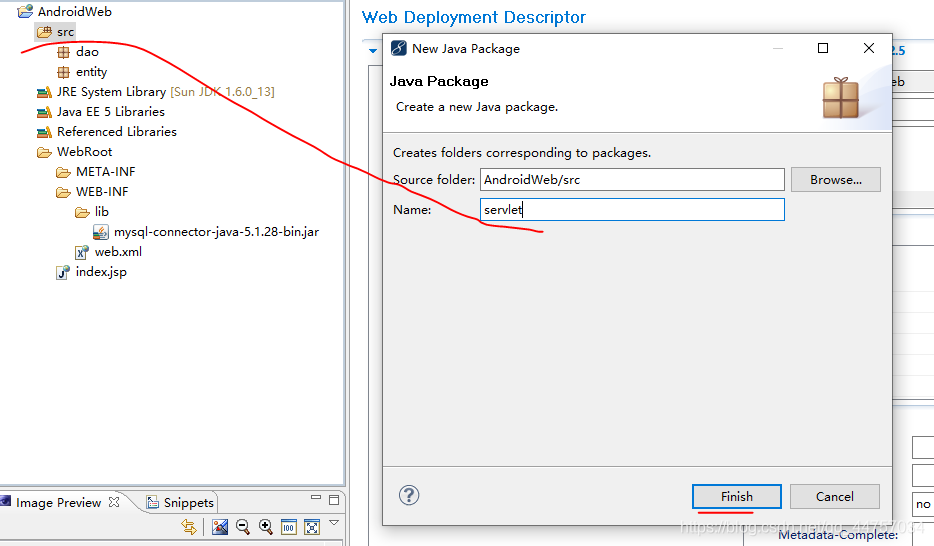
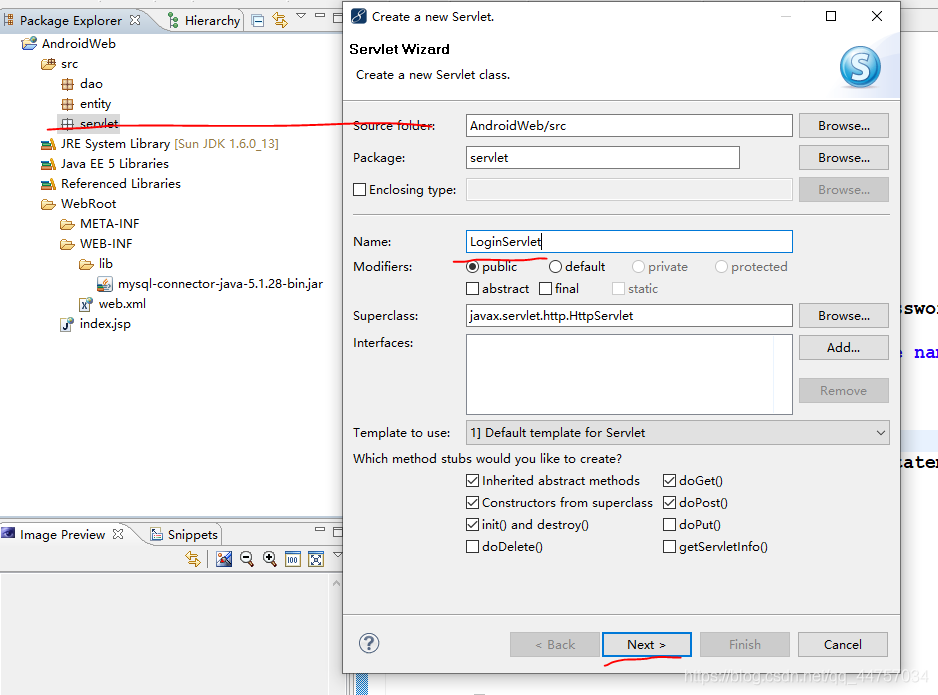
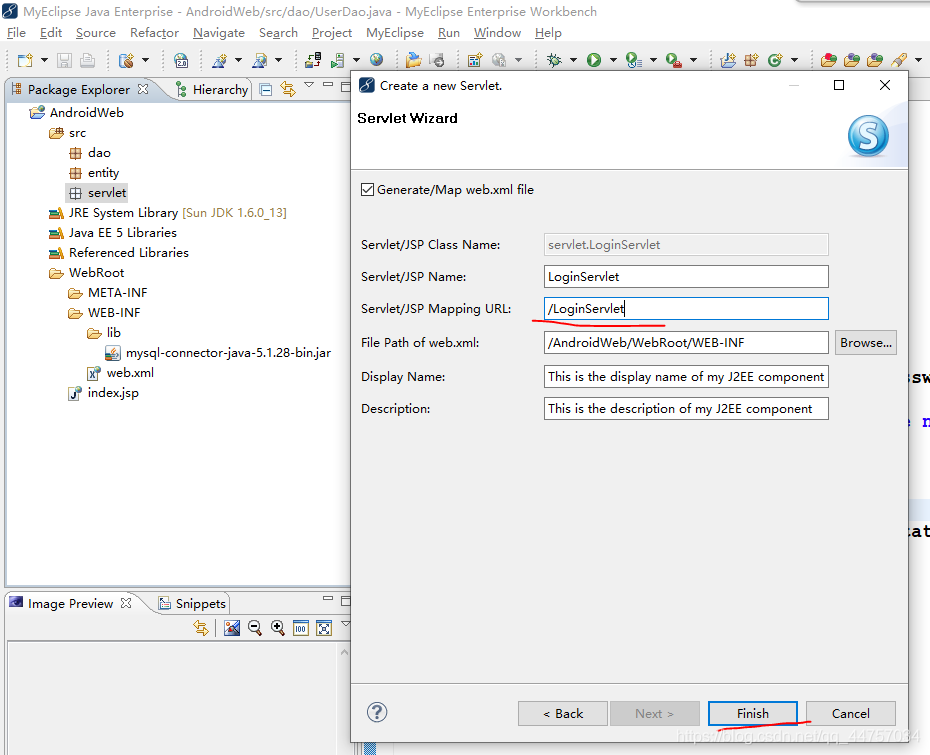

package servlet;

import java.io.IOException;
import java.io.PrintWriter;

import javax.servlet.ServletException;
import javax.servlet.http.HttpServlet;
import javax.servlet.http.HttpServletRequest;
import javax.servlet.http.HttpServletResponse;

import dao.UserDao;

public class LoginServlet extends HttpServlet {
	public void doGet(HttpServletRequest request, HttpServletResponse response)
			throws ServletException, IOException {
		doPost(request, response);
	}
	public void doPost(HttpServletRequest request, HttpServletResponse response)
			throws ServletException, IOException {
		String name = request.getParameter("name");
		String password =  request.getParameter("password");
		response.setCharacterEncoding("UTF-8");
		UserDao dao = new UserDao();
		boolean login = dao.login(name, password);
		String msg = "";
		if(login){
			msg = "成功";
		}else{
			msg = "失败";
		}
		PrintWriter out = response.getWriter();
		out.println(msg);
		out.flush();
		out.close();
	}
}
三、在Android Studio当中调用Servlet
(一)实现登录功能
1、创建连接Servlet的工具类(PostUtil)

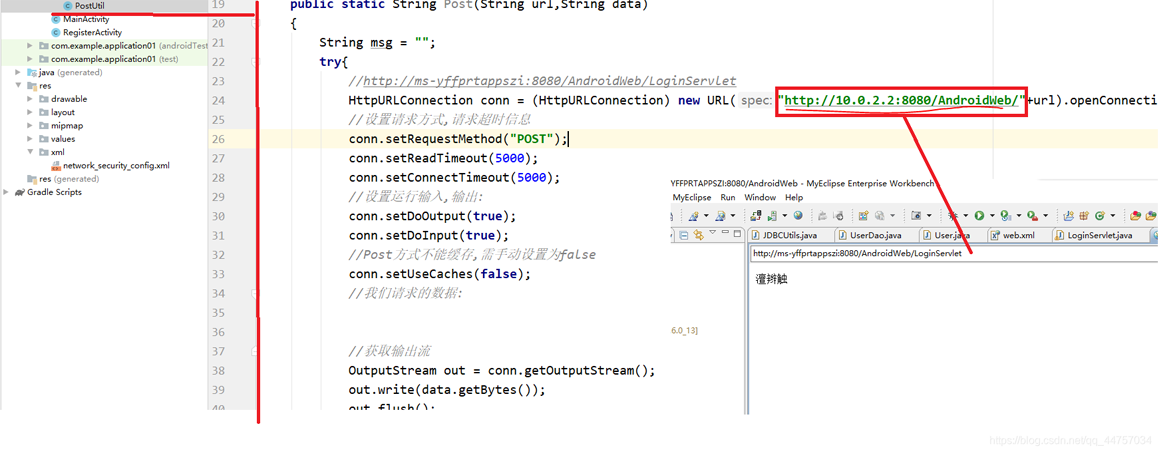
package com.example.application01.utils;

import java.io.BufferedReader;
import java.io.IOException;
import java.io.InputStream;
import java.io.InputStreamReader;
import java.io.OutputStream;
import java.net.HttpURLConnection;
import java.net.URL;
import java.net.URLEncoder;

//访问servlet
public class PostUtil {


    //访问的serlver不一样
    //传递的参数不一样

    public static String Post(String url,String data)
    {
        String msg = "";
        try{
            //http://ms-yffprtappszi:8080/AndroidWeb/LoginServlet
            HttpURLConnection conn = (HttpURLConnection) new URL("http://10.0.2.2:8080/AndroidWeb/"+url).openConnection();
            //设置请求方式,请求超时信息
            conn.setRequestMethod("POST");
            conn.setReadTimeout(5000);
            conn.setConnectTimeout(5000);
            //设置运行输入,输出:
            conn.setDoOutput(true);
            conn.setDoInput(true);
            //Post方式不能缓存,需手动设置为false
            conn.setUseCaches(false);
            //我们请求的数据:


            //获取输出流
            OutputStream out = conn.getOutputStream();
            out.write(data.getBytes());
            out.flush();
            if (conn.getResponseCode() == 200) {
                // 获取响应的输入流对象
                InputStream is = conn.getInputStream();
                BufferedReader reader = new BufferedReader(new InputStreamReader(is));
                StringBuffer response = new StringBuffer();

                String line=null;
                while ((line = reader.readLine()) != null) {
                    response.append(line);
                }
                msg=response.toString();
            }
        }catch(Exception e)
        {
            e.printStackTrace();
        }
        return msg;
    }
}
2、在MainActivity调用这个类

package com.example.application01;

import androidx.appcompat.app.AppCompatActivity;

import android.content.Intent;
import android.os.Bundle;
import android.os.Handler;
import android.os.Message;
import android.view.View;
import android.widget.EditText;
import android.widget.Toast;

import com.example.application01.dao.UserDao;
import com.example.application01.utils.PostUtil;

import java.io.UnsupportedEncodingException;
import java.net.URLEncoder;

public class MainActivity extends AppCompatActivity {

    @Override
    protected void onCreate(Bundle savedInstanceState) {
        super.onCreate(savedInstanceState);
        setContentView(R.layout.activity_main);
    }

    public void reg(View view){

        startActivity(new Intent(getApplicationContext(),RegisterActivity.class));

    }


    public void login(View view){

        EditText EditTextname = (EditText)findViewById(R.id.name);
        EditText EditTextpassword = (EditText)findViewById(R.id.password);

        new Thread(){
            @Override
            public void run() {

                String data="";
                try {
                    data = "name="+ URLEncoder.encode(EditTextname.getText().toString(), "UTF-8")+
                            "&password="+ URLEncoder.encode(EditTextpassword.getText().toString(), "UTF-8");
                } catch (UnsupportedEncodingException e) {
                    e.printStackTrace();
                }

                String request = PostUtil.Post("LoginServlet",data);

                int msg = 0;
                if(request.equals("成功")){
                    msg = 1;
                }

                hand1.sendEmptyMessage(msg);


            }
        }.start();


    }
    final Handler hand1 = new Handler()
    {
        @Override
        public void handleMessage(Message msg) {

            if(msg.what == 1)
            {
                Toast.makeText(getApplicationContext(),"登录成功",Toast.LENGTH_LONG).show();

            }
            else
            {
                Toast.makeText(getApplicationContext(),"登录失败",Toast.LENGTH_LONG).show();
            }
        }
    };
}
在开启web项目的情况下运行Android项目
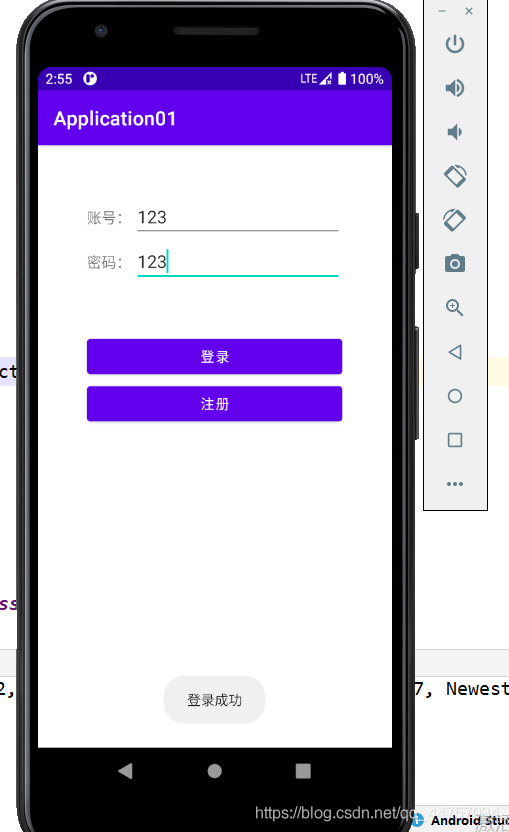
(二)实现注册功能
1、在web工程当中创建RegisterServlet

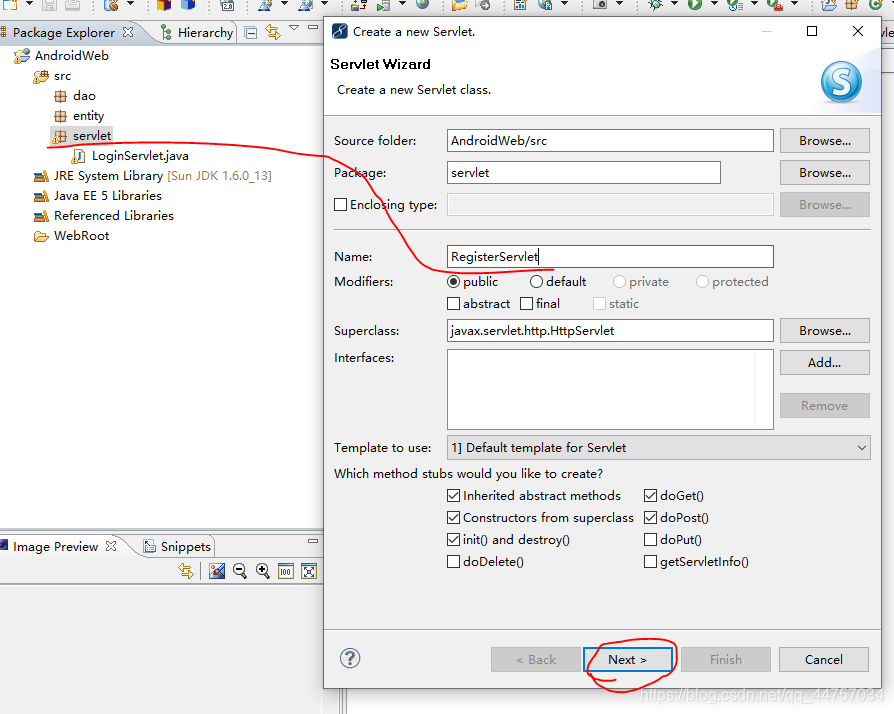
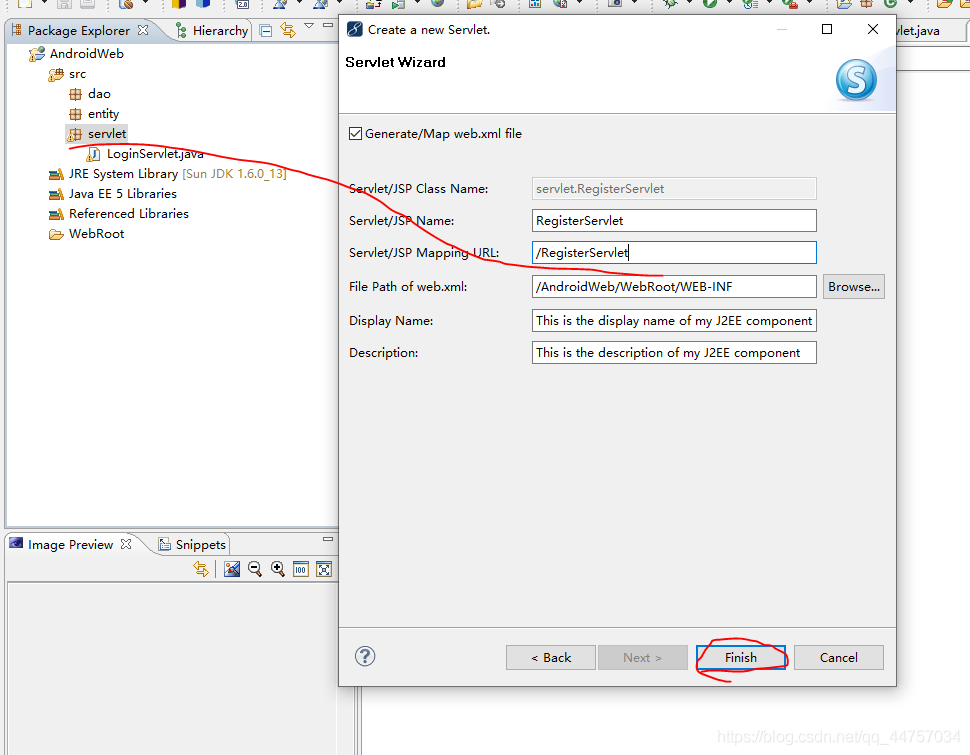
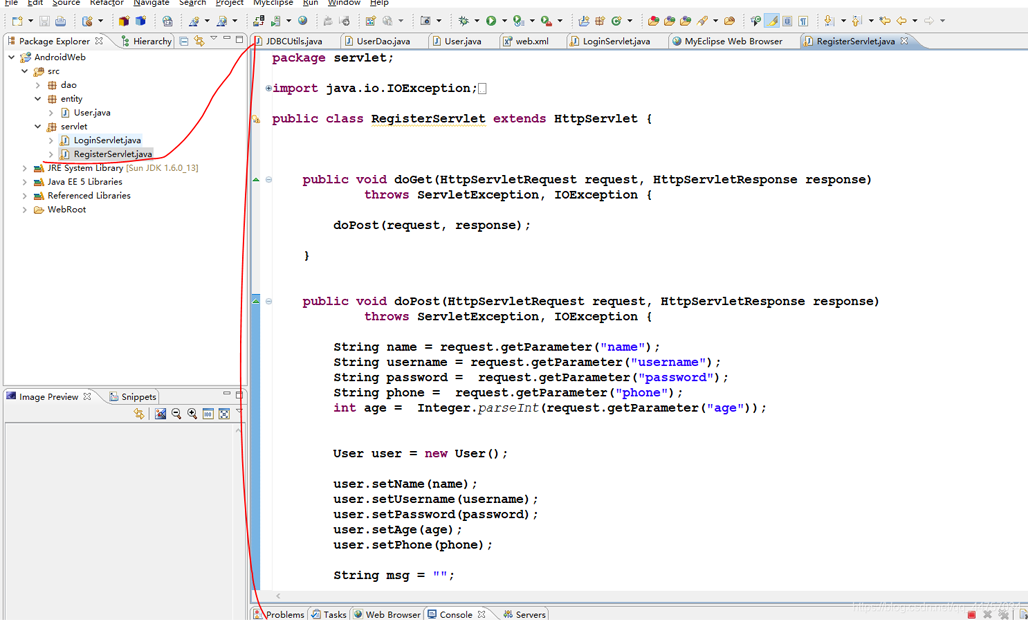
package servlet;

import java.io.IOException;
import java.io.PrintWriter;

import javax.servlet.ServletException;
import javax.servlet.http.HttpServlet;
import javax.servlet.http.HttpServletRequest;
import javax.servlet.http.HttpServletResponse;

import dao.UserDao;

import entity.User;

public class RegisterServlet extends HttpServlet {


	public void doGet(HttpServletRequest request, HttpServletResponse response)
			throws ServletException, IOException {

		doPost(request, response);

	}


	public void doPost(HttpServletRequest request, HttpServletResponse response)
			throws ServletException, IOException {

		System.out.println("-----------------");
		response.setCharacterEncoding("UTF-8");
		String name = request.getParameter("name");
		String username = request.getParameter("username");
		String password =  request.getParameter("password");
		String phone =  request.getParameter("phone");
		int age =  Integer.parseInt(request.getParameter("age"));


		User user = new User();

        user.setName(name);
        user.setUsername(username);
        user.setPassword(password);
        user.setAge(age);
        user.setPhone(phone);

        String msg = "";
        UserDao userDao = null;
        User uu = null;
        	userDao = new UserDao();
        	 uu = userDao.findUser(user.getName());


        boolean flag = false;
        if(uu == null){
        	flag = userDao.register(user);

        }


        if(flag){
            msg = "成功";
        }else{
        	msg = "失败";
        }
	     if(uu != null)
	   	{

	   		 msg = "已存在";
	   	 }

        PrintWriter out = response.getWriter();
		out.println(msg);
		out.flush();
		out.close();

	}
}
2、在Android当中的RegisterActivity访问Servlet
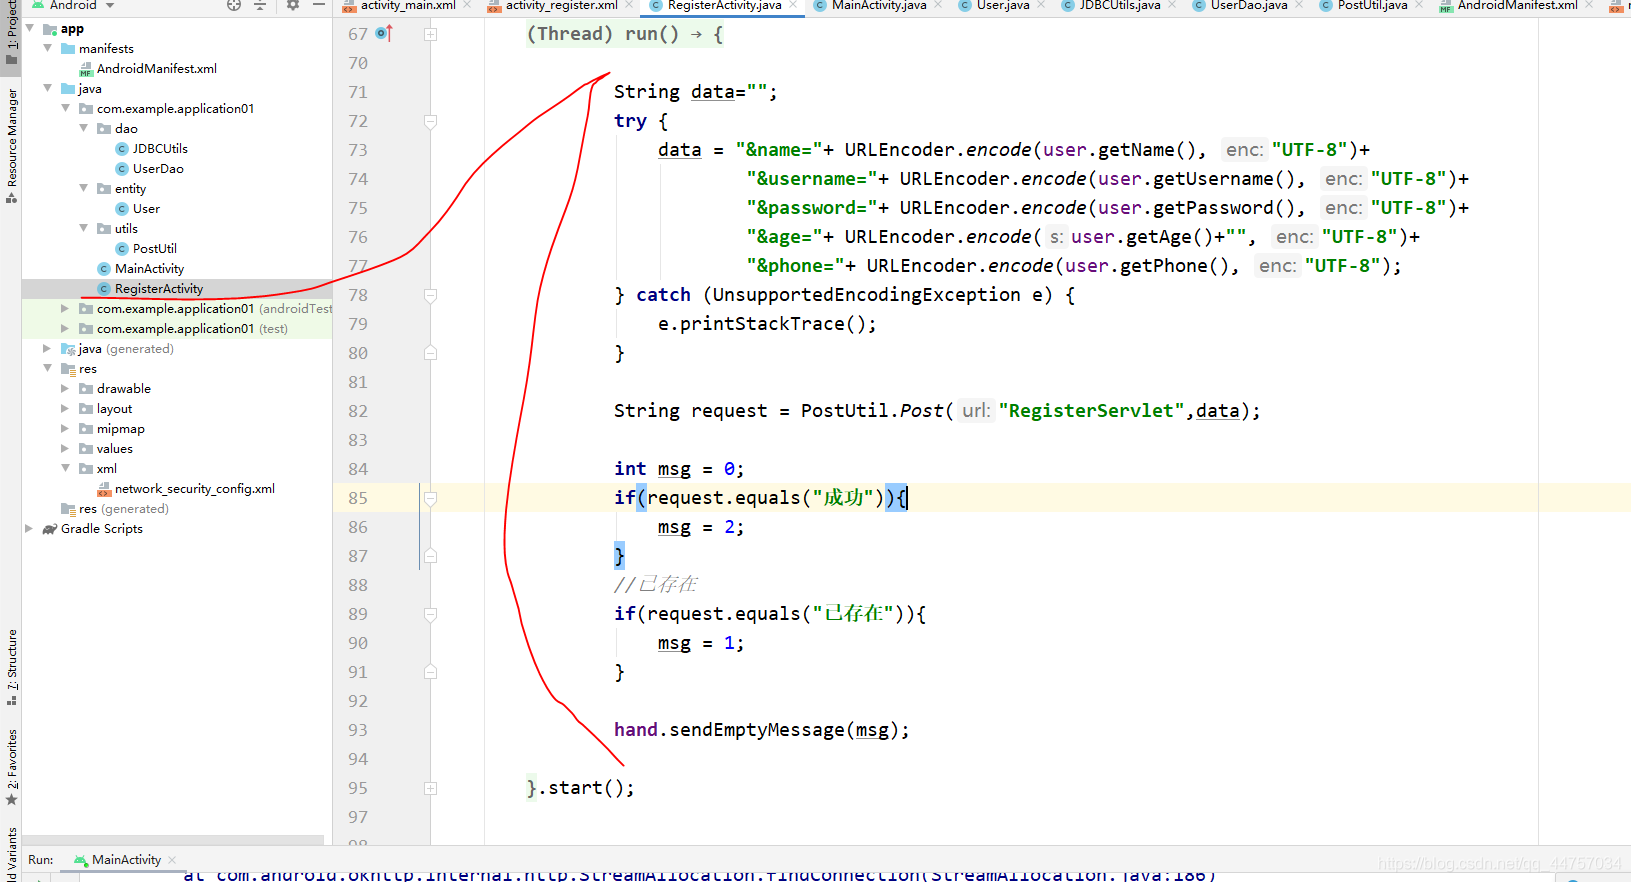
package com.example.application01;

import androidx.appcompat.app.AppCompatActivity;

import android.content.Intent;
import android.os.Bundle;
import android.os.Handler;
import android.os.Message;
import android.view.View;
import android.widget.EditText;
import android.widget.Toast;

import com.example.application01.dao.UserDao;
import com.example.application01.entity.User;
import com.example.application01.utils.PostUtil;

import java.io.UnsupportedEncodingException;
import java.net.URLEncoder;

public class RegisterActivity extends AppCompatActivity {
    EditText name = null;
    EditText username = null;
    EditText password = null;
    EditText phone = null;
    EditText age = null;
    @Override
    protected void onCreate(Bundle savedInstanceState) {
        super.onCreate(savedInstanceState);
        setContentView(R.layout.activity_register);

         name = findViewById(R.id.name);
         username = findViewById(R.id.username);
         password = findViewById(R.id.password);
         phone = findViewById(R.id.phone);
         age = findViewById(R.id.age);
    }


    public void register(View view){


        String cname = name.getText().toString();
        String cusername = username.getText().toString();
        String cpassword = password.getText().toString();

        System.out.println(phone.getText().toString());

        String cphone = phone.getText().toString();
        int cgae = Integer.parseInt(age.getText().toString());

        if(cname.length() < 2 || cusername.length() < 2 || cpassword.length() < 2 ){
            Toast.makeText(getApplicationContext(),"输入信息不符合要求请重新输入",Toast.LENGTH_LONG).show();
            return;

        }


        User user = new User();

        user.setName(cname);
        user.setUsername(cusername);
        user.setPassword(cpassword);
        user.setAge(cgae);
        user.setPhone(cphone);

        new Thread(){
            @Override
            public void run() {

                String data="";
                try {
                    data = "&name="+ URLEncoder.encode(user.getName(), "UTF-8")+
                            "&username="+ URLEncoder.encode(user.getUsername(), "UTF-8")+
                            "&password="+ URLEncoder.encode(user.getPassword(), "UTF-8")+
                            "&age="+ URLEncoder.encode(user.getAge()+"", "UTF-8")+
                            "&phone="+ URLEncoder.encode(user.getPhone(), "UTF-8");
                } catch (UnsupportedEncodingException e) {
                    e.printStackTrace();
                }

                String request = PostUtil.Post("RegisterServlet",data);

                int msg = 0;
                if(request.equals("成功")){
                    msg = 2;
                }
                //已存在
                if(request.equals("已存在")){
                    msg = 1;
                }

                hand.sendEmptyMessage(msg);

            }
        }.start();


    }
    final Handler hand = new Handler()
    {
        @Override
        public void handleMessage(Message msg) {
            if(msg.what == 0)
            {
                Toast.makeText(getApplicationContext(),"注册失败",Toast.LENGTH_LONG).show();

            }
            if(msg.what == 1)
            {
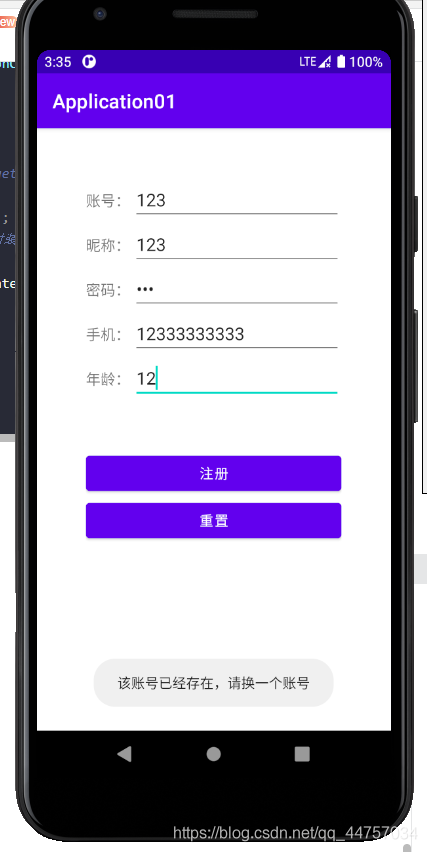
                Toast.makeText(getApplicationContext(),"该账号已经存在,请换一个账号",Toast.LENGTH_LONG).show();

            }
            if(msg.what == 2)
            {
                //startActivity(new Intent(getApplication(),MainActivity.class));

                Intent intent = new Intent();
                //将想要传递的数据用putExtra封装在intent中
                intent.putExtra("a","???);
                setResult(RESULT_CANCELED,intent);
                finish();
            }

        }
    };
}
到此这篇关于Android Studio+Servlet+MySql实现登录注册 的文章就介绍到这了,更多相关Android Studio 登录注册 内容请搜索自学编程网以前的文章或继续浏览下面的相关文章希望大家以后多多支持自学编程网!

- 本文固定链接: https://zxbcw.cn/post/212427/
- 转载请注明:必须在正文中标注并保留原文链接
- QQ群: PHP高手阵营官方总群(344148542)
- QQ群: Yii2.0开发(304864863)
