1.视图模型介绍
在Qml中、常见的View视图有:
- ListView: 列表视图,视图中数据来自ListModel、XmlListModel或c++中继承自QAbstractItemModel或QAbstractListModel的自定义模型类
- TableView: 和excel类似的视图
- GridView: 网格视图,类似于home菜单那样,排列着一个个app小图标
- PathView: 路径视图,可以根据用户自定义的path路径来显示不一样的视图效果
- SwipeView: 滑动视图,使用一组页面填充。每次只显示一个页面。用户可以通过横向滑动在页面之间导航,一般会将它与PageIndicator结合使用
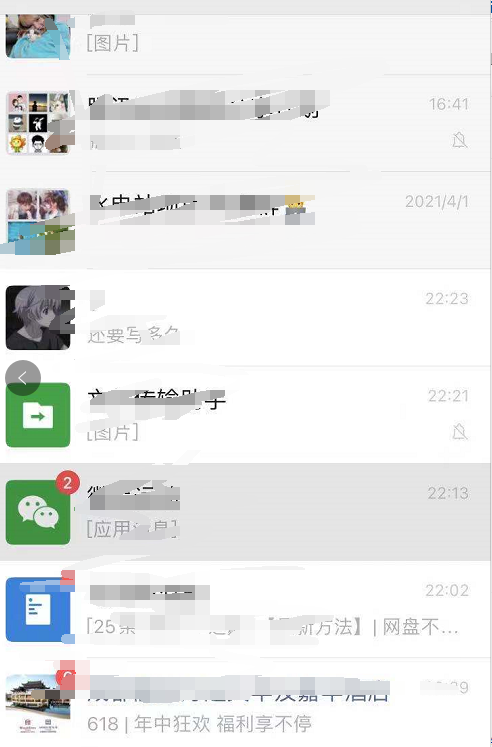
本章首先来学习ListView.以微信好友列表为例:

里面的每个好友就是由一个个 item 组成的,存在视图中的model里,然后写一个delegate组件,即可通过ListView显示出来.
由于时间不是很多,所以本章实现的微信好友列表和聊天列表(v1版本)是通过模拟数据实现的,等后面有时间后,再来实现个一个真正的内网聊天工具.
2.demo实现(支持自适应)
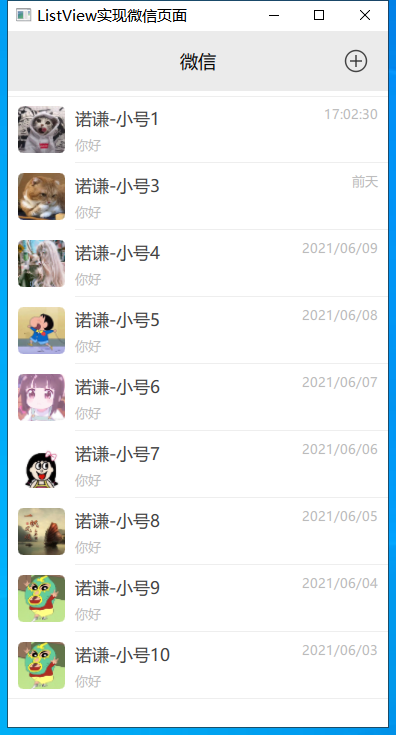
好友列表如下图所示:

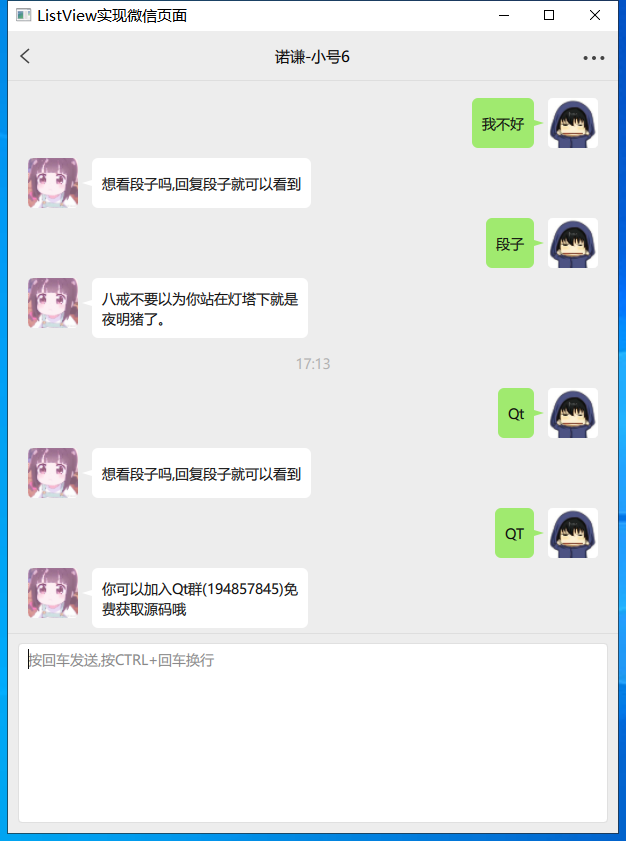
聊天列表如下图所示:

整个效果如下所示:

觉得GIF模糊的话,可以转弯去bilibilihttps://www.bilibili.com/video/BV1Z64y1R7kL/
由于代码上传CSDN,会导致有些同学可能没积分无法下载,所以已经上传群里了.
如果下载后学习有收获,一定要来这里给我点个赞呀,都没动力更新文章了,赞的人太少了

3.重要组件-实现气泡组件源码
import QtQuick 2.0
import "BubbleNormal.js" as BubbleNormal
import "BubbleBlue.js" as BubbleBlue
import "BubbleBlack.js" as BubbleBlack


Item {
    id: container
    property var bubbleIndex: 0
    property string msgText: ""
    property bool isSend: true
    property int iconHeight: 40
    property int maxWidth: 100

    Canvas {
        id: canvas
        anchors.fill: parent

        onPaint: {
            bubble().drawBubble(getContext('2d'));
        }
    }

    Text {
        id: text
        text: msgText
        font.pixelSize: 17
        font.family: "Microsoft Yahei"
        wrapMode: Text.WrapAnywhere

        horizontalAlignment:  Text.AlignLeft
        verticalAlignment: Text.AlignVCenter
        anchors.fill: parent
    }

    Component.onCompleted: {
        bubble().initText();
        bubble().reUpdateSize();
        canvas.requestPaint();
    }

    onBubbleIndexChanged: {
        bubble().initText();
        bubble().reUpdateSize();
        canvas.requestPaint();
    }
    function bubble() {
        switch (bubbleIndex) {
            case 0 :  return BubbleNormal
            case 1 :  return BubbleBlue
            case 2 :  return BubbleBlack
            default: return BubbleNormal
        }
    }

}
代码如上所示,只要用户更改了bubbleIndex值,那么我们就会去马上调用替换后对应的气泡js文件的function(),进行初始化消息、重绘气泡背景。这个组件实现后,我们如果想实现其它的气泡,也可以直接往里加就好了
4.重要组件-实现聊天列表委托源码
/****************************************************************************
**  聊天列表委托
** Author   : 诺谦 https://www.cnblogs.com/lifexy/
** Create   : 2021-6-12
****************************************************************************/

import QtQuick 2.12
import QtGraphicalEffects 1.12
import "./bubble" as Bubble
import "qrc:/Common.js" as Common

Item {
    id: container
    property var headSrc
    property var myHeadSrc : "qrc:/head/myhead.jpg"
    property var bubbleIndex : 0

    height: _layout.height + 10
    width: ListView.view.width
    state: msgType
    states: [
        State {
              name: "hint"
              AnchorChanges { target: _layout;
                  anchors.horizontalCenter: container.horizontalCenter;
                  anchors.verticalCenter: container.verticalCenter; }
        },
        State {
              name: "hintDate"
              AnchorChanges { target: _layout;
                  anchors.horizontalCenter: container.horizontalCenter;
                  anchors.verticalCenter: container.verticalCenter; }
        },
        State {
              name: "recv"
              AnchorChanges { target: _layout;
                  anchors.left: container.left;
                  anchors.verticalCenter: container.verticalCenter; }
        },
        State {
              name: "send"
              AnchorChanges { target: _layout;
                  anchors.right: container.right;
                  anchors.verticalCenter: container.verticalCenter; }
        }
    ]

    Row {
        id: _layout
        anchors.leftMargin: 20
        anchors.rightMargin: 20
        spacing: 4
        layoutDirection : msgType == "send" ? Qt.RightToLeft : Qt.LeftToRight
        HeadImage {
            id: _head
            width : 50
            height : 50
            headUrl: msgType == "recv" ? headSrc : myHeadSrc
            visible: msgType == "recv" || msgType == "send"
        }

        Text {
            id: _hint
            visible: msgType == "hintDate" || msgType == "hint"
            text: msgType == "hintDate" ? getChatDate() : msg
            color: "#B0B0B0"
            font.pixelSize: 14
            font.family: "Microsoft Yahei"
            wrapMode: Text.WrapAnywhere
            elide: Text.ElideRight
            width: container.width - 40
            height: 30
            horizontalAlignment: Text.AlignHCenter
            verticalAlignment: Text.AlignVCenter
        }

        Bubble.ChatBubble {
            id: _msg
            visible: msgType == "recv" || msgType == "send"
            msgText:  msgType == "recv" || msgType == "send" ?  msg : ""
            isSend: msgType == "send" ? true : false
            iconHeight: _head.height
            maxWidth: container.width - _layout.anchors.leftMargin * 2 - _head.width * 2 - _layout.spacing * 2
            bubbleIndex: container.bubbleIndex
        }
    }


    // 判断消息时间,与当前时间间隔多久,来动态显示
    function getChatDate () {
        var total = new Date() - date;
        if (total < (1000*60*60*24)) {
            return date.toLocaleTimeString(Qt.locale(), "hh:mm");
        } else if (total < (1000*60*60*24) * 2) {
            return "昨天 "+date.toLocaleTimeString(Qt.locale(), "hh:mm");
        } else if (total < (1000*60*60*24) * 3) {
            return "前天 "+date.toLocaleTimeString(Qt.locale(), "hh:mm");
        } else {
            return date.toLocaleString(Qt.locale(), "yyyy年M月d日 hh:mm");
        }
    }
}
代码如上所示,我们会去判断消息类型:
- 如果消息类型是"hint"类型,就直接居中显示。
- 如果消息类型是"hintDate"类型,则调用getChatDate()来动态获取要如何显示时间.
- 如果消息类型是"recv"类型,则靠左显示对方头像,并加上气泡消息
- 如果消息类型是"send"类型,则靠又显示自己头像,并加上气泡消息
以上就是qt quick-ListView高仿微信好友列表和聊天列表的详细内容,更多关于qt 微信好友列表和聊天列表的资料请关注自学编程网其它相关文章!

- 本文固定链接: https://zxbcw.cn/post/214801/
- 转载请注明:必须在正文中标注并保留原文链接
- QQ群: PHP高手阵营官方总群(344148542)
- QQ群: Yii2.0开发(304864863)
