
一、常规形式
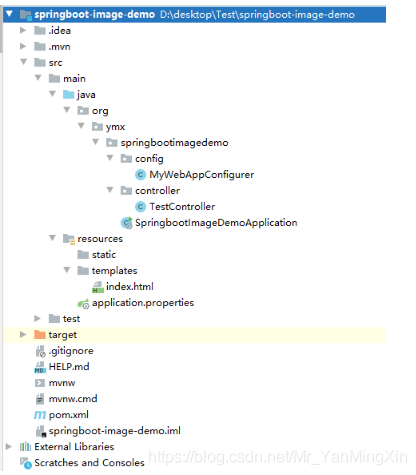
1 项目结构
2 配置文件及环境设置
(1)配置文件
# 应用服务 WEB 访问端口
server.port=8080
# spring 静态资源扫描路径
spring.resources.static-locations=classpath:/static/
# 访问template下的html文件需要配置模板
spring.thymeleaf.prefix.classpath=classpath:/templates/
# 是否启用缓存
spring.thymeleaf.cache=false
# 模板文件后缀
spring.thymeleaf.suffix=.html
# 模板文件编码
spring.thymeleaf.encoding=UTF-8
#上传的绝对路径
file.upload.path=G://images/     #最关键#
#绝对路径下的相对路径
file.upload.path.relative=/images/**      #最关键#
#设置文件最大值
spring.servlet.multipart.max-file-size=5MB
在相关路径新建文件夹
![[外链图片转存失败,源站可能有防盗链机制,建议将图片保存下来直接上传(img-lxFge7I3-1625452749715)(C:\Users\17122\AppData\Roaming\Typora\typora-user-images\image-20201106192605478.png)]](/uploads/202110/12/16340354612.png)
3 代码
(1)pom.xml
<dependency>
     <groupId>org.springframework.boot</groupId>
     <artifactId>spring-boot-starter-thymeleaf</artifactId>
</dependency>
<dependency>
     <groupId>org.springframework.boot</groupId>
     <artifactId>spring-boot-starter-web</artifactId>
</dependency>
(2)index.html
<!DOCTYPE html>
<html lang="en" xmlns:th="http://www.w3.org/1999/xhtml">
<head>
    <meta charset="UTF-8">
    <title>Title</title>
</head>
<body>
<form action="../upload" method="post" enctype="multipart/form-data">
    <input type="file" name="file" accept="image/*">
    <br>
    <input type="text" value="">
    <input type="submit" value="上传" class="btn btn-success">
</form>
[[${filename}]]
<br>
<img th:src="@{${filename}}" alt="图片">
</body>
</html>
(3)TestController.java
import org.springframework.beans.factory.annotation.Value;
import org.springframework.stereotype.Controller;
import org.springframework.ui.Model;
import org.springframework.web.bind.annotation.RequestMapping;
import org.springframework.web.bind.annotation.RequestParam;
import org.springframework.web.bind.annotation.ResponseBody;
import org.springframework.web.multipart.MultipartFile;

import java.io.File;
import java.io.IOException;

@Controller
public class TestController {

    /**
     * 上传地址
     */
    @Value("${file.upload.path}")
    private String filePath;

    // 跳转上传页面
    @RequestMapping("test")
    public String test() {
        return "Page";
    }

    // 执行上传
    @RequestMapping("upload")
    public String upload(@RequestParam("file") MultipartFile file, Model model) {
        // 获取上传文件名
        String filename = file.getOriginalFilename();
        // 定义上传文件保存路径
        String path = filePath + "rotPhoto/";
        // 新建文件
        File filepath = new File(path, filename);
        // 判断路径是否存在,如果不存在就创建一个
        if (!filepath.getParentFile().exists()) {
            filepath.getParentFile().mkdirs();
        }
        try {
            // 写入文件
            file.transferTo(new File(path + File.separator + filename));
        } catch (IOException e) {
            e.printStackTrace();
        }
        // 将src路径发送至html页面
        model.addAttribute("filename", "/images/rotPhoto/" + filename);
        return "index";
    }
}
(4)MyWebAppConfigurer
import org.springframework.beans.factory.annotation.Value;
import org.springframework.context.annotation.Configuration;
import org.springframework.web.servlet.config.annotation.ResourceHandlerRegistry;
import org.springframework.web.servlet.config.annotation.WebMvcConfigurer;

/**
 * 资源映射路径
 */
@Configuration
public class MyWebAppConfigurer implements WebMvcConfigurer {

    /**
     * 上传地址
     */
    @Value("${file.upload.path}")
    private String filePath;
    /**
     * 显示相对地址
     */
    @Value("${file.upload.path.relative}")
    private String fileRelativePath;

    @Override
    public void addResourceHandlers(ResourceHandlerRegistry registry) {
        registry.addResourceHandler(fileRelativePath).
                addResourceLocations("file:/" + filePath);
    }
}
4 测试
![[外链图片转存失败,源站可能有防盗链机制,建议将图片保存下来直接上传(img-HU02Yilv-1625452749717)(C:\Users\17122\AppData\Roaming\Typora\typora-user-images\image-20201106200633411.png)]](/uploads/202110/12/16340354623.jpg)
二、增加异步操作
1 前端ajax
<div class="modal-body">
     <form method="post" enctype="multipart/form-data">
        <input type="file" name="file" id="img">
        <input type="button" value="上传" class="btn btn-outline-primary" onclick="uploadFile()"
                               style="width: 30%;">
     </form>
</div>
<script>
//上传文件
function uploadFile() {
    //formData里面存储的数据形式,一对key/value组成一条数据,key是唯一的,一个key可能对应多个value
    var myform = new FormData();
    // 此时可以调用append()方法来添加数据
    myform.append('file', $("#img")[0].files[0]);
    //验证不为空
    var file = $("#img")[0].files[0];
    if (file == null) {
        alert("请选择文件");
        return false;
    } else {
        $.ajax({
            url: "/user/upLoad",
            type: "POST",
            data: myform,
            async: false,
            contentType: false,
            processData: false,
            success: function (result) {
                console.log(result);
                alert("上传成功!");
                $("#div_show_img").html("<img id='input_img' src='" + result + "'>");
                $("#imgPath").attr("value", result);
                $("#div_upload").removeClass("show");
            },
            error: function (data) {
                alert("系统错误");
            }
        });
    }
}
</script>
2 后端Controller
@ResponseBody
@RequestMapping("/upLoad")
public String upLoadImage(@RequestParam("file") MultipartFile file) {
    // 获取上传文件名
    String filename = file.getOriginalFilename();
    String suffixName = filename.substring(filename.lastIndexOf("."));
    // 定义上传文件保存路径
    String path = filePath + "images/";
    //生成新的文件名称
    String newImgName = UUID.randomUUID().toString() + suffixName;
    // 新建文件
    File filepath = new File(path, newImgName);
    // 判断路径是否存在,如果不存在就创建一个
    if (!filepath.getParentFile().exists()) {
        filepath.getParentFile().mkdirs();
    }
    try {
        // 写入文件
        file.transferTo(new File(path + File.separator + newImgName));
    } catch (IOException e) {
        e.printStackTrace();
    }
    return "/images/images/" + newImgName;
}
到此这篇关于Spring Boot 实现图片上传并回显功能的文章就介绍到这了,更多相关Spring Boot上传图片回显内容请搜索自学编程网以前的文章或继续浏览下面的相关文章希望大家以后多多支持自学编程网!

- 本文固定链接: https://zxbcw.cn/post/216744/
- 转载请注明:必须在正文中标注并保留原文链接
- QQ群: PHP高手阵营官方总群(344148542)
- QQ群: Yii2.0开发(304864863)