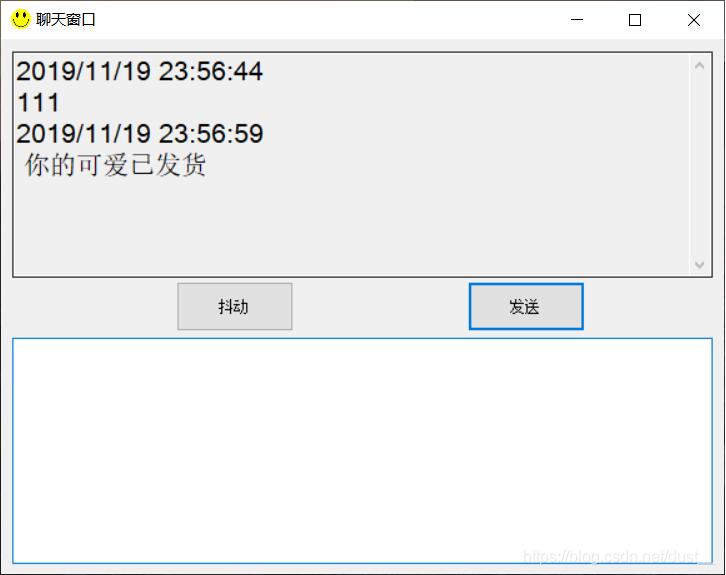
本文实例为大家分享了C#实现QQ聊天窗口的具体代码,供大家参考,具体内容如下
效果图:

using System;
using System.Collections.Generic;
using System.ComponentModel;
using System.Data;
using System.Drawing;
using System.Linq;
using System.Text;
using System.Threading.Tasks;
using System.Windows.Forms;
using System.Threading;// 用于暂停 的线程
namespace 聊天窗口
{
    public partial class Form1 : Form
    {
        public Form1()
        {
            InitializeComponent();
        }

        int x, y;// x为窗体left,y为窗体top
        private void Form1_Load(object sender, EventArgs e)
        {
            this.Location = new Point(Screen.PrimaryScreen.WorkingArea.Width / 2 - this.Width / 2, Screen.PrimaryScreen.WorkingArea.Height / 2 - this.Height / 2);
            x = this.Left;
            y = this.Top;
            this.AcceptButton = button2; //按回车发送
            textBox1.ReadOnly = true; // 禁止输入
            textBox1.ScrollBars = ScrollBars.Vertical; //显示垂直滚动条
            textBox1.Font = new Font("", 16);
            textBox2.Font = new Font("", 16);
        }
        int t = 5, space = 10;// t为暂停时间,space为移动距离

        //抖动
        private void button1_Click(object sender, EventArgs e)
        {  // 循环抖动
            for (int i = 0; i <5; i++)
            {  // 改变窗体位置
                this.Location = new Point(x - space, y);
                Thread.Sleep(t);
                this.Location = new Point(x - space, y - space);
                Thread.Sleep(t);
                this.Location = new Point(x, y - space);
                Thread.Sleep(t);
                this.Location = new Point(x + space, y - space);
                Thread.Sleep(t);
                this.Location = new Point(x + space, y);
                Thread.Sleep(t);
                this.Location = new Point(x + space, y + space);
                Thread.Sleep(t);
                this.Location = new Point(x, y + space);
                Thread.Sleep(t);
                this.Location = new Point(x - space, y + space);
                Thread.Sleep(t);
                this.Location = new Point(x - space, y);
                Thread.Sleep(t);
                this.Location = new Point(x, y);
            }
        }
        // 发送
        private void button2_Click(object sender, EventArgs e)
        {
            // 记录超出文本框高度 最新消息显示
            textBox1.AppendText(DateTime.Now + "\r\n" + textBox2.Text + "\r\n");
            textBox2.Text = " ";// 文本框清空
        }

    }
}
以上就是本文的全部内容,希望对大家的学习有所帮助,也希望大家多多支持自学编程网。

- 本文固定链接: https://zxbcw.cn/post/217138/
- 转载请注明:必须在正文中标注并保留原文链接
- QQ群: PHP高手阵营官方总群(344148542)
- QQ群: Yii2.0开发(304864863)
