Python实现图像处理:PiL依赖库的应用
本文包含的练习题主要是PIL依赖库,即pillow相关的应用。
练习一:使用python给图片增加数字
实现思路:
- 使用PIL的Image.open导入图片。
- 获取图片的大小。
- 调用ImageDraw,在图片的指定位置写上数字。
#coding=utf-8
#Auther by Alice
#在图片的右上角增加一个数字

from PIL import Image,ImageFont,ImageDraw
image = Image.open('/Users/alice/Documents/Photo/IMG_8379.JPG')
#打开原图

wight, hight = image.size
text = "015"
color = (255,255,0)
fontsize = wight//10
font = ImageFont.truetype('Apple Symbols',fontsize)
#设定增加的数字的参数,数字内容、数字颜色和数字字号

draw = ImageDraw.Draw(image)
draw.text((fontsize*6,0), text, color, font)
image.save('/Users/alice/Documents/Photo/IMG_7997.JPG', 'jpeg')
#保存添加了数字之后的图片
实现前:

实现后:

修改其中两行代码字体和颜色如下后,
color = (105,200,45)
font = ImageFont.truetype('Palatino.ttc',fontsize)
则运行的结果为:

练习二:使用python将一个图片放大缩小
实现思路:
- 使用PIL,即Python图像标准依赖库。
- 使用open打开本地图片。
- 使用image.thumbnail放大缩小图片
#coding by alice
#coding=utf-8

from PIL import Image

im = Image.open('/Users/alice/Documents/Develop/PythonCode/test.JPG')
# 打开一个路径下的指定jpg图像文件
w,h = im.size
# 获得图像尺寸
im.thumbnail((w//10, h//10))
# 缩放到10%
im.save('/Users/alice/Documents/Develop/PythonCode/test2.JPG', 'jpeg')
# 把缩放后的图像用jpeg格式保存:
等同于代码:
#coding by alice
#coding=utf-8

from PIL import Image

image = Image.open('/Users/alice/Documents/Develop/PythonCode/test.JPG')
# 打开一个路径下的指定jpg图像文件
wight,hight = image.size
# 获得图像尺寸
image.thumbnail((weight//10, high//10))
# 缩放到10%
image.save('/Users/alice/Documents/Develop/PythonCode/test2.JPG', 'jpeg')
# 把缩放后的图像用jpg格式保存:
运行后的效果为:

练习三:使用python将一个图片实现模糊
实现思路:
- 使用PIL,即Python图像标准依赖库。
- 使用open打开本地图片。
- 使用image.thumbnail放大缩小图片
#coding by alice
#coding=utf-8

from PIL import Image
from PIL import ImageFilter

image = Image.open('/Users/alice/Documents/Develop/PythonCode/test.JPG')
# 打开一个路径下的jpg图像文件
image = image.filter(ImageFilter.BLUR)
# 应用模糊滤镜
image.save('/Users/alice/Documents/Develop/PythonCode/test3.JPG', 'jpeg')
#保存图片
运行后的结果为

如果是静物或者人脸,放大后看则模糊效果会更明显。

练习四:使用python获取一个图片的元素坐标
实现思路:
- 使用PIL,即Python图像标准依赖库。
- 使用open打开本地图片。
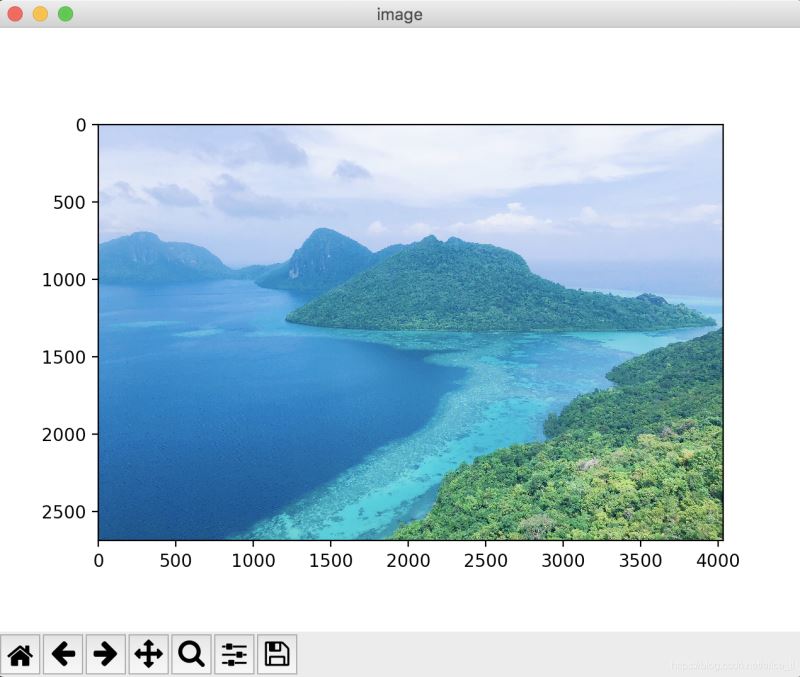
- 使用imshow显示图像
- 获取图片上点击光标,输出坐标
#coding by alice
#coding=utf-8

from PIL import Image
import matplotlib.pyplot as plt

image = Image.open('/Users/alice/Documents/Develop/PythonCode/test.JPG')
#打开所在位置及图像的名称
plt.figure('image')
#图像窗口名称
plt.imshow(image)
plt.show()

到此这篇关于python实现图像处理之PiL依赖库的案例应用详解的文章就介绍到这了,更多相关python实现图像处理之PiL依赖库内容请搜索自学编程网以前的文章或继续浏览下面的相关文章希望大家以后多多支持自学编程网!

- 本文固定链接: https://zxbcw.cn/post/217786/
- 转载请注明:必须在正文中标注并保留原文链接
- QQ群: PHP高手阵营官方总群(344148542)
- QQ群: Yii2.0开发(304864863)
