
本文实例为大家分享了Unity Shader实现黑幕过场效果的具体代码,供大家参考,具体内容如下
一、效果演示

二、实现
Shader:黑幕过场着色器
//黑幕过场着色器

Shader "Custom/BlackScreenSpread"
{
 Properties
 {
  _Color("Main Color", Color) = (1,1,1,1)
  _MainTex("Base (RGB)", 2D) = "white" {}
  _Radius("Radius",float)=1.5
  _Center_X("Center_X", float) =0.5
  _Center_Y("Center_Y", float) =0.5
  _Sharp("Sharp", float) = 100
 }

 SubShader
 {
  Pass
  {
   ZTest Always Cull Off ZWrite Off
   Fog{ Mode off
  }

  CGPROGRAM
  #pragma vertex vert_img
  #pragma fragment frag
  #include "UnityCG.cginc"

  fixed4 _Color;
  sampler2D _MainTex;
  float _Radius;
  float _Center_X;
  float _Center_Y;
  float _Sharp;

  float _tanh(float x)
  {
   return 2.0f / (1.0f + exp(-2.0f * x)) - 1.0f;
  }

  float4 frag(v2f_img i) : COLOR
  {
   _Center_X=_Center_X*(_ScreenParams.x / _ScreenParams.y);
   float x = i.uv.x*(_ScreenParams.x / _ScreenParams.y);
   float y = i.uv.y;

   float dis = sqrt((x - _Center_X)*(x - _Center_X) + (y - _Center_Y)*(y - _Center_Y));
   float t = _Radius - dis;
   float rt = 0.5f + _tanh(t * _Sharp) * 0.5f;
   float col = float4(rt, rt, rt, rt);
   return tex2D(_MainTex, i.uv) * col * _Color;
  }
  ENDCG
 }
 }
 Fallback off
}
CS:后处理的基类
using UnityEngine;

/// <summary>
/// 后处理的基类
/// </summary>
[ExecuteInEditMode]
[RequireComponent(typeof(Camera))]
public class PostEffectBase : MonoBehaviour
{
    [Header("后处理着色器")]
    public Shader shader = null;

    private Material _material = null;

    public Material material
    {
        get
        {
            if (_material == null)
            {
                _material = GenerateMaterial(shader);
            }
            return _material;
        }
    }

    protected Material GenerateMaterial(Shader shader)
    {
        if (shader == null || shader.isSupported == false)
        {
            return null;
        }
        Material material = new Material(shader);
        material.hideFlags = HideFlags.DontSave;
        if (material)
        {
            return material;
        }
        return null;
    }
}
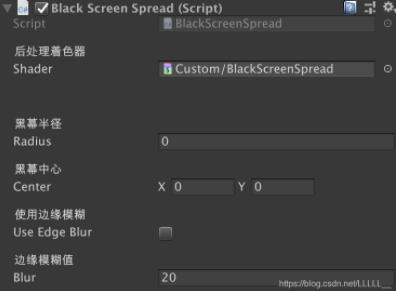
CS:黑幕过场效果(挂载到渲染的相机上)
using UnityEngine;

/// <summary>
/// 黑幕过场效果
/// </summary>
[RequireComponent(typeof(Camera))]
public class BlackScreenSpread : PostEffectBase
{
    [Header("黑幕半径")]
    [Space(25)]
    public float radius;

    [Header("黑幕中心")]
    public Vector2 center;

    [Header("使用边缘模糊")]
    public bool useEdgeBlur;
    [Header("边缘模糊值")]
    public float blur = 10;

    public void OnRenderImage(RenderTexture source, RenderTexture destination)
    {
        if (material)
        {
            material.SetFloat("_Center_X", center.x);
            material.SetFloat("_Center_Y", center.y);
            material.SetFloat("_Radius", radius);
            material.SetFloat("_Sharp", useEdgeBlur ? blur : 200);
            Graphics.Blit(source, destination, material);
        }
        else
        {
            Graphics.Blit(source, destination);
        }
    }
}
——设置属性
以上就是本文的全部内容,希望对大家的学习有所帮助,也希望大家多多支持自学编程网。

- 本文固定链接: https://zxbcw.cn/post/218212/
- 转载请注明:必须在正文中标注并保留原文链接
- QQ群: PHP高手阵营官方总群(344148542)
- QQ群: Yii2.0开发(304864863)