
本文实例为大家分享了Unity实现虚拟摇杆效果的具体代码,供大家参考,具体内容如下
首先添加两者图片
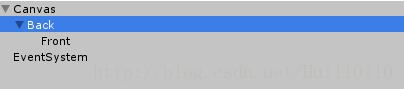
从左到右分别是Back和Front

将Front放到Back中心
在Front身上添加脚本
using System.Collections;
using System.Collections.Generic;
using UnityEngine;
using UnityEngine.EventSystems;//导入命名空间

public class JoyStick : MonoBehaviour,IPointerDownHandler,IPointerUpHandler {//实现接口

 private bool isTouched = false;//标志位,用于标示值是否拖拽按钮
 private static float h = 0;
 private static float v = 0;//这两者用于表示水平(竖直)方向按钮移动的值,相当于通过Input.GetAxis("Horizontal");Input.GetAxis("Vertical");
 [SerializeField] private Vector2 joystickPivot;//按钮中心位置在世界坐标中的值
 [SerializeField] private float radius;//按钮的半径(决定了按钮的活动范围)

 // Update is called once per frame
 void Update () {
 if (isTouched)
 {
  Vector2 mouPos = Input.mousePosition;
  mouPos -= joystickPivot;//将鼠标位置转换为本地坐标
  if (Vector2.Distance(mouPos,Vector2.zero)>=radius)//如果鼠标移动超出范围,将图片放到边缘
  {
  mouPos = mouPos.normalized*radius;
  }
  transform.localPosition = mouPos;
  h = mouPos.x/radius;
  v = mouPos.y/radius;

 }
 }

 public void OnPointerDown(PointerEventData eventData)
 {
 isTouched = true;
 }

 public void OnPointerUp(PointerEventData eventData)
 {
 isTouched = false;
 h = 0;
 v = 0;//不拖拽时二者为0
 transform.localPosition = Vector3.zero;//让按钮返回中心魏智
 }
}
对于代码中的h,v就是我们操作遥感时水平(竖直)方向获取的值(0-1),其他脚本获取这两个静态变量的值就可以实现对自身物体的移动了。
以上就是本文的全部内容,希望对大家的学习有所帮助,也希望大家多多支持自学编程网。

- 本文固定链接: https://zxbcw.cn/post/184679/
- 转载请注明:必须在正文中标注并保留原文链接
- QQ群: PHP高手阵营官方总群(344148542)
- QQ群: Yii2.0开发(304864863)