
最近做项目的时候需要在游戏里截一张高清截图,研究了一下写成脚本,方便以后使用。
脚本可以自定义分辨率,用相机截高清截图。可以用代码动态截图,也可以在编辑模式下截图。
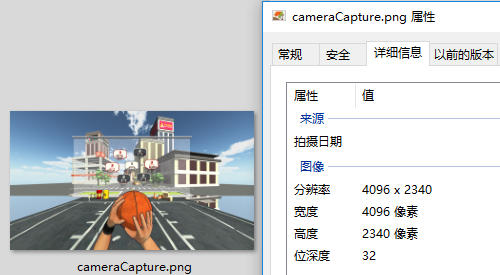
注意截图宽高比要正确,宽高比不正确时可能会出问题。
截图效果:


脚本:
CameraCapture.cs
using UnityEngine;
using System.IO;

/// <summary>
/// 相机截图
/// <para>ZhangYu 2018-07-06</para>
/// </summary>
public class CameraCapture : MonoBehaviour {

 // 截图尺寸
 public enum CaptureSize {
 CameraSize,
 ScreenResolution,
 FixedSize
 }

 // 目标摄像机
 public Camera targetCamera;
 // 截图尺寸
 public CaptureSize captureSize = CaptureSize.CameraSize;
 // 像素尺寸
 public Vector2 pixelSize;
 // 保存路径
 public string savePath = "StreamingAssets/";
 // 文件名称
 public string fileName = "cameraCapture.png";

 #if UNITY_EDITOR
 private void Reset() {
 targetCamera = GetComponent<Camera>();
 pixelSize = new Vector2(Screen.currentResolution.width, Screen.currentResolution.height);
 }
 #endif

 /// <summary> 保存截图 </summary>
 /// <param name="camera">目标摄像机</param>
 public void saveCapture() {
 Vector2 size = pixelSize;
 if (captureSize == CaptureSize.CameraSize) {
  size = new Vector2(targetCamera.pixelWidth, targetCamera.pixelHeight);
 } else if (captureSize == CaptureSize.ScreenResolution) {
  size = new Vector2(Screen.currentResolution.width, Screen.currentResolution.height);
 }
 string path = Application.dataPath + "/" + savePath + fileName;
 saveTexture(path, capture(targetCamera, (int)size.x, (int)size.y));
 }

 /// <summary> 相机截图 </summary>
 /// <param name="camera">目标相机</param>
 public static Texture2D capture(Camera camera) {
 return capture(camera, Screen.width, Screen.height);
 }

 /// <summary> 相机截图 </summary>
 /// <param name="camera">目标相机</param>
 /// <param name="width">宽度</param>
 /// <param name="height">高度</param>
 public static Texture2D capture(Camera camera, int width, int height) {
 RenderTexture rt = new RenderTexture(width, height, 0);
 rt.depth = 24;
 rt.antiAliasing = 8;
 camera.targetTexture = rt;
 camera.RenderDontRestore();
 RenderTexture.active = rt;
 Texture2D texture = new Texture2D(width, height, TextureFormat.ARGB32, false, true);
 Rect rect = new Rect(0, 0, width, height);
 texture.ReadPixels(rect, 0, 0);
 texture.filterMode = FilterMode.Point;
 texture.Apply();
 camera.targetTexture = null;
 RenderTexture.active = null;
 Destroy(rt);
 return texture;
 }

 /// <summary> 保存贴图 </summary>
 /// <param name="path">保存路径</param>
 /// <param name="texture">Texture2D</param>
 public static void saveTexture(string path, Texture2D texture) {
 File.WriteAllBytes(path, texture.EncodeToPNG());
 #if UNITY_EDITOR
 Debug.Log("已保存截图到:" + path);
 #endif
 }

}
脚本编辑器:
CameraCaptureEditor.cs
using UnityEditor;
using UnityEngine;

/// <summary>
/// 相机截图 编辑器
/// <para>ZhangYu 2018-07-06</para>
/// </summary>
[CanEditMultipleObjects]
[CustomEditor(typeof(CameraCapture))]
public class CameraCaptureEditor : Editor {

 public override void OnInspectorGUI() {
 // 属性
 CameraCapture script = (CameraCapture)target;
 int selected = (int)script.captureSize;

 // 重绘GUI
 EditorGUI.BeginChangeCheck();
 drawProperty("targetCamera", "目标像机");
 string[] options = new string[] { "像机尺寸", "屏幕尺寸", "固定尺寸"};
 selected = EditorGUILayout.Popup("截图尺寸", selected, options, GUILayout.ExpandWidth(true));
 script.captureSize = (CameraCapture.CaptureSize)selected;
 if (script.captureSize == CameraCapture.CaptureSize.FixedSize) {
  drawProperty("pixelSize", "像素尺寸");
  EditorGUILayout.HelpBox("请保持正确的宽高比!\n否则截图区域可能出现错误。", MessageType.Info);
 }
 drawProperty("savePath", "保存路径");
 drawProperty("fileName", "文件名称");

 // 保存截图按钮
 bool isPress = GUILayout.Button("保存截图", GUILayout.ExpandWidth(true));
 if (isPress) script.saveCapture();
 if (EditorGUI.EndChangeCheck()) serializedObject.ApplyModifiedProperties();
 }

 private void drawProperty(string property, string label) {
 EditorGUILayout.PropertyField(serializedObject.FindProperty(property), new GUIContent(label), true);
 }

}
以上就是本文的全部内容,希望对大家的学习有所帮助,也希望大家多多支持自学编程网。

- 本文固定链接: https://zxbcw.cn/post/184982/
- 转载请注明:必须在正文中标注并保留原文链接
- QQ群: PHP高手阵营官方总群(344148542)
- QQ群: Yii2.0开发(304864863)