
window7下Java环境安装记录:
一、安装Tomcat
1、下载tomcat 7.0,解压,无需安装,放置到目录:D:\apache-tomcat-7.0.90。
2、配置系统环境变量,CATALINA_BASE=D:\apache-tomcat-7.0.90,CATALINA_HOME=D:\apache-tomcat-7.0.90,在Path中新增“%CATALINA_HOME%\lib;%CATALINA_HOME%\bin”的环境变量。
3、进入D:\apache-tomcat-7.0.90\bin,执行startup启动tomcat,浏览器中输入“127.0.0.1:8080”即可查看是否成功。
二、使用SpringMVC搭建页面
1、使用Idea创建SpringMVC工程,webAppTest2

2、修改web/WEB-INF/web.xml的url规则为接受所有
<?xml version="1.0" encoding="UTF-8"?>
<web-app xmlns="http://xmlns.jcp.org/xml/ns/javaee"
     xmlns:xsi="http://www.w3.org/2001/XMLSchema-instance"
     xsi:schemaLocation="http://xmlns.jcp.org/xml/ns/javaee http://xmlns.jcp.org/xml/ns/javaee/web-app_4_0.xsd"
     version="4.0">
  <context-param>
    <param-name>contextConfigLocation</param-name>
    <param-value>/WEB-INF/applicationContext.xml</param-value>
  </context-param>
  <listener>
    <listener-class>org.springframework.web.context.ContextLoaderListener</listener-class>
  </listener>
  <servlet>
    <servlet-name>dispatcher</servlet-name>
    <servlet-class>org.springframework.web.servlet.DispatcherServlet</servlet-class>
    <init-param>
      <param-name>contextConfigLocation</param-name>
      <param-value>classpath:dispatcher-servlet.xml</param-value>
    </init-param>
  </servlet>
  <servlet-mapping>
    <servlet-name>dispatcher</servlet-name>
    <url-pattern>/</url-pattern>
  </servlet-mapping>
</web-app>
3、在src下创建dispatcher-servlet.xml文件
<?xml version="1.0" encoding="UTF-8"?>
<beans xmlns="http://www.springframework.org/schema/beans"
    xmlns:xsi="http://www.w3.org/2001/XMLSchema-instance"
    xmlns:context="http://www.springframework.org/schema/context"
    xmlns:mvc="http://www.springframework.org/schema/mvc"
    xsi:schemaLocation="http://www.springframework.org/schema/beans http://www.springframework.org/schema/beans/spring-beans.xsd
    http://www.springframework.org/schema/context http://www.springframework.org/schema/context/spring-context-4.1.xsd
    http://www.springframework.org/schema/mvc http://www.springframework.org/schema/mvc/spring-mvc-4.1.xsd">

  <!-- scan the package and the sub package -->
  <context:component-scan base-package="test"/>

  <!-- don't handle the static resource -->
  <mvc:default-servlet-handler />

  <!-- if you use annotation you must configure following setting -->
  <mvc:annotation-driven />

  <!-- configure the InternalResourceViewResolver -->
  <bean class="org.springframework.web.servlet.view.InternalResourceViewResolver"
     id="internalResourceViewResolver">
    <!-- 前缀 -->
    <property name="prefix" value="/WEB-INF/jsp/" />
    <!-- 后缀 -->
    <property name="suffix" value=".jsp" />
  </bean>
</beans>
4、在src下创建test目录,目录下同时创建MyController文件
package test;

import org.springframework.stereotype.Controller;
import org.springframework.web.bind.annotation.RequestMapping;

@Controller
@RequestMapping("/mvc")
public class MyController {

  @RequestMapping("/hello")
  public String hello(){
    return "hello";
  }
}
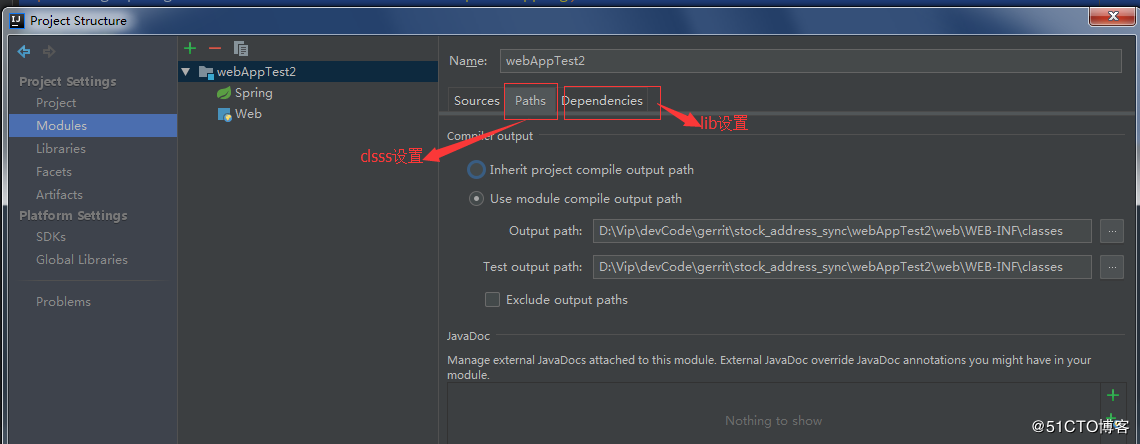
5、在web/WEB-INF下创建classes和lib文件夹,用来设置编译的.class文件目录和第三方依赖包目录。
6、web/WEB-INF/下创建jsp目录,并在目录下创建hello.jsp
<%@ page contentType="text/html;charset=UTF-8" language="java" %>
<html>
<head>
  <title>Title</title>
</head>
<body>
Hello world!!!!
</body>
</html>
7、打war包Build-->Build Artifacts,包名webAppTest2,放到D:\apache-tomcat-7.0.90\webapps目录下。
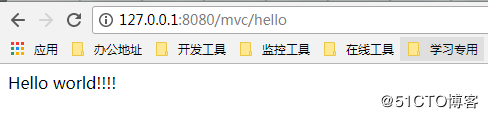
8、重启tomcat,访问http://127.0.0.1:8080/webAppTest2/mvc/hello 即可。

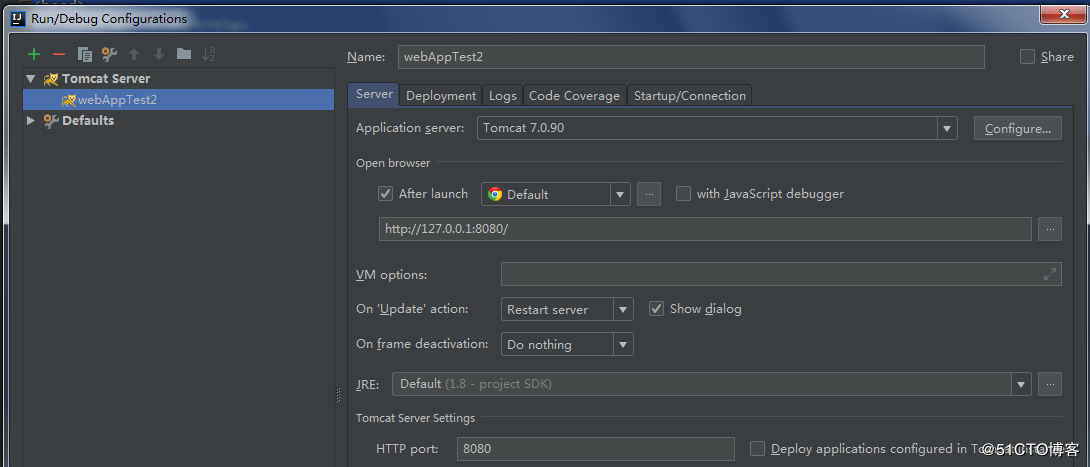
9、也可以设置Idea内置Tomcat,直接Idea内启动浏览器
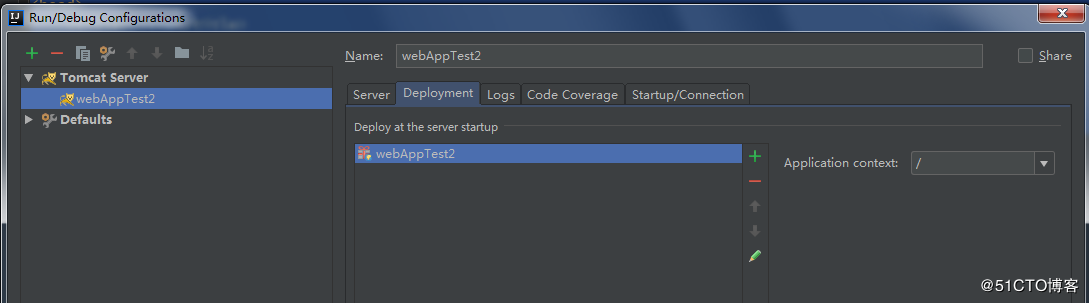
10、省略工程名,直接访问即可
到此这篇关于Java +Tomcat + SpringMVC实现页面访问示例解析的文章就介绍到这了,更多相关Java Tomcat SpringMVC 页面访问内容请搜索自学编程网以前的文章或继续浏览下面的相关文章希望大家以后多多支持自学编程网!

- 本文固定链接: https://zxbcw.cn/post/191611/
- 转载请注明:必须在正文中标注并保留原文链接
- QQ群: PHP高手阵营官方总群(344148542)
- QQ群: Yii2.0开发(304864863)