
一、准备开发环境
1.主要开发工具的选择
- vscode
- .NET Core command-line interface (CLI) tools
- Dbeaver
这里选择vscode + .net core cli 是因为不管在Windows还是Linux和Mac上都能使用这一套工具,而且命令行工具也非常强大。
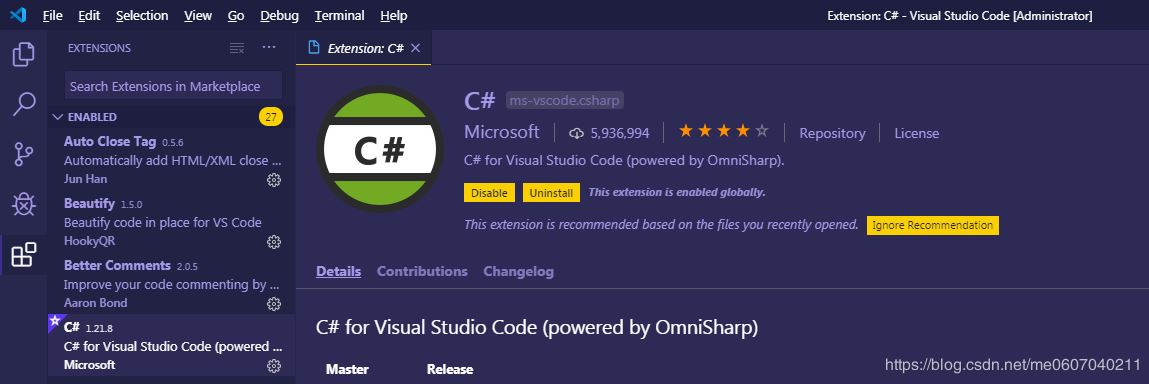
2.vscode安装C#插件
在vscode插件市场中搜索安装即可
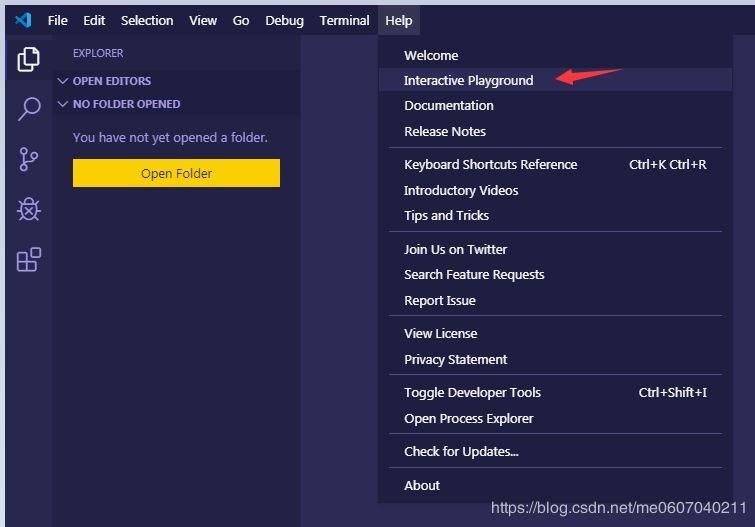
新手还可以去这里了解vscode的强大之处
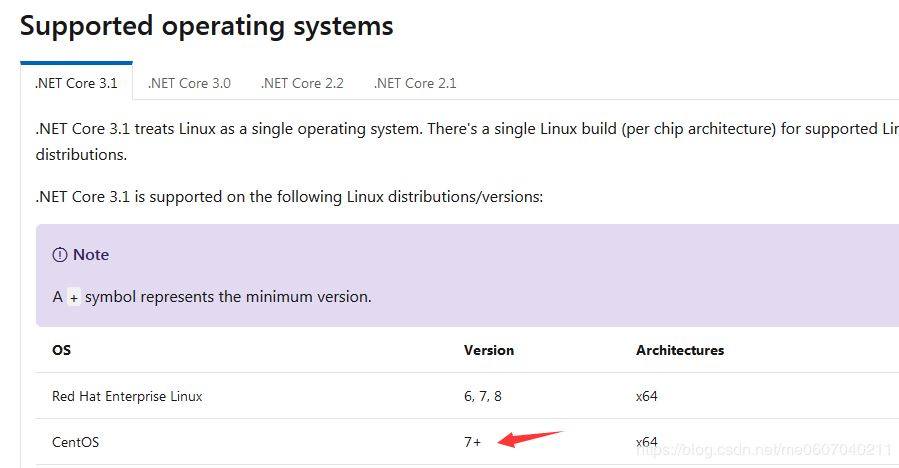
3.安装数据库
这里使用Centos7,因为.NET Core 3.1只支持7及以上版本
配置网络
nmcli conn
nmcli conn add ifname ens34 con-name ens34 type enthernet autoconnect yes ip4 192.168.30.110/24
安装mariadb-server
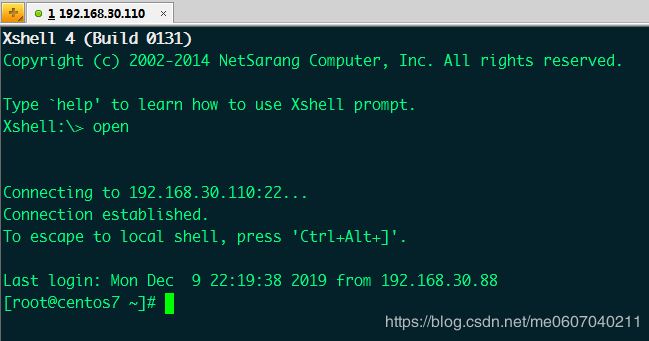
使用XShell连接服务器
cd /etc/yum.repos.d/
mkdir bak
mv Cen* ./bak/
curl -o /etc/yum.repos.d/CentOS-Base.repo http://mirrors.aliyun.com/repo/Centos-7.repo
yum install mariadb-server.x86_64
启动服务
systemctl enable mariadb.service
systemctl start mariadb.service
systemctl status mariadb
执行安全加强脚本
mysql_secure_installation
创建数据库并授权访问帐号
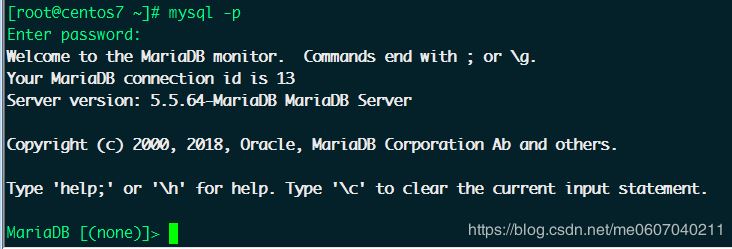
MariaDB [(none)]> create database HotelWebDb default charset utf8 collate utf8_general_ci;
MariaDB [(none)]> grant all on HotelWebDb.* to sa@'192.168.30.%' identified by '110';
MariaDB [(none)]> show databases;
+--------------------+
| Database      |
+--------------------+
| information_schema |
| HotelWebDb     |
| mysql       |
| performance_schema |
+--------------------+
4 rows in set (0.00 sec)
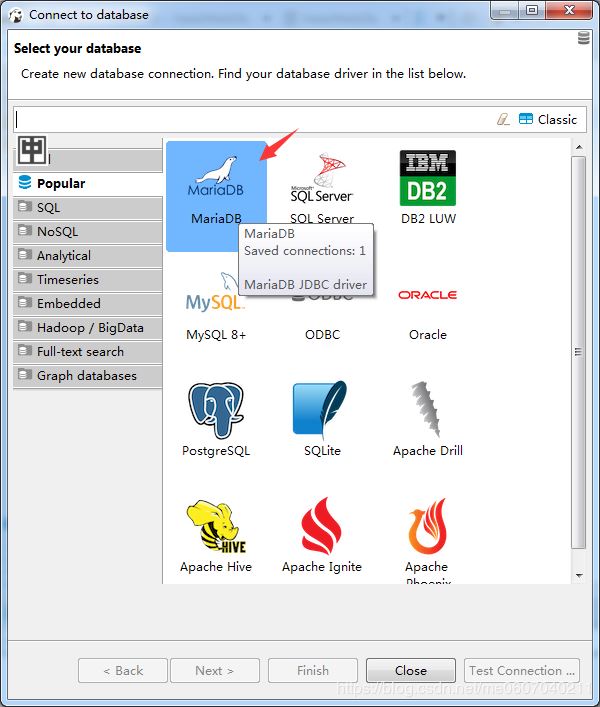
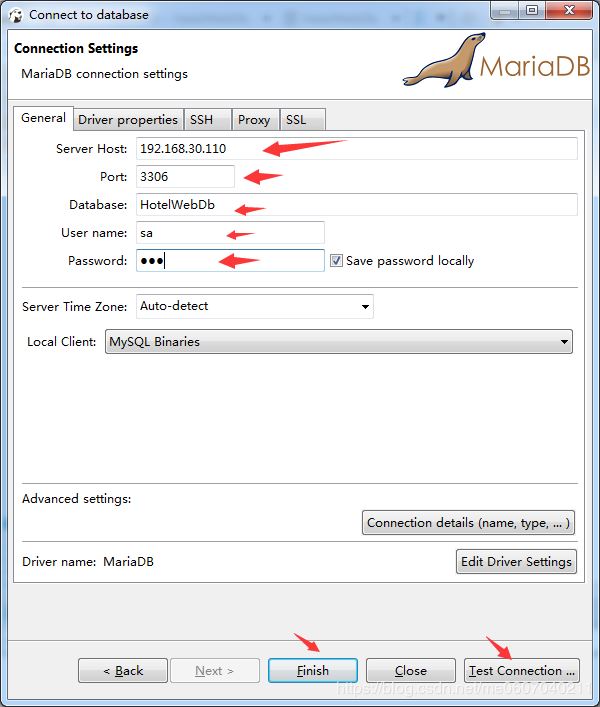
4.使用Dbeaver连接数据库创建数据表和测试数据

编写Sql脚本
-- 管理员登录表
CREATE TABLE if not EXISTS SysAdmins
(
  LoginId INT UNSIGNED PRIMARY KEY AUTO_INCREMENT,
  LoginName VARCHAR(20) NOT NULL,
  LoginPwd VARCHAR(20) NOT NULL
)engine=innodb DEFAULT charset=utf8;
ALTER TABLE SysAdmins AUTO_INCREMENT=10000;

-- 新闻分类表
CREATE TABLE if not EXISTS NewsCategory
(
  CategoryId INT UNSIGNED PRIMARY KEY AUTO_INCREMENT,
  CategoryName VARCHAR(20) NOT NULL
)engine=innodb DEFAULT charset=utf8;

-- 新闻表
CREATE TABLE if not EXISTS News
(
  Id INT UNSIGNED PRIMARY KEY AUTO_INCREMENT,
  NewsTitle VARCHAR(100),
  NewsContent TEXT,
  PublishTime TIMESTAMP DEFAULT now(),
  CategoryId INT UNSIGNED ,
  FOREIGN KEY(CategoryId) REFERENCES NewsCategory (CategoryId)
)engine=innodb DEFAULT charset=utf8;
ALTER TABLE News AUTO_INCREMENT=1000;

-- 菜品分类表
CREATE TABLE if not EXISTS DishCategory
(
  CategoryId INT UNSIGNED PRIMARY KEY AUTO_INCREMENT,
  CategoryName VARCHAR(20)
)engine=innodb DEFAULT charset=utf8;


-- 菜品表
CREATE TABLE if not EXISTS Dishes
(
  Id INT UNSIGNED PRIMARY KEY AUTO_INCREMENT,
  DishName VARCHAR(100),
  UnitPrice NUMERIC(18, 2),
  CategoryId INT UNSIGNED,
  FOREIGN KEY(CategoryId) REFERENCES DishCategory (CategoryId)
)engine=innodb DEFAULT charset=utf8;
ALTER TABLE Dishes AUTO_INCREMENT=10000;

-- 菜品预订表
CREATE TABLE if not EXISTS DishBook
(
  Id INT UNSIGNED PRIMARY KEY AUTO_INCREMENT,
  HotelName VARCHAR(50),
  ConsumeTime datetime,
  ConsumePersons INT UNSIGNED,
  RoomType VARCHAR(20),
  CustomerPhone VARCHAR(20),
  CustomerName VARCHAR(20),
  CustomerEmail VARCHAR(100),
  Comments VARCHAR(500),
  BookTime TIMESTAMP DEFAULT now(),
  BookStatus INT DEFAULT 0 -- ( 0 表示未审核,1 表示审核通过,2 表示消费完成,-1 表示撤销订单)
)engine=innodb DEFAULT charset=utf8;
ALTER TABLE DishBook AUTO_INCREMENT=1000;

-- 招聘信息表
CREATE TABLE if not EXISTS Recruitment
(
  PostId INT UNSIGNED PRIMARY KEY AUTO_INCREMENT,
  PostName NVARCHAR(100),
  PostType CHAR(4), -- (全职或兼职)
  WorkPlace NVARCHAR(50),
  PostDesc TEXT,
  PostRequire TEXT,
  Experience NVARCHAR(100),
  EduBackground NVARCHAR(100),
  RequireCount INT,
  PublishTime TIMESTAMP DEFAULT now(),
  Manager VARCHAR(20),
  PhoneNumber VARCHAR(20),
  Email VARCHAR(100)
)engine=innodb DEFAULT charset=utf8;
ALTER TABLE Recruitment AUTO_INCREMENT=100000;

-- 投诉建议表
CREATE TABLE if not EXISTS Suggestion
(
  Id INT UNSIGNED PRIMARY KEY AUTO_INCREMENT,
  CustomerName VARCHAR(20),
  ConsumeDesc TEXT,
  SuggestionDesc TEXT,
  SuggestionTime TIMESTAMP DEFAULT now(),
  PhoneNumber VARCHAR(20),
  Email VARCHAR(20),
  StatusId INT DEFAULT 0 -- (0:未受理;1:已经受理)
)engine=innodb DEFAULT charset=utf8;
ALTER TABLE Suggestion AUTO_INCREMENT=10000;
创建测试数据
-- 插入测试数据
-- 管理员信息
insert into SysAdmins(LoginPwd,LoginName)values('123456','李浩');
insert into SysAdmins(LoginPwd,LoginName)values('123456','赵雪伶');
-- 新闻分类
insert into NewsCategory(CategoryName)values('公司新闻');
insert into NewsCategory(CategoryName)values('社会新闻');
-- 菜品分类
insert into DishCategory(CategoryName)values('川菜');
insert into DishCategory(CategoryName)values('湘菜');
insert into DishCategory(CategoryName)values('鲁菜');
insert into DishCategory(CategoryName)values('海鲜类');
insert into DishCategory(CategoryName)values('其他');
-- 新闻
insert into News(NewsTitle,NewsContent,CategoryId)values('迎接十一海鲜大促销','最新鲜的鱼类全面上市,欢迎新老顾客品尝。',1);
insert into News(NewsTitle,NewsContent,CategoryId)values('本店正在热招加盟商','如果您愿意在酒店行业有所突破,请加入我们。',1);
insert into News(NewsTitle,NewsContent,CategoryId)values('互联网的消费正在兴起','网上购物已经成为人们生活必不可少的一部分。',2);
insert into News(NewsTitle,NewsContent,CategoryId)values('本店正在热招加盟商','如果您愿意在酒店行业有所突破,请加入我们。',1);
insert into News(NewsTitle,NewsContent,CategoryId)values('互联网的消费正在兴起','网上购物已经成为人们生活必不可少的一部分。',2);
-- 菜品信息
insert into Dishes(DishName,UnitPrice,CategoryId)values('水煮鱼',50,1);
insert into Dishes(DishName,UnitPrice,CategoryId)values('回锅肉',85,1);
insert into Dishes(DishName,UnitPrice,CategoryId)values('剁椒鱼头',75,2);
insert into Dishes(DishName,UnitPrice,CategoryId)values('红椒腊牛肉',40,2);
insert into Dishes(DishName,UnitPrice,CategoryId)values('糖醋鲤鱼',70,3);
insert into Dishes(DishName,UnitPrice,CategoryId)values('玉记扒鸡',60,3);
insert into Dishes(DishName,UnitPrice,CategoryId)values('汤爆双脆',90,3);
insert into Dishes(DishName,UnitPrice,CategoryId)values('赤贝',80,4);
-- 预定信息
insert into DishBook(HotelName,ConsumeTime,ConsumePersons,RoomType,CustomerName,CustomerPhone,CustomerEmail,Comments)
values('天津南开店','2014-09-11 12:30',5,'包间','李丽','13589011222','lilivip@163.com','希望房间敞亮些');
insert into DishBook(HotelName,ConsumeTime,ConsumePersons,RoomType,CustomerName,CustomerPhone,CustomerEmail,Comments)
values('天津和平店','2014-10-11 14:30',5,'包间','王鑫新','13889018888','wangxinxin@qq.com','希望房间安静些');
insert into DishBook(HotelName,ConsumeTime,ConsumePersons,RoomType,CustomerName,CustomerPhone,CustomerEmail,Comments)
values('北京朝阳点','2014-12-10 17:30',5,'散座','刘花雨','13689011999','liuhuayu@126.com','房间靠里面点儿');
-- 招聘信息
insert into Recruitment(PostName,PostType,WorkPlace,PostDesc,PostRequire,Experience,EduBackground,RequireCount,Manager,PhoneNumber,Email)
values('大堂经理','全职','天津','负责一层楼的管理','要求具备该职位3年以上经营管理经验','3年','本科',2,'李超阳','15689011231','lichaoyang@hyl.com');
insert into Recruitment(PostName,PostType,WorkPlace,PostDesc,PostRequire,Experience,EduBackground,RequireCount,Manager,PhoneNumber,Email)
values('接待员','全职','北京','负责客户的接待礼仪','要求具备该职位1年以上经验','1年','高中',5,'李超阳','15689011231','lichaoyang@hyl.com');
insert into Recruitment(PostName,PostType,WorkPlace,PostDesc,PostRequire,Experience,EduBackground,RequireCount,Manager,PhoneNumber,Email)
values('总经理助理','全职','天津','负责日常的文秘工作','要求具备该职位3年以上经营管理经验','3年','本科',1,'李超阳','15689011231','lichaoyang@hyl.com');
-- 投诉建议
insert into Suggestion(CustomerName,ConsumeDesc,SuggestionDesc,PhoneNumber,Email)
values('杜小杰','在该店举行一次婚礼','感觉总体服务不到位,菜品味道没有以前的好。','15687423456','duxiaojie@qq.com');
insert into Suggestion(CustomerName,ConsumeDesc,SuggestionDesc,PhoneNumber,Email)
values('柳钢','在本店聚会一次','感觉上菜有点慢,希望后续改进。','15686623456','liugang@qq.com');
二、搭建项目框架
1.使用vscode创建一个mvc项目
进入vscode,打开终端创建项目的根目录
快捷键:Ctrl + `
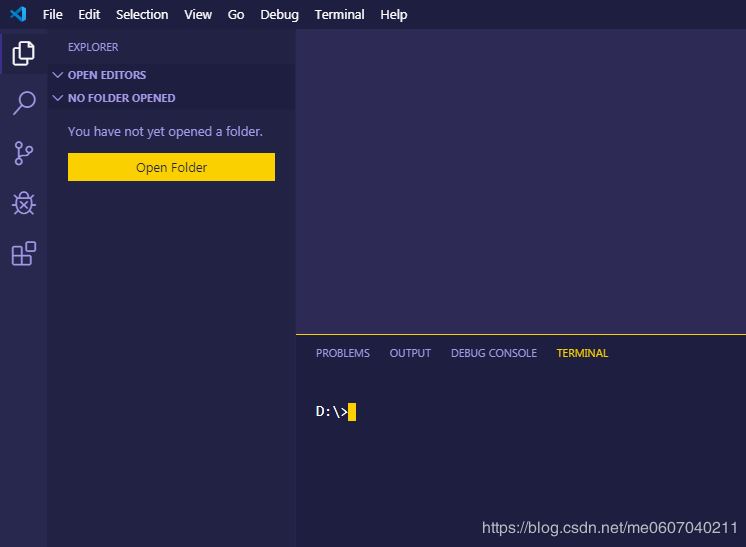
创建项目根目录
D:\dotnet_core>mkdir HotelWebMVC
D:\dotnet_core>dir
 驱动器 D 中的卷是 补充
 卷的序列号是 0004-524D

 D:\dotnet_core 的目录

2019/12/10 09:33  <DIR>     .
2019/12/10 09:33  <DIR>     ..
2019/08/30 16:31  <DIR>     .vscode
2018/05/07 20:25  <DIR>     helloworld
2019/12/10 09:33  <DIR>     HotelWebMVC
2019/12/09 20:22  <DIR>     netcore_mvc
安装 .NET Core SDK
下载地址:https://dotnet.microsoft.com/download
查看命令帮助
D:\dotnet_core\HotelWebMVC>dotnet new --help
用法: new [选项]

选项:
 -h, --help     Displays help for this command.
 -l, --list     Lists templates containing the specified name. If no name is specified, lists all templates.
 -n, --name     The name for the output being created. If no name is specified, the name of the current directory is used.
 -o, --output    Location to place the generated output.
 -i, --install    Installs a source or a template pack.
 -u, --uninstall   Uninstalls a source or a template pack.
 --nuget-source   Specifies a NuGet source to use during install.
 --type       Filters templates based on available types. Predefined values are "project", "item" or "other".
 --dry-run      Displays a summary of what would happen if the given command line were run if it would result in a template creation.
 --force       Forces content to be generated even if it would change existing files.
 -lang, --language  Filters templates based on language and specifies the language of the template to create.
 --update-check   Check the currently installed template packs for updates.
 --update-apply   Check the currently installed template packs for update, and install the updates.
创建项目

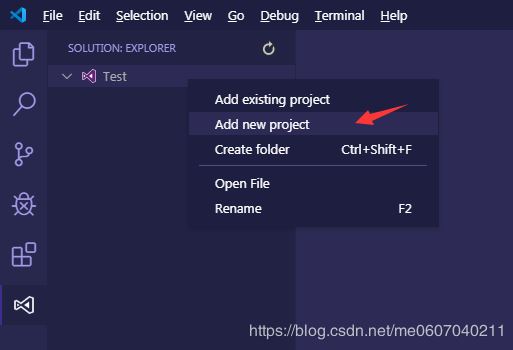
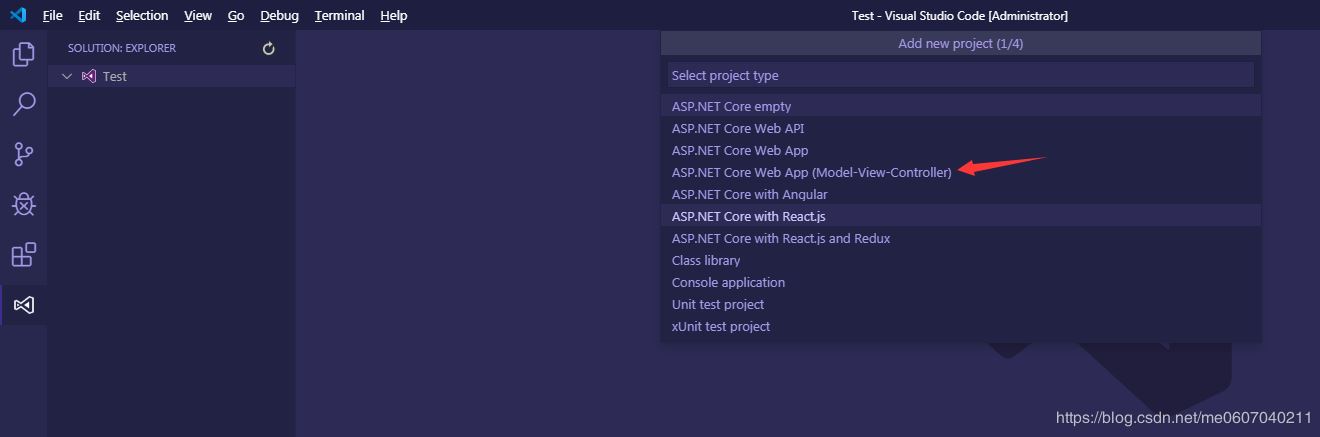

以上操作都是可以使用命令完成
比如添加解决方案
D:\dotnet_core\HotelWebMVC>dotnet sln ./HotelWebMVC.sln add DAL\DAL.csproj
已将项目“DAL\DAL.csproj”添加到解决方案中。

D:\dotnet_core\HotelWebMVC>dotnet sln ./HotelWebMVC.sln add BLL\BLL.csproj
已将项目“BLL\BLL.csproj”添加到解决方案中。

D:\dotnet_core\HotelWebMVC>dotnet sln list
项目
--
HotelWebMVC\HotelWebMVC.csproj
Models\Models.csproj
DAL\DAL.csproj
BLL\BLL.csproj
添加启动项目和类库项目之间的引用
Models -->DAL
D:\dotnet_core\HotelWebMVC\DAL>dotnet add reference ..\Models\Models.csproj
已将引用“..\Models\Models.csproj”添加到项目。
DAL —> BLL
D:\dotnet_core\HotelWebMVC\DAL>dotnet add ..\bll\BLL.csproj reference .\DAL.csproj
已将引用“..\DAL\DAL.csproj”添加到项目。
HotelWebMVC --> BLL
D:\dotnet_core\HotelWebMVC\DAL>dotnet add ..\HotelWebMVC\HotelWebMVC.csproj reference ..\bll\BLL.csproj
已将引用“..\bll\BLL.csproj”添加到项目。
2.生成Model
① 使用EF Core 生成模型
DB First模式
全局安装ef工具
dotnet tool install --global dotnet-ef
测试工具是否安装成功
D:\dotnet_core\HotelWebMVC>dotnet ef

           _/\__
        ---==/  \\
     ___ ___  |.  \|\
    | __|| __| | )  \\\
    | _| | _|  \_/ | //|\\
    |___||_|    /  \\\/\\

Entity Framework Core .NET Command-line Tools 3.1.0

Usage: dotnet ef [options] [command]

Options:
 --version    Show version information
 -h|--help    Show help information
 -v|--verbose   Show verbose output.
 --no-color    Don't colorize output.
 --prefix-output Prefix output with level.

Commands:
 database  Commands to manage the database.
 dbcontext  Commands to manage DbContext types.
 migrations Commands to manage migrations.

Use "dotnet ef [command] --help" for more information about a command.
只要看到有这个独角兽就代表安装成功了。
添加需要的NuGet包
dotnet add package Microsoft.EntityFrameworkCore.Design
dotnet add package Pomelo.EntityFrameworkCore.MySql
使用EF工具
查看帮助
D:\dotnet_core\HotelWebMVC\DAL>dotnet ef dbcontext scaffold --help


Usage: dotnet ef dbcontext scaffold [arguments] [options]

Arguments:
 <CONNECTION> The connection string to the database.
 <PROVIDER>  The provider to use. (E.g. Microsoft.EntityFrameworkCore.SqlServer)

Options:
 -d|--data-annotations         Use attributes to configure the model (where possible). If omitted, only the fluent API is used.
 -c|--context <NAME>          The name of the DbContext.
 --context-dir <PATH>          The directory to put DbContext file in. Paths are relative to the project directory.
 -f|--force               Overwrite existing files.
 -o|--output-dir <PATH>         The directory to put files in. Paths are relative to the project directory.
 --schema <SCHEMA_NAME>...       The schemas of tables to generate entity types for.
 -t|--table <TABLE_NAME>...       The tables to generate entity types for.
 --use-database-names          Use table and column names directly from the database.
 --json                 Show JSON output.
 -p|--project <PROJECT>         The project to use.
 -s|--startup-project <PROJECT>     The startup project to use.
 --framework <FRAMEWORK>        The target framework.
 --configuration <CONFIGURATION>    The configuration to use.
 --runtime <RUNTIME_IDENTIFIER>     The runtime to use.
 --msbuildprojectextensionspath <PATH> The MSBuild project extensions path. Defaults to "obj".
 --no-build               Don't build the project. Only use this when the build is up-to-date.
 -h|--help               Show help information
 -v|--verbose              Show verbose output.
 --no-color               Don't colorize output.
 --prefix-output            Prefix output with level.
连接数据库生成模型数据
D:\dotnet_core\HotelWebMVC\DAL>dotnet ef dbcontext scaffold "Server=192.168.30.110,3306;DataBase=HotelWebDb;User=sa;Pwd=110;" "Pomelo.EntityFrameworkCore.MySql" -s ..\HotelWebMVC\HotelWebMVC.csproj
Build started...
Build succeeded.
修改连接字符串的位置
修改在appsettings.json文件中添加连接字符串
{
 "Logging": {
  "LogLevel": {
   "Default": "Information",
   "Microsoft": "Warning",
   "Microsoft.Hosting.Lifetime": "Information"
  }
 },
 "AllowedHosts": "*",
 "ConnectionStrings":{
  "HotelWeb":"Server=192.168.30.110,3306;DataBase=HotelWebDb;User=sa;Pwd=110;"
 }
}
然后在Sartup.cs文件获取连接字符串
public void ConfigureServices(IServiceCollection services)
{
	services.AddControllersWithViews();
	string connString=Configuration.GetConnectionString("HotelWeb");
	services.AddDbContext<DAL.HotelWebDbContext>(options=>options.UseMySql(connString, x => x.ServerVersion("5.5.64-mariadb")));
}
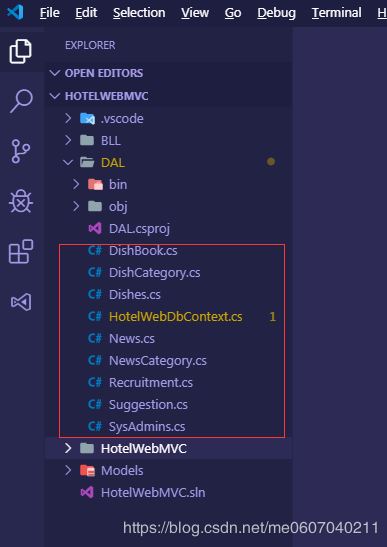
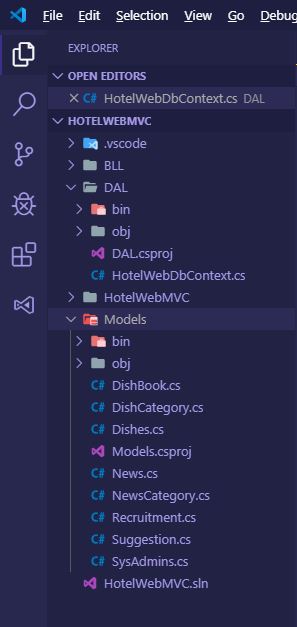
最后DbContenxt类中配置就可以删除了
移动DAL生成的实体类到Models模块
修改实体类中的命名空间
② 另一种使用ADO.NET实现
不是这次的重点,所以略过。
三、编写Model部分的代码
1.编写一个简单的Helper类
using Microsoft.EntityFrameworkCore;

namespace DAL
{
  class EFCoreHelper
  {
    private DbContext dbContext = null;
    public EFCoreHelper(DbContext context)
    {
      this.dbContext = context;
    }

    /// <summary>
    /// 添加实体
    /// </summary>
    /// <typeparam name="T"></typeparam>
    public int Add<T>(T entity) where T : class
    {
      dbContext.Entry(entity).State=EntityState.Added;
      return dbContext.SaveChanges();
    }

    /// <summary>
    /// 修改实体的全部属性
    /// </summary>
    /// <typeparam name="T"></typeparam>
    public int Modify<T>(T entity) where T:class
    {
      dbContext.Entry(entity).State=EntityState.Modified;
      return dbContext.SaveChanges();
    }

    /// <summary>
    /// 删除实体
    /// </summary>
    /// <typeparam name="T"></typeparam>
    public int Delete<T>(T entity) where T:class
    {
      dbContext.Entry(entity).State=EntityState.Deleted;
      return dbContext.SaveChanges();
    }
  }
}
2.完成新闻后台数据访问类
数据访问类
using System;
using System.Linq;
using System.Collections.Generic;
using Models;

namespace DAL
{
  public class NewsService
  {
    private EFCoreHelper helper = new EFCoreHelper(new HotelWebDbContext());

    /// <summary>
    /// 添加新闻
    /// </summary>
    /// <param name="news"></param>
    /// <returns></returns>
    public int AddNews(News news) => helper.Add(news);

    /// <summary>
    /// 修改新闻
    /// </summary>
    /// <param name="news"></param>
    /// <returns></returns>
    public int ModifyNews(News news) => helper.Modify(news);

    /// <summary>
    /// 删除新闻
    /// </summary>
    /// <param name="newssId"></param>
    /// <returns></returns>
    public int DeleteNews(string newssId)
    {
      News news = new News() { Id = Convert.ToUInt32(newssId) };
      return helper.Delete(news);
    }

    /// <summary>
    /// 获取指定数量的新闻列表
    /// </summary>
    /// <param name="count"></param>
    /// <returns></returns>
    public List<News> GetNews(int count)
    {
      using (HotelWebDbContext dbContext = new HotelWebDbContext())
      {
        return (from n in dbContext.News orderby n.PublishTime descending select n).Take(count).ToList();
      }
    }

    /// <summary>
    /// 根据ID获取新闻信息
    /// </summary>
    /// <param name="newssId"></param>
    /// <returns></returns>
    public News GetNewsById(string newssId)
    {
      uint id = Convert.ToUInt32(newssId);
      using (HotelWebDbContext dbContext = new HotelWebDbContext())
      {
        return (from n in dbContext.News where n.Id == id select n).FirstOrDefault();
      }
    }

    /// <summary>
    /// 获取所有的新闻分类
    /// </summary>
    /// <returns></returns>
    public List<NewsCategory> GetCategories()
    {
      using (HotelWebDbContext dbContext = new HotelWebDbContext())
      {
        return (from c in dbContext.NewsCategory select c).ToList();
      }
    }
  }
}
业务逻辑部分
using System.Collections.Generic;
using DAL;
using Models;

namespace BLL
{
  public class NewsManager
  {
    private NewsService objService=new NewsService();
    /// <summary>
    /// 添加新闻
    /// </summary>
    /// <param name="news"></param>
    /// <returns></returns>
    public int AddNews(News news) => objService.AddNews(news);

    /// <summary>
    /// 修改新闻
    /// </summary>
    /// <param name="news"></param>
    /// <returns></returns>
    public int ModifyNews(News news) => objService.ModifyNews(news);

    /// <summary>
    /// 删除新闻
    /// </summary>
    /// <param name="newssId"></param>
    /// <returns></returns>
    public int DeleteNews(string newssId) => objService.DeleteNews(newssId);

    /// <summary>
    /// 获取指定数量的新闻列表
    /// </summary>
    /// <param name="count"></param>
    /// <returns></returns>
    public List<News> GetNews(int count) => objService.GetNews(count);

    /// <summary>
    /// 根据ID获取新闻信息
    /// </summary>
    /// <param name="newssId"></param>
    /// <returns></returns>
    public News GetNewsById(string newssId) => objService.GetNewsById(newssId);

    /// <summary>
    /// 获取所有的新闻分类
    /// </summary>
    /// <returns></returns>
    public List<NewsCategory> GetCategories() => objService.GetCategories();
  }
}
3.添加一个控制台项目用来测试
添加需要的引用
dotnet add package Microsoft.EntityFrameworkCore.Design
dotnet add package Pomelo.EntityFrameworkCore.MySql
DbContext中的数据库连接字符串添加回去
   protected override void OnConfiguring(DbContextOptionsBuilder optionsBuilder)
    {
      if(!optionsBuilder.IsConfigured)
      {
        optionsBuilder.UseMySql("Server=192.168.30.110;DataBase=HotelWebDb;User=sa;Pwd=110;",x => x.ServerVersion("5.5.64-mariadb"));
      }
    }
编写测试代码
 News news=new News()
      {
        NewsContent="你好这是一个测试新闻内容",
        NewsTitle="测试新闻",
        CategoryId=1
      };

      Console.WriteLine(objNews.AddNews(news));
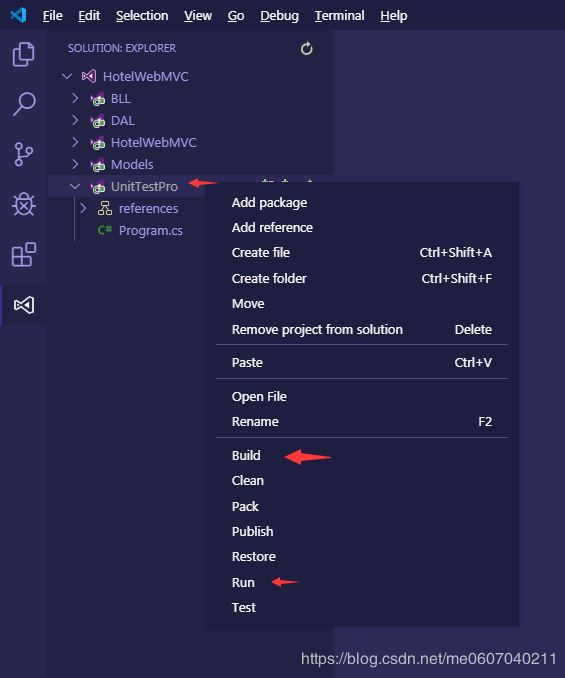
启动调试
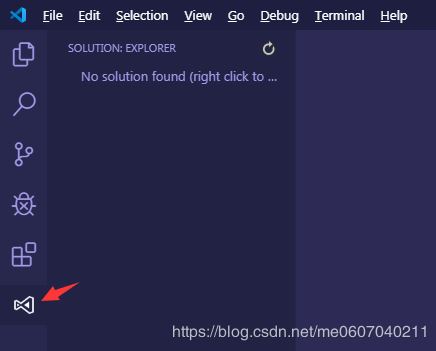
选择启动项目有两种方法
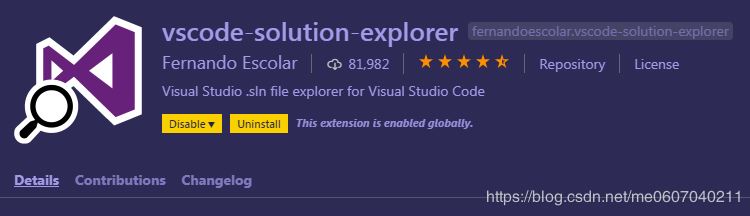
①通过solution explorer 插件选择
②通过配置launch.json 文件启动
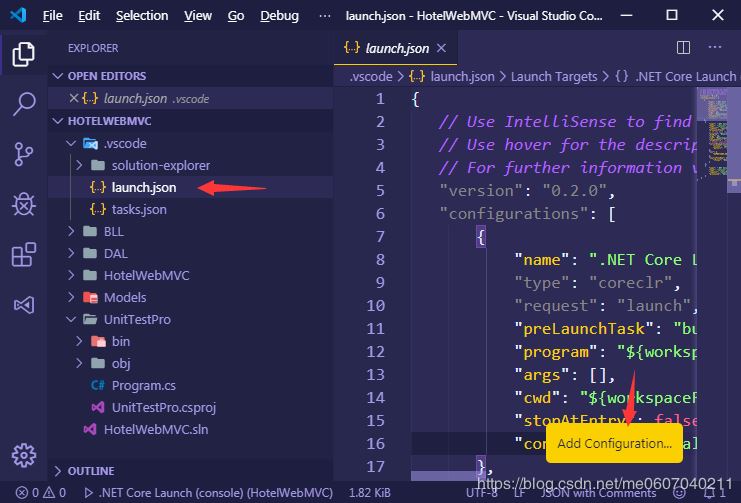
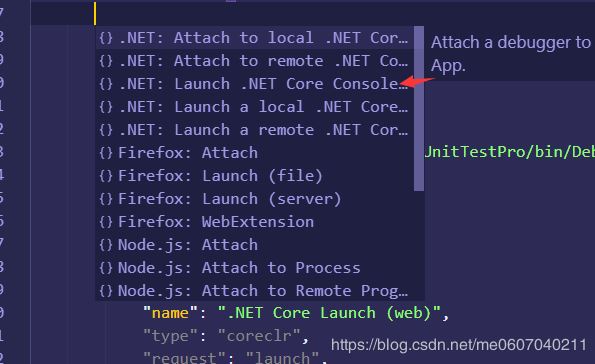
然后修改启动程序入口就可以了
 {
      "name": ".NET Core Launch (console)",
      "type": "coreclr",
      "request": "launch",
      "preLaunchTask": "build",
      "program": "${workspaceFolder}/UnitTestPro/bin/Debug/netcoreapp3.1/UnitTestPro.dll",
      "args": [],
      "cwd": "${workspaceFolder}",
      "stopAtEntry": false,
      "console": "internalConsole"
    },
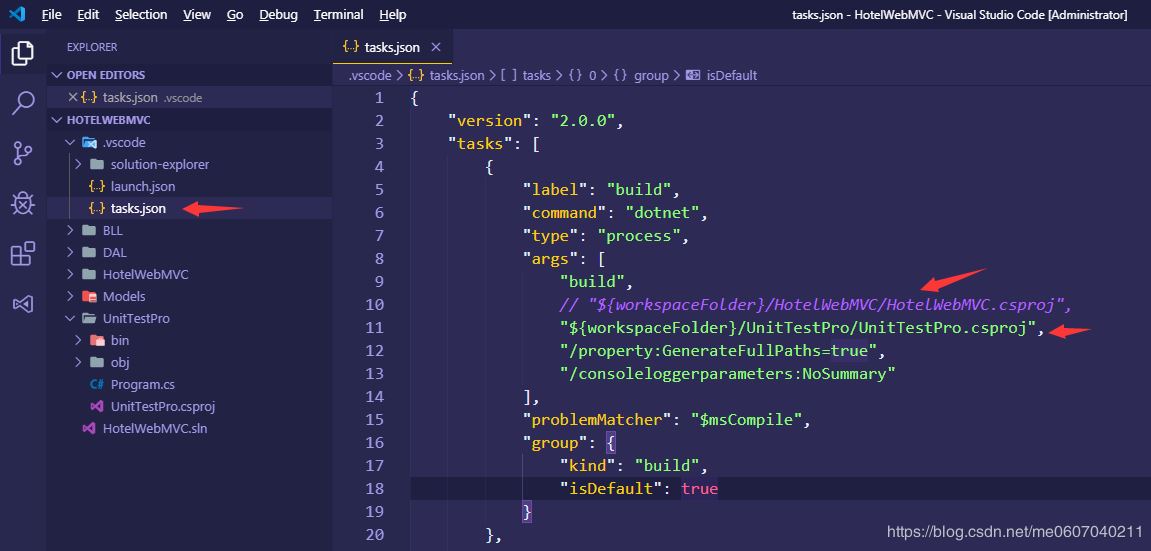
还要修改task文件,否则测试项目中新加的代码不能被执行。
结果查验
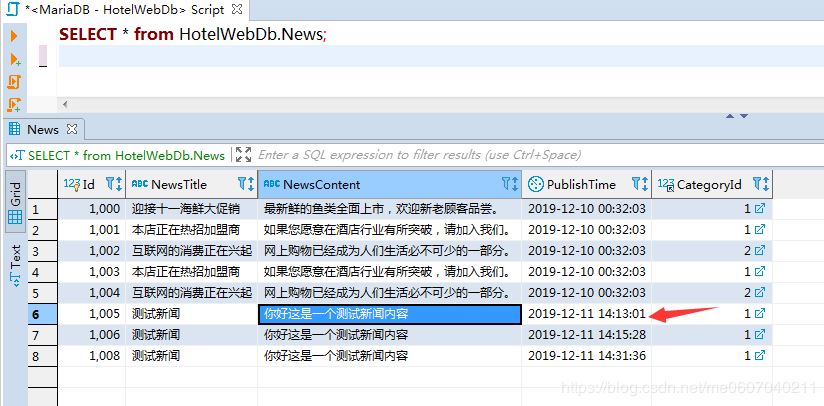
结果符合预期
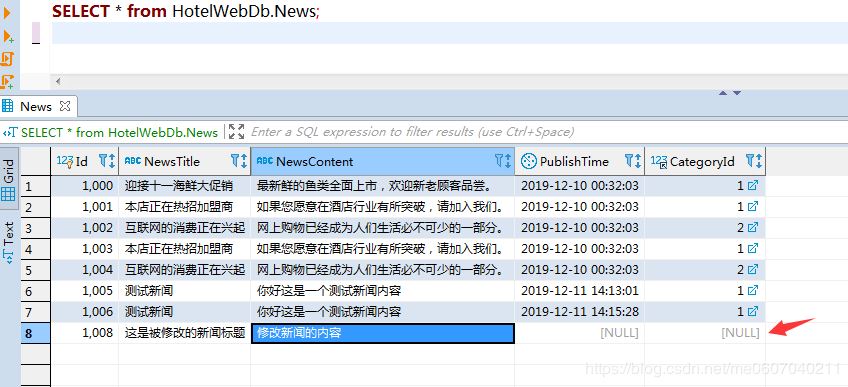
注意事项
修改新闻调用的方法不支持部分属性修改,如果对象属性不设置,那么没有设置的字段被设置为空。
后面有字段部分修改的方法。
   News news=new News()
      {
        Id=1008,
        NewsContent="修改新闻的内容",
        NewsTitle="这是被修改的新闻标题",
      };
      Console.WriteLine(objNews.ModifyNews(news));
4.编写菜品预订
5.编写招聘
6.编写投诉和建议
7.管理员登录
类似不再贴代码
四、前端UI实现
1.完成前端Html代码的编写
不多说
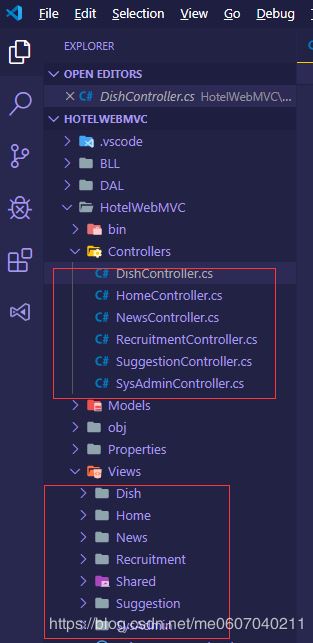
2.完成MVC项目中控制器和视图的文件添加
这个只能手动添加,不像VS有模板可用
3.复制网站的静态资源
asp.net core 网站静态资源都是放在wwwroot目录的,并且文件名一般是小写。

4.在视图中引用资源
MVC框架可以直接识别在wwwroot中的静态资源,不用写显示的写出目录名。
 <link rel="stylesheet" href="~/lib/bootstrap/dist/css/bootstrap.min.css" rel="external nofollow" rel="external nofollow" />
  <link rel="stylesheet" href="~/css/site.css" rel="external nofollow" rel="external nofollow" />
5.编写动作方法
  public IActionResult Index()
    {
      return View();
    }
6.添加视图

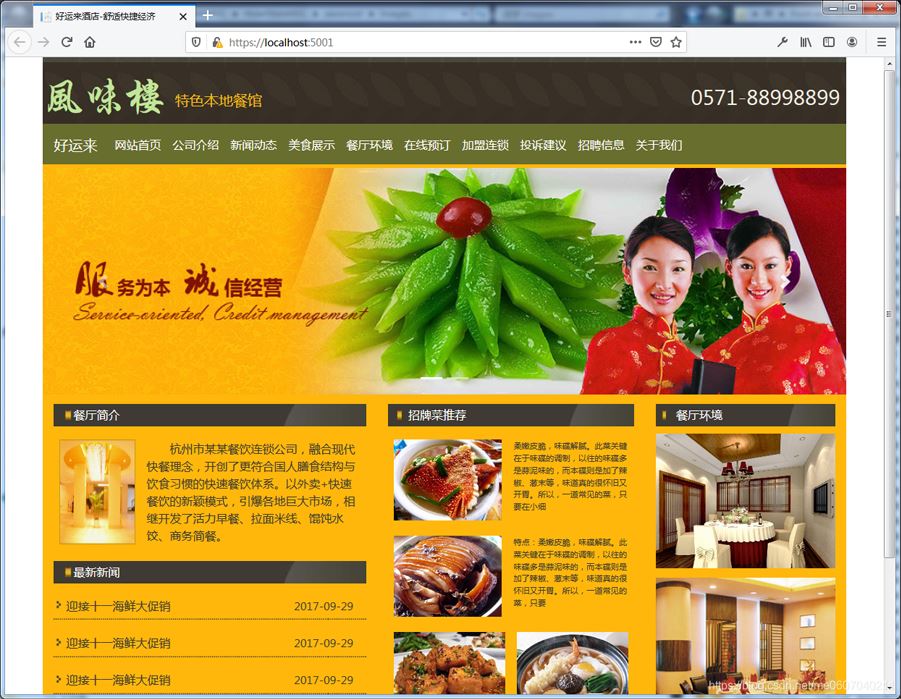
7.启动调试
首页效果图
8.视图与控制器之间传递数据
使用ViewData
视图的网页标题可以使用这种方式传递
  public IActionResult Index()
    {
      ViewData["title"]="好运来酒店";
      ViewBag.list=new NewsManager().GetNews(4);
      return View();
    }
视图中引用数据
<!doctype html>
<html lang="zh">

<head>
  <!-- Required meta tags -->
  <meta charset="utf-8">
  <meta name="viewport" content="width=device-width, initial-scale=1, shrink-to-fit=no">

  <!-- Bootstrap CSS -->
  <link rel="stylesheet" href="~/lib/bootstrap/dist/css/bootstrap.min.css" rel="external nofollow" rel="external nofollow" />
  <link rel="stylesheet" href="~/css/site.css" rel="external nofollow" rel="external nofollow" />

  <title>@ViewData["title"]-舒适快捷经济</title>
</head>
使用ViewBag
这是所谓的动态类型,直接无中生有造一个属性
ViewBag.list=new NewsManager().GetNews(4);
视图中引用
 @foreach (News item in @ViewBag.list) {
    <div class="d-flex flex-row justify-content-between newslist">
      <div class="p-2">
        <a href="/News/NewsDetail?id=@item.Id" rel="external nofollow" rel="external nofollow" >@item.NewsTitle</a>
      </div>
      <div class="p-2">
        @item.PublishTime.ToShortDateString()
      </div>
    </div>
使用viewmodel
控制器中使用View的重载方法传递viewmodel
   public IActionResult Index()
    {
      ViewData["title"]="好运来酒店";
      return View(new NewsManager().GetNews(4));
    }
视图中先声明后使用
Specify a model using the @model directive. Use the model with @Model:
@model list<News>
...
    @foreach (News item in @Model) {
    <div class="d-flex flex-row justify-content-between newslist">
      <div class="p-2">
        <a href="/News/NewsDetail?id=@item.Id" rel="external nofollow" rel="external nofollow" >@item.NewsTitle</a>
      </div>
      <div class="p-2">
        @item.PublishTime.ToShortDateString()
      </div>
    </div>
修改后的首页

9.分部视图
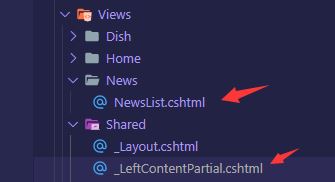
创建分部视图
分部视图的创建和其他视图的创建没有任何区别,只是它作为其他视图的一部分来视图用。
避免视图代码的重复。
在其他视图中使用分部视图
引用分部视图使用特殊的标签 <partial name="..." />
@model List<News>
<div class="row">
<div class="col-md-4">
<partial name="../Shared/_LeftContentPartial.cshtml" />
</div>
<div class="col-md-8">
<div class="lefttitle righttitle">您现在所在的位置:中式餐厅酒店>新闻动态</div>
<div class="bg-light">
@foreach (News item in @Model) {
<div class="d-flex flex-row justify-content-between">
<div class="p-2"><a href="NewsDetail?id=@item.Id" rel="external nofollow" >@item.NewsTitle</a></div>
<div class="p-2">@item.PublishTime.ToShortDateString()</div>
</div>
}
</div>
</div>
</div>
10.使用Section布局定义
@RenderSection("js",required:false)
使用
 @section js{
    <script type="text/javascript">
      function changeFontSize(fontSize) {
        //获取要变化的对象
        var divContent = $(".row .m-4");
        divContent.css("font-size",fontSize);
      }
    </script>
  }
11.表单验证
使用模型验证方式实现
添加验证特性
public partial class DishBook
  {
    public uint Id { get; set; }

    public string HotelName { get; set; }

    [Required(ErrorMessage = "{0}不能为空")]
    [Display(Name = "消费时间")]
    public DateTime? ConsumeTime { get; set; }

    [Required(ErrorMessage = "{0}不能为空")]
    [RegularExpression(@"^\d+$", ErrorMessage = "请输入正确的{0}")]
    [Display(Name = "消费人数")]
    public uint? ConsumePersons { get; set; }

    public string RoomType { get; set; }

    [Required(ErrorMessage = "{0}不能为空")]
    [RegularExpression(@"^(13[0-9]|14[5|7]|15[0|1|2|3|5|6|7|8|9]|18[0|1|2|3|5|6|7|8|9])\d{8}$", ErrorMessage = "请输入正确的{0}")]
    [Display(Name = "手机号码")]
    public string CustomerPhone { get; set; }

    [Required(ErrorMessage = "{0}不能为空")]
    [Display(Name = "姓名")]
    public string CustomerName { get; set; }

    [EmailAddress(ErrorMessage = "请输入正确的{0}")]
    [Display(Name = "电子邮件")]
    public string CustomerEmail { get; set; }

    public string Comments { get; set; }

    public DateTime BookTime { get; set; }
    public int? BookStatus { get; set; }

    // 扩展属性
    [Required(ErrorMessage = "{0}不能为空")]
    [Remote(action:"CheckVcode",controller:"Dish")]
    [Display(Name = "验证码")]
    public string ValidationCode { get; set; }
  }
使用 Tag Helper 完成前端代码编写
@model DishBook
@section js{
  <partial name="../Shared/_ValidationScriptsPartial.cshtml" />
  <script src="~/lib/My97DatePicker/WdatePicker.js"></script>
}
<div class="row">
<div class="col-md-4">
<partial name="../Shared/_DishPartial.cshtml" />
</div>
<div class="col-md-8">
<div class="lefttitle righttitle">您现在所在的位置:中式餐厅酒店>在线预订</div>
<form class="bg-light p-3" asp-controller="Dish" asp-action="Booking" method="post">
<div class="form-group">
<label for="HotelName">酒店名称:</label>
<select class="form-control w-25" name="HotelName">
<option value="天津南开店">天津南开店</option>
<option value="天津和平店">天津和平店</option>
<option value="北京朝阳店">北京朝阳店</option>
</select>
</div>
<div class="form-group">
<span><label asp-for="ConsumeTime"></label> :</span>
<div class="d-flex flex-row align-items-center">
<input class="form-control w-50" asp-for="ConsumeTime" onclick="WdatePicker({dateFmt:'yyyy-MM-dd HH:mm:ss'})">
<span class="p-2 text-danger">*</span>
<span asp-validation-for="ConsumeTime"></span>
</div>
</div>
<div class="form-group">
<span><label asp-for="ConsumePersons"></label>:</span>
<div class="d-flex flex-row align-items-center">
<input class="form-control w-50" type="text" asp-for="ConsumePersons">
<span class="p-2 text-danger text-center">*</span>
<span asp-validation-for="ConsumePersons"></span>
</div>
</div>
<div class="form-group">
<label for="RoomType"> 选择包间类型: </label>
<select class="form-control w-25" name="RoomType">
<option value="包间">包间</option>
<option value="散座">散座</option>
</select>
</div>
<div class="form-group">
<span>您的<label asp-for="CustomerName"></label>:</span>
<div class="d-flex flex-row align-items-center">
<input class="form-control w-50" asp-for="CustomerName">
<span class="p-2 text-danger text-center">*</span>
<span asp-validation-for="CustomerName"></span>
</div>
</div>
<div class="form-group">
<span><label asp-for="CustomerPhone"></label>:</span>
<div class="d-flex flex-row align-items-center">
<input class="form-control w-50" asp-for="CustomerPhone">
<span class="p-2 text-danger text-center">*</span>
<span asp-validation-for="CustomerPhone"></span>
</div>
</div>
<div class="form-group">
<span><label asp-for="CustomerEmail"></label>:</span>
<div class="d-flex flex-row align-items-center">
<input class="form-control w-50" asp-for="CustomerEmail">
<span asp-validation-for="CustomerEmail"></span>
</div>
</div>
<div class="form-group">
<label for="Comments"> 备注事项: </label>
<textarea class="form-control" cols="20" name="Comments" rows="4" placeholder="备注"></textarea>
</div>
<div class="form-group">
<span><label asp-for="ValidationCode"></label>:</span>
<div class="d-flex flex-row align-items-center">
<input class="form-control w-50" asp-for="ValidationCode">
<span class="p-2 text-danger text-center">*</span>
<span asp-validation-for="ValidationCode"></span>
</div>
</div>
<div class="form-group">
<img alt="验证码图片" title="看不清?点击换一个" src='@Url.Action("ValidationCode","Dish")' onclick="this.src=this.src+'?'" />
</div>
<div class="form-group">
<input class="btn btn-success" type="submit" value="马上预定" />
</div>
</form>
</div>
</div>
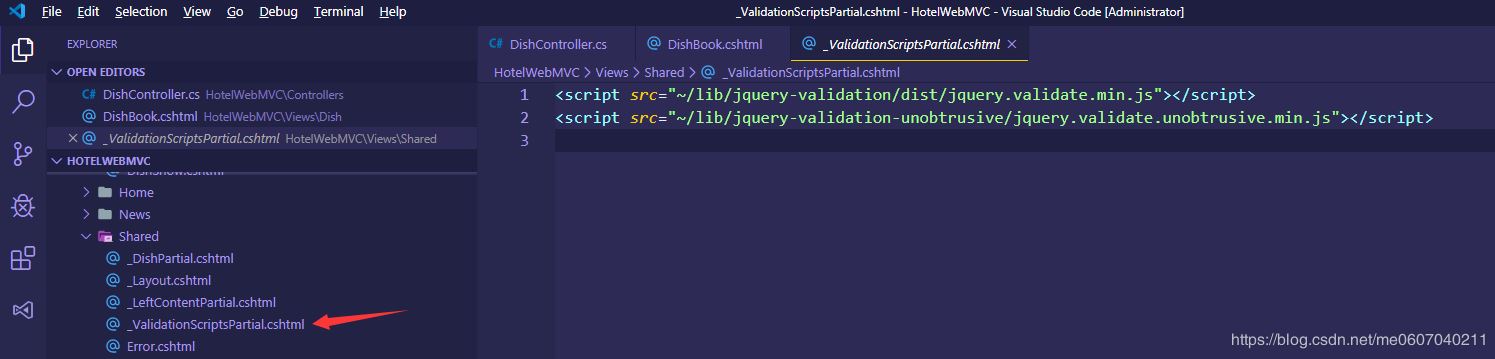
引入jQuery验证插件
这个是插件MVC项目时,模板自动生成的
@section js{
<partial name="../Shared/_ValidationScriptsPartial.cshtml" />
<script src="~/lib/My97DatePicker/WdatePicker.js"></script>
}
Tag Helper自动根据数据类型生成对应的输入框类型
可以手动设置 type 来覆盖

验证码提交到服务器验证
使用 [Remote] 特性
详细文档参考:https://docs.microsoft.com/en-us/aspnet/core/mvc/models/validation?view=aspnetcore-3.1
The jQuery Validate remote method expects a JSON response:
- true means the input data is valid.
- false, undefined, or null means the input is invalid. Display the default error message.
- Any other string means the input is invalid. Display the string as a custom error message.
注意:The [Remote] attribute is in the Microsoft.AspNetCore.Mvc namespace.
五、使用区域项目完成后台管理系统
1.创建区域项目
建立区域项目目录结构
- Project name
  Areas
   Admin //分区项目1
    Controllers
    Views
   Services //分区项目2
    Controllers
    Views
添加路由规则
在Startup.cs文件中添加区域项目路由规则
  app.UseEndpoints(endpoints =>
  {
    endpoints.MapControllerRoute(
      name: "Admin",
      pattern: "{area:exists}/{controller=Home}/{action=Index}/{id?}"

    );
    endpoints.MapControllerRoute(
      name: "default",
      pattern: "{controller=Home}/{action=Index}/{id?}"
    );
  });
测试页面
如果有和主项目同名的控制器使用区域特性区分
 using Microsoft.AspNetCore.Mvc;

  namespace HotelWebMVC.Areas.Admin.Controllers
  {
    [Area("Admin")]
    public class HomeController : Controller
    {
      public IActionResult Index()
      {
        return View();
      }

      public IActionResult Welcome()
      {
        ViewData["Message"] = "Your welcome message";

        return View();
      }
    }
  }
如果不打区域标记区分,启动项目会包错。
2.使用Cookie保存登录凭证
添加依赖包
dotnet add package Microsoft.AspNetCore.Authentication.Cookies
配置服务
public void ConfigureServices(IServiceCollection services)
    {
      services.AddControllersWithViews();

      services.AddDistributedMemoryCache();
      services.AddSession(options =>
      {
        // Set a short timeout for easy testing.
        options.IdleTimeout = TimeSpan.FromSeconds(300);
        options.Cookie.HttpOnly = true;
        // Make the session cookie essential
        options.Cookie.IsEssential = true;
      });
      services.AddAuthentication(CookieAuthenticationDefaults.AuthenticationScheme)
      .AddCookie(options=>{
          options.Cookie.HttpOnly=true;
          options.ExpireTimeSpan=TimeSpan.FromMinutes(5);
          options.LoginPath="/admin";
          // options.AccessDeniedPath="/403.html";
        }
      );

      string connString = Configuration.GetConnectionString("HotelWeb");
      services.AddDbContext<DAL.HotelWebDbContext>(options => options.UseMySql(connString, x => x.ServerVersion("5.5.64-mariadb")));
    }
启用认证服务添加的位置有要求:必须在app.UseRouting 和 app.UseEndpoints 之间。
    app.UseRouting();

      app.UseSession();

      app.UseAuthentication();

      app.UseAuthorization();

      app.UseEndpoints(endpoints =>
      {
        endpoints.MapControllerRoute(
          name: "admin",
          pattern: "{area:exists}/{controller=SysAdmin}/{action=Index}/{id?}"

        );
        endpoints.MapControllerRoute(
          name: "default",
          pattern: "{controller=Home}/{action=Index}/{id?}");
      });
登录成功后签发凭证
using System.Security.Claims;
using Microsoft.AspNetCore.Mvc;
using Microsoft.AspNetCore.Authentication;
using Microsoft.AspNetCore.Authentication.Cookies;
List<Claim> claims = new List<Claim>() { new Claim("username", admin.LoginName) };

ClaimsIdentity claimsIdentity = new ClaimsIdentity(claims, CookieAuthenticationDefaults.AuthenticationScheme);

AuthenticationProperties properties = new AuthenticationProperties()
{
	IsPersistent = true
};

await HttpContext.SignInAsync
(
	CookieAuthenticationDefaults.AuthenticationScheme,
	new ClaimsPrincipal(claimsIdentity),
	properties
);
其他需登录后才能访问的资源,在控制器上添加 [Authorize]标记
[Authorize]
public class HomeController : Controller
{
  public IActionResult Index()
  {
    return View();
  }

  public IActionResult Welcome()
  {
    ViewData["Message"] = "Your welcome message";

    return View();
  }
}
3.使用ajax提交表单
在dotnet core 中不再支持@Ajax.Form方式,而是使用jquery插件的方式支持了。
通过定义data-* 属性来支持类似的功能
和Ajax助手的对照
======================================================
AjaxOptions	      HTML attribute
======================================================
Confirm	        data-ajax-confirm
HttpMethod	      data-ajax-method
InsertionMode	     data-ajax-mode
LoadingElementDuration	data-ajax-loading-duration
LoadingElementId	   data-ajax-loading
OnBegin	        data-ajax-begin
OnComplete	      data-ajax-complete
OnFailure	       data-ajax-failure
OnSuccess	       data-ajax-success
UpdateTargetId	    data-ajax-update
Url	          data-ajax-url
======================================================
这个特性只能在form和a标签上起作用
使用方法:
①下载插件并引用到项目中
地址:https://github.com/aspnet/jquery-ajax-unobtrusive/releases
将src文件夹中的js文件拷贝到项目对应的存放位置
②编写需要的js函数
编写回调函数
	<script>
    var onSuccess=function(data){
      alert(data);
      $("#mainForm")[0].reset();
      dishImg.src = "/images/default.png";
    };

    var onFailed=function(data){
      alert(data);
    };
  </script>
③使用data属性改写标签
这里注意:要使用ajax提交表单,data-ajax="true"必须要设置为true。
data-ajax-confirm=“确认要提交吗?” 这里是弹出框的内容,不是具体的函数名
data-ajax-begin
data-ajax-complete
data-ajax-failure
data-ajax-success
这些属性值就是回调函数的名称。
4.CKeditor使用
推荐使用ckeditor4,因为5版本中文输入有问题。
使用步骤:
下载编辑器的软件包
在页面中引入它的js脚本
<script src="../../third_files/ckeditor4/ckeditor.js"></script>
使用texterea作为目标
编辑器的高度可以config.js文件中设置
<textarea id="editor" name="editor" rows="20"></textarea>
在js中创建
<script>
  CKEDITOR.replace( 'editor' );
</script>
自定义配置
修改配置文件config.js,推荐直接在默认的文件中添加需要的配置。
CKEDITOR.editorConfig = function( config ) {
 config.language = 'es';
 config.uiColor = '#F7B42C';
 config.height = 300;
 config.toolbarCanCollapse = true;
};
获取编辑器的内容
用于提交前验证是否有内容,NewsContent是编辑器textarea的id
var content=CKEDITOR.instances.NewsContent.getData();
注意此时数据验证通过,使用js提交表单的话,编辑器并没有替换原来的内容,需要手动替换
$("#NewsContent").html(content);
不然提交到控制器中是没有值的。
var onSubmit=function(){
  var content=CKEDITOR.instances.NewsContent.getData();

  if(content==""){
    alert("新闻内容不能为空");
  }
  else{
    $("#NewsContent").html(content);
    $("#mainForm").submit();
  }
}
清空编辑器的内容
CKEDITOR.instances.NewsContent.setData("");
In rare cases it may happen that the server or application configuration
will reject submitted HTML content if it is not encoded first (e.g. ASP.NET ValidateRequest).
In such case check the config.htmlEncodeOutput option.
config.htmlEncodeOutput = true;
上传图片设置
需要外部插件:file browser,popup,filetools
配置config.js文件
config.filebrowserBrowseUrl = ‘/browser/browse.php';
config.filebrowserUploadUrl = ‘/uploader/upload.php';
控制器中的参数使用 (IFormFile upload) 使用的是upload的参数名。
如何给一个响应,放弃不用这个,使用filebrowserBrowseUrl这个功能,里面也有上传
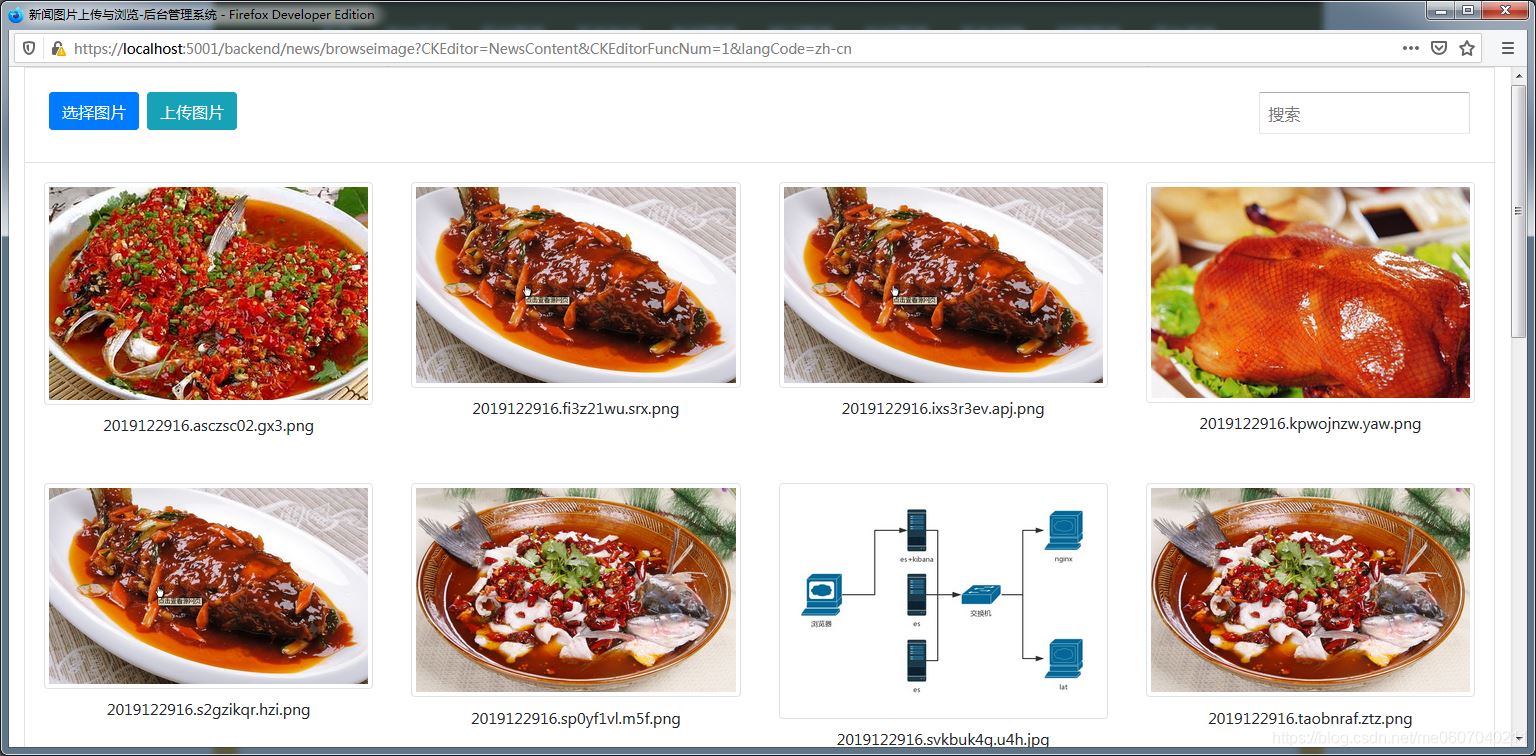
具体方法是:
- 构建一个图片上传和浏览的页面
- 完成图片上传功能
- 图片选装功能
响应的js代码如下:
<script>
  // Helper function to get parameters from the query string.
  function getUrlParam( paramName ) {
    var reParam = new RegExp( '(?:[\?&]|&)' + paramName + '=([^&]+)', 'i' );
    var match = window.location.search.match( reParam );
    return ( match && match.length > 1 ) ? match[1] : null;
  }

  var upload=function(){
    var file=$(".btnUpload>input")[0].files[0];
    if(file==null){
      alert("请选择上传图片");
    }
    else{
      var formData=new FormData();
      formData.append("upload",file);
      // 实例化一个AJAX对象
      var xhr = new XMLHttpRequest();
      xhr.onload = function() {
        $(".border3").first().before('<div class="w-25 p-3 border3"><span class="d-inline-block"><h3><span class="badge badge-info rotated">new</span></h3><img class="img-thumbnail" src="/images/news/'+xhr.responseText+'" onclick="select(this)"></span><div class="text-center p-2">'+xhr.responseText+'</div></div>');
      }
      xhr.open("post",'@Url.Action("UploadImage","News")',true);

      // 发送表单数据
      xhr.send(formData);
    }
  }

  var selectedImg=null;
  var select=function(img){
    if(selectedImg!=null){
      selectedImg.parents(".border3").removeClass("selected");
    }
    selectedImg=$(img);
    selectedImg.parents(".border3").addClass("selected");
  }

  var choose=function(){
    if(selectedImg!=null){
      var funcNum = getUrlParam( 'CKEditorFuncNum' );
      var fileUrl = selectedImg.attr("src");
      window.opener.CKEDITOR.tools.callFunction( funcNum, fileUrl );
      window.close();
    }
    else{
      alert("请选装图片");
    }
  }
</script>
5.其他功能省略代码
六、使用依赖注入改进项目
1.抽取接口
通过vs来抽取接口,效率高。
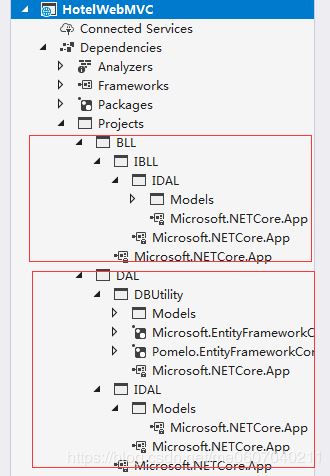
2.重新组织项目结构
新增IDAL、IBLL、DBUtility
UI?>IBLL?>IDAL?>Models
BLL?>IBLL、IDAL
IDAL?>Models
DAL?>IDAL、DBUtility
3.注册依赖服务
public void ConfigureServices(IServiceCollection services)
  {
   //其他代码省略了
   ...

    services.AddDbContext<DBUtility.HotelWebDbContext>(
      options => options.UseMySql(
        Configuration.GetConnectionString("HotelWeb"),
        x => x.ServerVersion("5.5.64-mariadb")
      )
    );

    services.AddTransient<INewsManager, NewsManager>();
    services.AddTransient<IDishManager, DishManager>();
    services.AddTransient<IDishBookManager, DishBookManager>();
    services.AddTransient<ISuggestionManager, SuggestionManager>();
    services.AddTransient<IRecruitmentManager, RecruitmentManager>();
    services.AddTransient<ISysAdminManager, SysAdminManager>();

    services.AddTransient<INewsService,NewsService>();
    services.AddTransient<IDishService,DishService>();
    services.AddTransient<IDishBookService,DishBookService>();
    services.AddTransient<ISuggestionService,SuggestionService>();
    services.AddTransient<IRecruitmentService,RecruitmentService>();
    services.AddTransient<ISysAdminService,SysAdminService>();
  }
4.修改代码使用依赖注入
public class HomeController : Controller
  {
    private readonly INewsManager newsManager;
    private readonly ISuggestionManager suggestionManager;
    private readonly IRecruitmentManager recruitmentManager;
    public HomeController(
     INewsManager newsManager,
     ISuggestionManager suggestionManager,
     IRecruitmentManager recruitmentManager)
    {
      this.newsManager = newsManager;
      this.suggestionManager = suggestionManager;
      this.recruitmentManager = recruitmentManager;
    }

    // ...
  }
5.测试
启动项目也没有什么问题
七、项目发布
1.项目配置
dotnet core 中没有Web.conf文件了。
查看文档,都是通过Startup.cs中配置项目的。
暂时放弃配置。
2.命令行发布项目
CLI 提供了发布项目的相关命令
dotnet publish -c Release --no-self-contained -o /path/to/save/project/
3.另一种方式使用vs发布
很简单,下一步下一步做就好了。
八、通过Nginx部署到Linux服务器
1.在Centos7 上安装运行时
Register Microsoft key and feed
sudo rpm -Uvh https://packages.microsoft.com/config/centos/7/packages-microsoft-prod.rpm
Install the ASP.NET Core runtime
sudo yum install dotnet-sdk-3.1
2.安装libgdiplus
因为项目中使用验证码,需要用到这个命名空间:System.Drawing.Common
速度太慢,放弃。
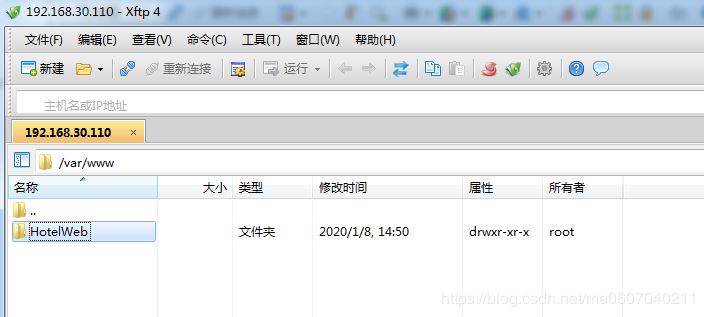
3.将项目目录上传到linux
使用xshell 的ftp 轻松完成。
4.测试项目是否运行
cd /var/www/HotelWeb/
dotnet HotelWeb.dll

[root@centos7 HotelWeb]# dotnet HotelWebMVC.dll
info: Microsoft.Hosting.Lifetime[0]
   Now listening on: http://localhost:5000
info: Microsoft.Hosting.Lifetime[0]
   Application started. Press Ctrl+C to shut down.
info: Microsoft.Hosting.Lifetime[0]
   Hosting environment: Production
info: Microsoft.Hosting.Lifetime[0]
   Content root path: /var/www/HotelWeb
5.安装Nginx并配置
yum install nginx
vim /etc/nginx/nginx.conf
---------------
# 删除nginx默认的server,添加下面两个

server {
  listen  80 default_server;
  return  444;
}

server {
  listen    80;
  server_name  *.hotel.com;
  location / {
    proxy_pass     http://localhost:5000;
    proxy_http_version 1.1;
    proxy_set_header  Upgrade $http_upgrade;
    proxy_set_header  Connection keep-alive;
    proxy_set_header  Host $host;
    proxy_cache_bypass $http_upgrade;
    proxy_set_header  X-Forwarded-For $proxy_add_x_forwarded_for;
    proxy_set_header  X-Forwarded-Proto $scheme;
  }
}

----------------
6.启动nginx
systemctl start nginx
nginx -t
# 配置确认没有问题后,重新载入配置
nginx -s reload
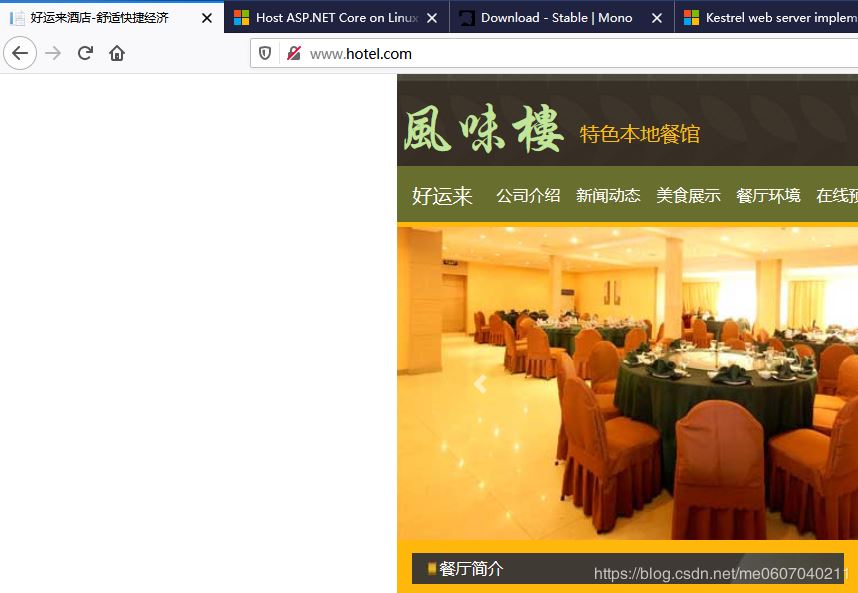
7.浏览器测试
修改win7的host
www.hotel.com 192.168.30.110
8.最后的问题
因为libgdiplus这个库没有安装,所以进入验证码的页面会有报错。
fail: Microsoft.AspNetCore.Diagnostics.ExceptionHandlerMiddleware[1]
An unhandled exception has occurred while executing the request.
System.TypeInitializationException: The type initializer for 'Gdip' threw an exception.
---> System.DllNotFoundException: Unable to load shared library 'libgdiplus' or one of its dependencies.
9.修改dotnet监听端口
在Program.cs 文件中修改
   public static IHostBuilder CreateHostBuilder(string[] args) =>
      Host.CreateDefaultBuilder(args)
        .ConfigureWebHostDefaults(webBuilder =>
        {
          webBuilder.ConfigureKestrel(serverOptions =>
          {
            serverOptions.Listen(IPAddress.Any, 5000);
          })
          .UseStartup<Startup>();
        });
  }
修改后
[root@centos7 HotelWeb]# dotnet HotelWebMVC.dll
info: Microsoft.Hosting.Lifetime[0]
   Now listening on: http://0.0.0.0:5000
info: Microsoft.Hosting.Lifetime[0]
   Application started. Press Ctrl+C to shut down.
info: Microsoft.Hosting.Lifetime[0]
   Hosting environment: Production
info: Microsoft.Hosting.Lifetime[0]
   Content root path: /var/www/HotelWeb


[root@centos7 ~]# ss -tna
State    Recv-Q Send-Q          Local Address:Port                  Peer Address:Port
LISTEN   0   128                  *:5000                       *:*
LISTEN   0   50                  *:3306                       *:*
LISTEN   0   128                  *:111                        *:*
LISTEN   0   128                  *:80                        *:*
LISTEN   0   128                  *:22                        *:*
LISTEN   0   100              127.0.0.1:25                        *:*
ESTAB    0   0            192.168.30.110:22                  192.168.30.88:1581
ESTAB    0   52            192.168.30.110:22                  192.168.30.88:1516
LISTEN   0   128                 :::111                       :::*
LISTEN   0   128                 :::22                        :::*
LISTEN   0   100                 ::1:25                        :::*
参考文档
Entity Framework Core tools reference - .NET CLI
Using a Separate Migrations Project
Model validation in ASP.NET Core MVC
Use cookie authentication without ASP.NET Core Identity
Dependency injection in ASP.NET Core
CentOS 7 Package Manager - Install .NET Core
Add the Mono repository to your system
到此这篇关于基于.NET Core 3.1 网站开发和部署的方法的文章就介绍到这了,更多相关.NET Core 3.1 网站开发部署内容请搜索自学编程网以前的文章或继续浏览下面的相关文章希望大家以后多多支持自学编程网!

- 本文固定链接: https://zxbcw.cn/post/193646/
- 转载请注明:必须在正文中标注并保留原文链接
- QQ群: PHP高手阵营官方总群(344148542)
- QQ群: Yii2.0开发(304864863)