下载maven

解压路径:
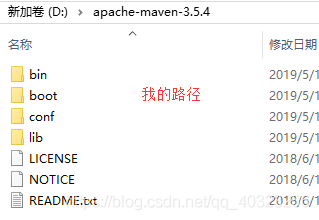
打开环境变量:右键此电脑-属性-高级系统设置-高级-环境变量
添加以下系统变量:
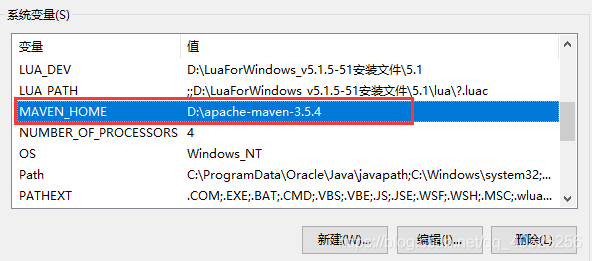
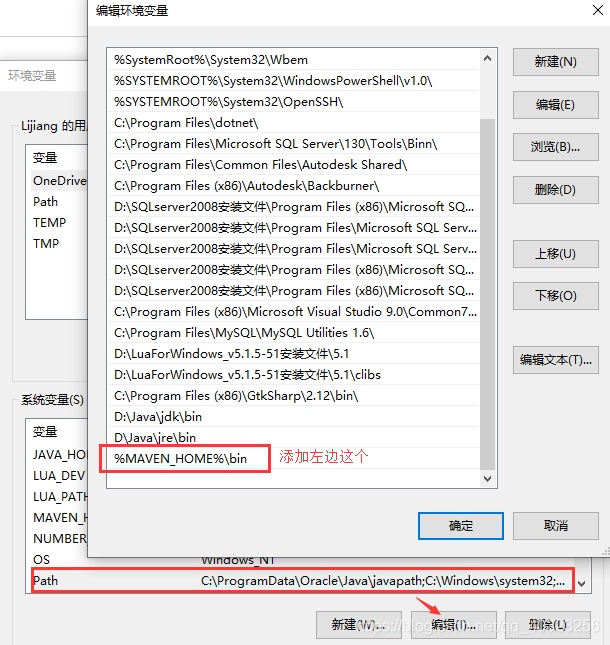
测试:win+r输入cmd
输入mvn -v,如果出现下面这些信息,就说明maven安装成功,环境变量设置成功。

修改本地仓库路径:

阿里云仓库的配置:
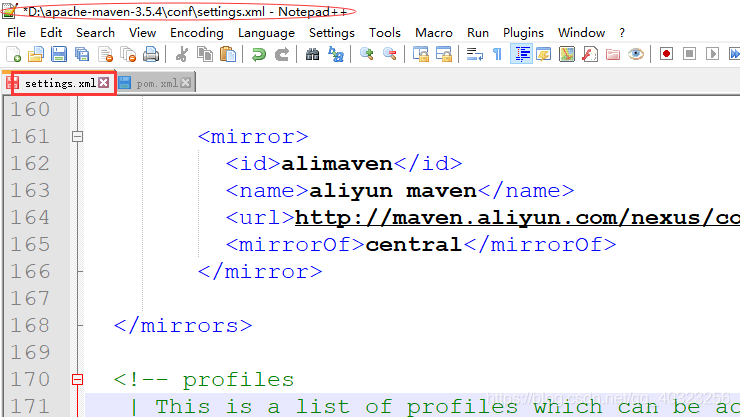
<mirror>
     <id>alimaven</id>
     <name>aliyun maven</name>
     <url>http://maven.aliyun.com/nexus/content/groups/public/</url>
     <mirrorOf>central</mirrorOf>
</mirror>
新建工作空间,在eclipse中进行基础的设置:https://blog.csdn.net/qq_40323256/article/details/90141711
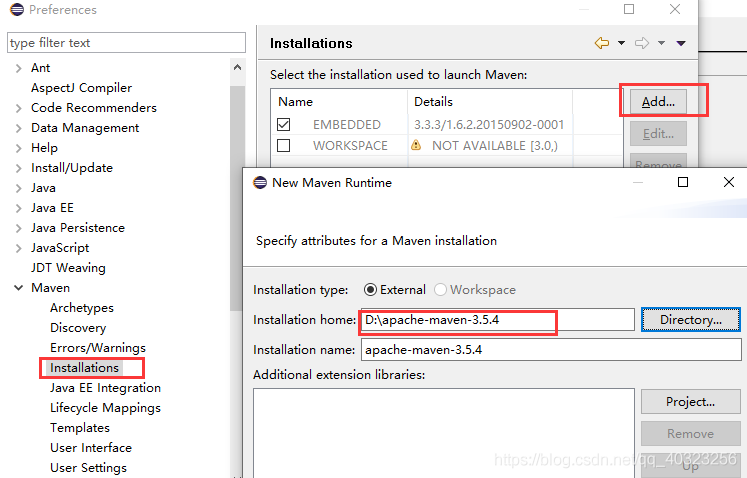
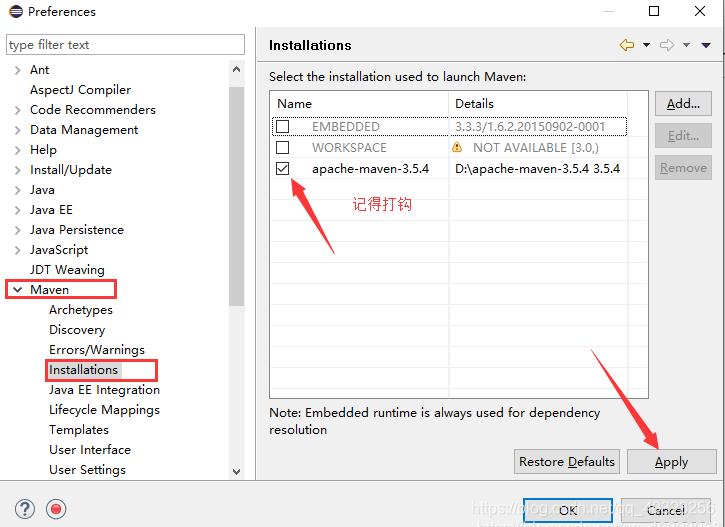
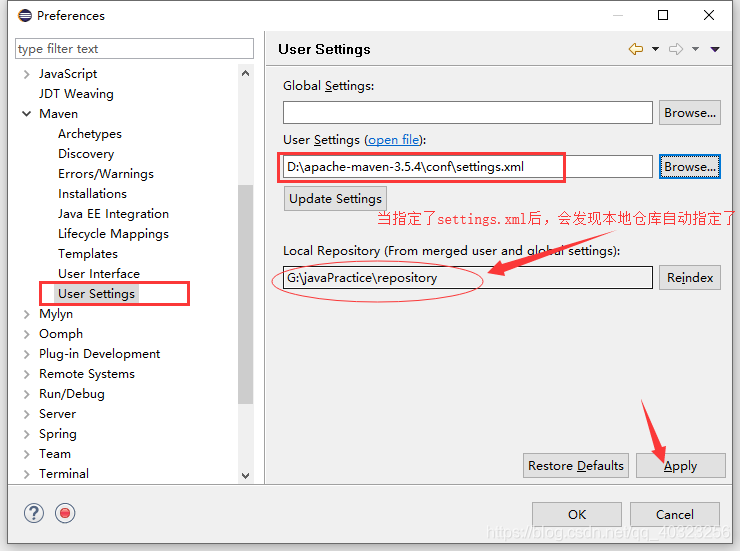
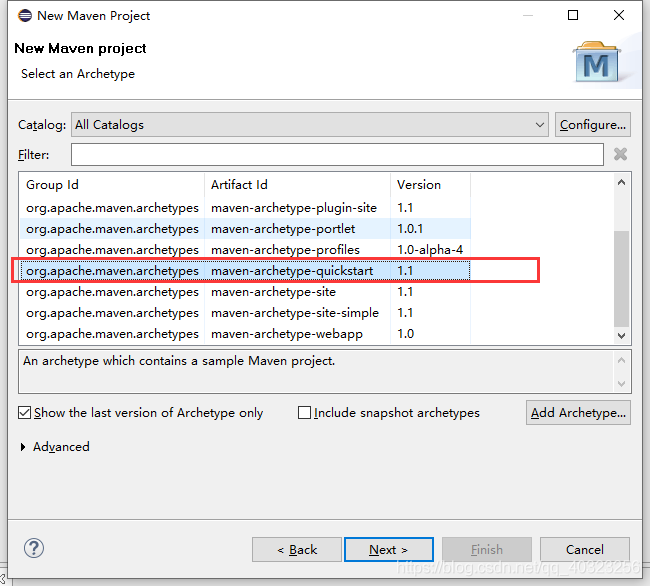
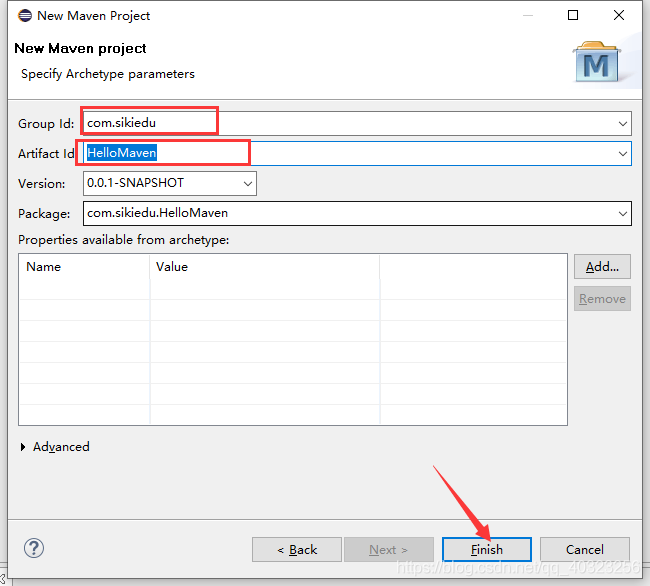
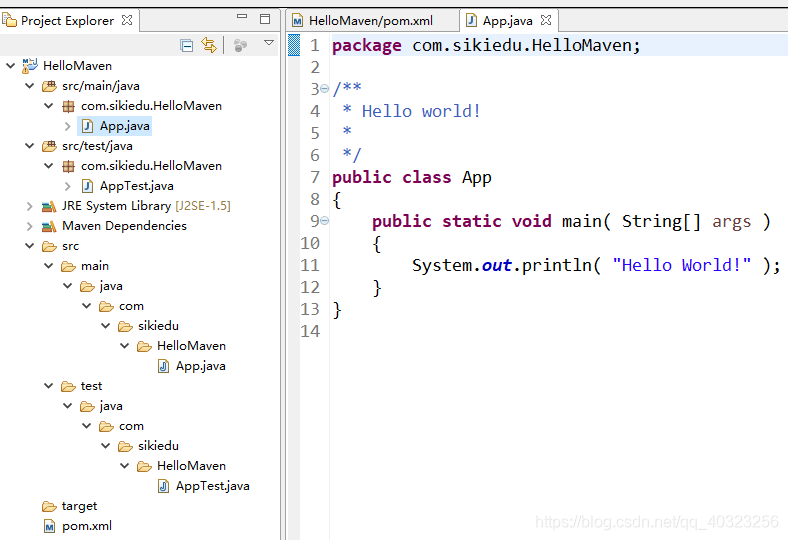
新建Maven工程:
(1)如果不勾选:Create a simple project,如下:
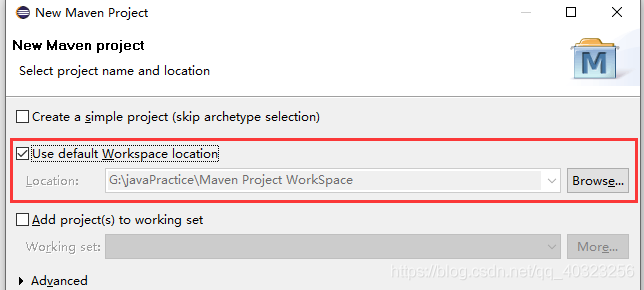
(2)如果勾选:Create a simple project,如下:

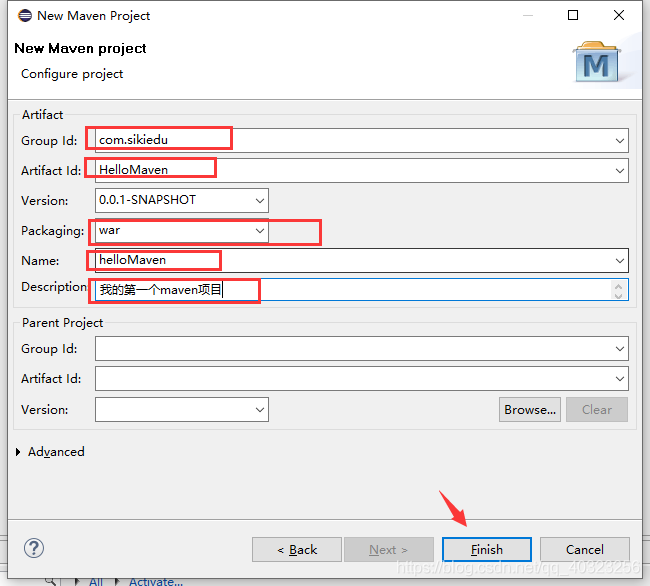
然后我们看到有报错,如下:

此时只需要在src-main-webapp下面新建文件夹“WEB-INF”,并在此文件夹下新建web.xml文件即可。或者直接在项目右键【javaEETools】-【generate deployment...】
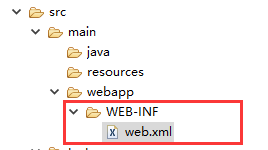
web.xml:
<?xml version="1.0" encoding="UTF-8"?>
<web-app xmlns:xsi="http://www.w3.org/2001/XMLSchema-instance"
     xmlns="http://xmlns.jcp.org/xml/ns/javaee"
     xsi:schemaLocation="http://xmlns.jcp.org/xml/ns/javaee http://xmlns.jcp.org/xml/ns/javaee/web-app_3_1.xsd"
     id="WebApp_ID" version="3.1">
 <display-name>HelloJavaWeb</display-name>
 <welcome-file-list>
  <welcome-file>index.html</welcome-file>
  <welcome-file>index.htm</welcome-file>
  <welcome-file>index.jsp</welcome-file>
  <welcome-file>default.html</welcome-file>
  <welcome-file>default.htm</welcome-file>
  <welcome-file>default.jsp</welcome-file>
 </welcome-file-list>
</web-app>
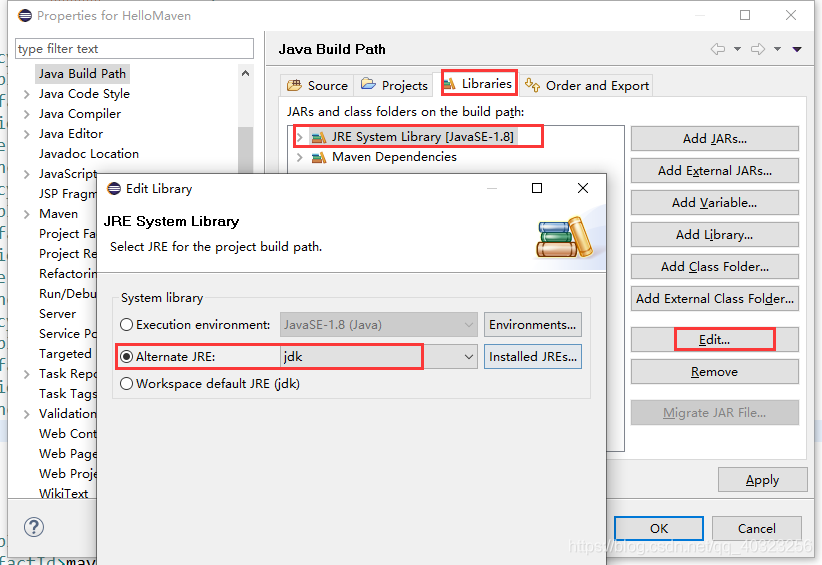
我们现在看到jre system library的后面是[j2se-1.5],

现在我们把它变为[javase-1.8]:
window-show view-other...
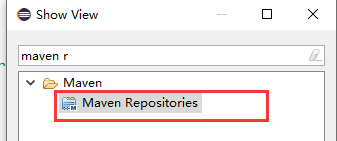
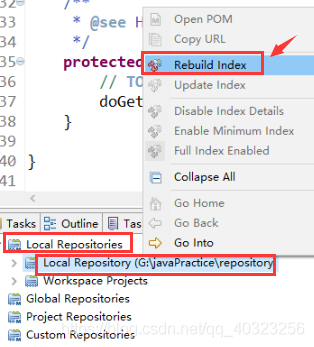

等待编译,大概2分钟

在pom.xml界面中右键:maven-add plugin
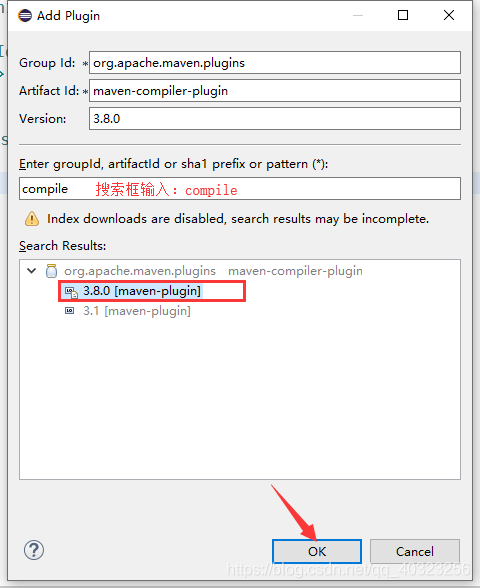
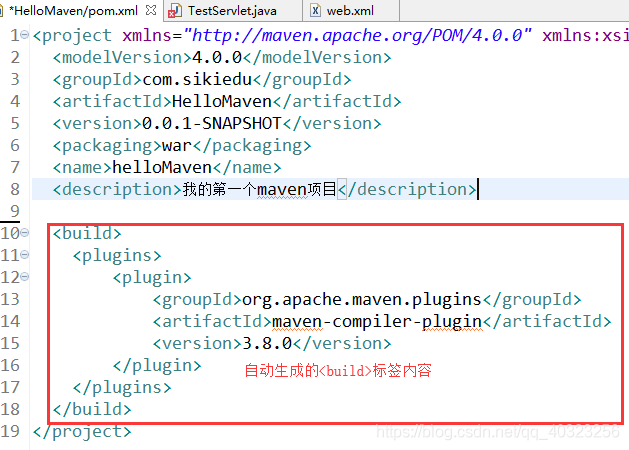
但是还不够,还要添加<configuration>标签内容,如下:
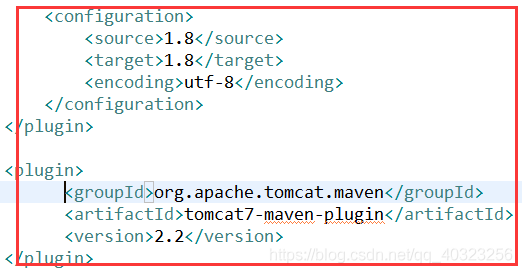
即:
 <build>
 	<plugins>
 		<plugin>
 			<groupId>org.apache.maven.plugins</groupId>
 			<artifactId>maven-compiler-plugin</artifactId>
 			<version>3.8.0</version>

 			<configuration>
 				<source>1.8</source>
 				<target>1.8</target>
 				<encoding>utf-8</encoding>
 			</configuration>
 		</plugin>

 		<plugin>
		   <groupId>org.apache.tomcat.maven</groupId>
		   <artifactId>tomcat7-maven-plugin</artifactId>
		   <version>2.2</version>
    </plugin>

 	</plugins>
 </build>
更新一下项目即可,步骤:右键项目-maven-update project...,这时候可以看到不报错了。
然后创建servlet:
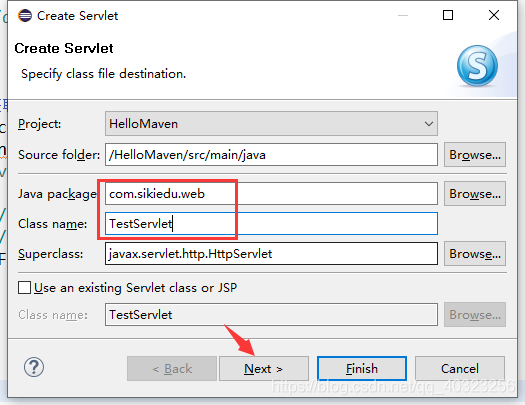

引入servlet的包:
在pom.xml界面中,右键-maven-Add dependency
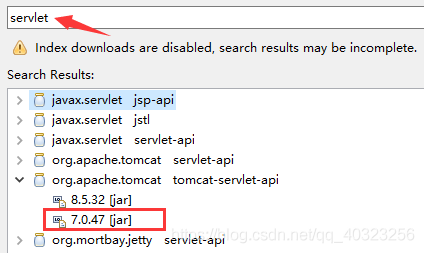
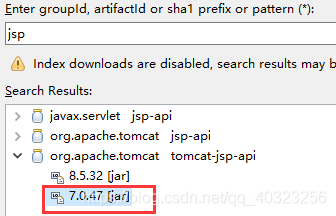
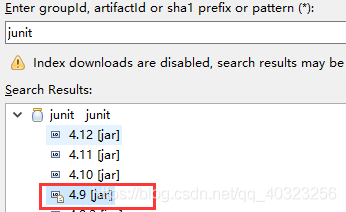
然后在pom.xml中可以看到添加的依赖,如下:

但是这还不够,还要添加:<scope>provided</scope>,如下:
 <dependencies>
	 	<dependency>
	 		<groupId>org.apache.tomcat</groupId>
	 		<artifactId>tomcat-jsp-api</artifactId>
	 		<version>7.0.47</version>
	 		<scope>provided</scope>
	 	</dependency>
	 	<dependency>
	 		<groupId>junit</groupId>
	 		<artifactId>junit</artifactId>
	 		<version>4.9</version>
	 		<scope>provided</scope>
	 	</dependency>
	 	<dependency>
	 		<groupId>org.apache.tomcat</groupId>
	 		<artifactId>tomcat-servlet-api</artifactId>
	 		<version>7.0.47</version>
	 	</dependency>
 </dependencies>
然后再:window-preferences:
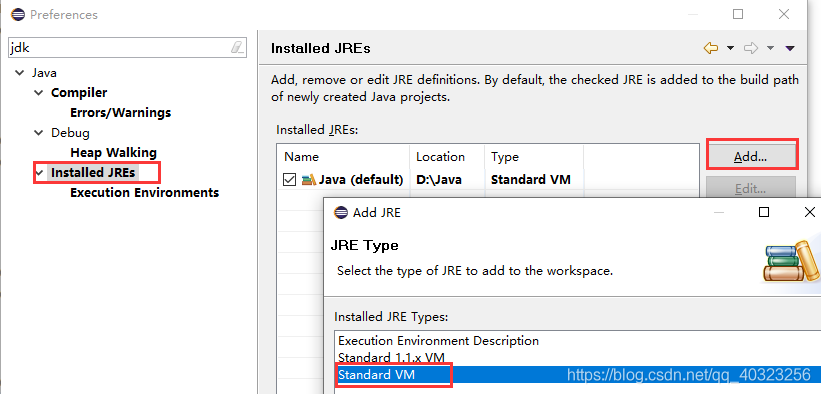
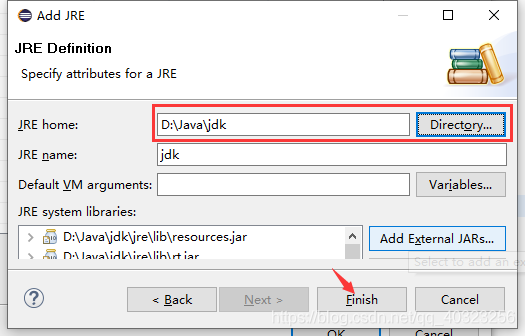
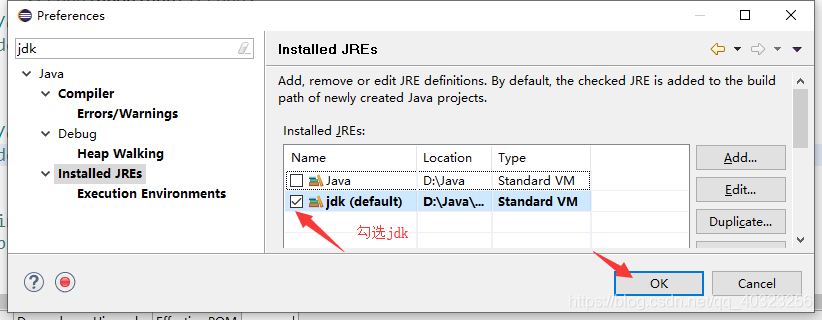
项目右键-build path-Configure build path...
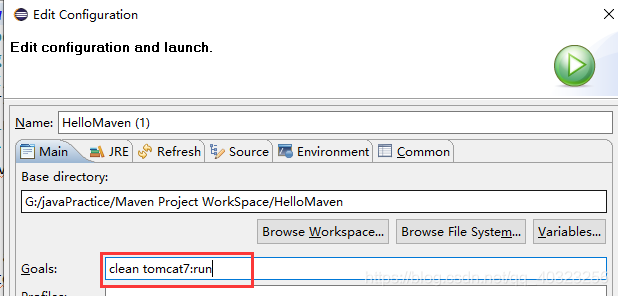
运行:runAs-maven build...,
注意:首次运行maven项目时,Goals中输入:clean tomcat7:run
对于非首次运行的maven项目,Goals中最好用这个,出现的bug少:clean tomcat7:redeploy
如果项目有报错,试试更新maven项目再运行:右键项目-【maven】-【update project...】
]


到此这篇关于Maven的安装配置详解的文章就介绍到这了,更多相关Maven 安装配置内容请搜索自学编程网以前的文章或继续浏览下面的相关文章希望大家以后多多支持自学编程网!

- 本文固定链接: https://zxbcw.cn/post/194375/
- 转载请注明:必须在正文中标注并保留原文链接
- QQ群: PHP高手阵营官方总群(344148542)
- QQ群: Yii2.0开发(304864863)
