
Python OpenCV存储图像使用的是Numpy存储,所以可以将Numpy当做图像类型操作,操作之前还需进行类型转换,转换到int8类型
import cv2
import numpy as np
# 使用numpy方式创建一个二维数组
img = np.ones((100,100))
# 转换成int8类型
img = np.int8(img)
# 颜色空间转换,单通道转换成多通道, 可选可不选
img = cv2.cvtColor(img, cv2.COLOR_GRAY2BGR)
cv2.imwrite("demo.jpg", img)
补充知识:Python中读取图片并转化为numpy.ndarray()数据的6种方式
方式: 返回类型
OpenCV np.ndarray
PIL PIL.JpegImagePlugin.JpegImageFile
keras.preprocessing.image PIL.JpegImagePlugin.JpegImageFile
Skimage.io np.ndarray
matplotlib.pyplot np.ndarray
matplotlib.image np.ndarray
import numpy as np
import cv2
from keras.preprocessing.image import ImageDataGenerator, array_to_img, img_to_array, load_img
from PIL import Image
import skimage.io as io
import matplotlib.pyplot as plt
import matplotlib.image as mpig

'''
方式:   返回类型
OpenCV   np.ndarray
PIL    PIL.JpegImagePlugin.JpegImageFile
keras.preprocessing.image PIL.JpegImagePlugin.JpegImageFile
Skimage.io   np.ndarray
matplotlib.pyplot  np.ndarray
matplotlib.image  np.ndarray
'''

imagePath="E:/DataSet/test1/trainSet/bus/300.jpg"

'''
方式一:使用OpenCV
'''
img1=cv2.imread(imagePath)
print("img1:",img1.shape)
print("img1:",type(img1))
print("-"*10)

'''
方式二:使用PIL
'''
img2=Image.open(imagePath)
print("img2:",img2)
print("img2:",type(img2))
#转换成np.ndarray格式
img2=np.array(img2)
print("img2:",img2.shape)
print("img2:",type(img2))
print("-"*10)

'''
方式三:使用keras.preprocessing.image
'''
img3=load_img(imagePath)
print("img3:",img3)
print("img3:",type(img3))
#转换成np.ndarray格式,使用np.array(),或者使用keras里的img_to_array()
#使用np.array()
#img3=np.array(img2)
#使用keras里的img_to_array()
img3=img_to_array(img3)
print("img3:",img3.shape)
print("img3:",type(img3))
print("-"*10)

'''
方式四:使用Skimage.io
'''
img4=io.imread(imagePath)
print("img4:",img4.shape)
print("img4:",type(img4))
print("-"*10)

'''
方式五:使用matplotlib.pyplot
'''
img5=plt.imread(imagePath)
print("img5:",img5.shape)
print("img5:",type(img5))
print("-"*10)

'''
方式六:使用matplotlib.image
'''
img6=mpig.imread(imagePath)
print("img6:",img6.shape)
print("img6:",type(img6))
print("-"*10)
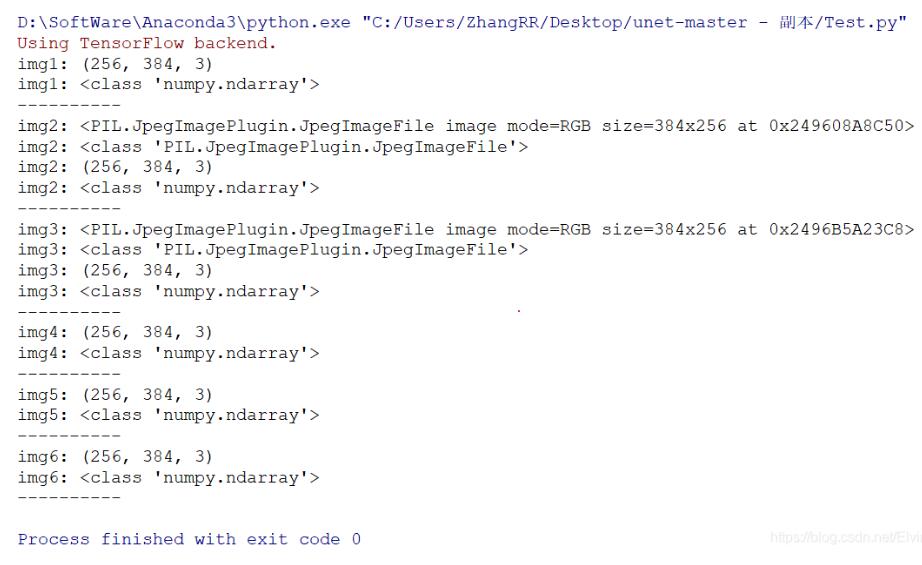
运行结果:
Using TensorFlow backend.
img1: (256, 384, 3)
img1: <class 'numpy.ndarray'>
----------
img2: <PIL.JpegImagePlugin.JpegImageFile image mode=RGB size=384x256 at 0x249608A8C50>
img2: <class 'PIL.JpegImagePlugin.JpegImageFile'>
img2: (256, 384, 3)
img2: <class 'numpy.ndarray'>
----------
img3: <PIL.JpegImagePlugin.JpegImageFile image mode=RGB size=384x256 at 0x2496B5A23C8>
img3: <class 'PIL.JpegImagePlugin.JpegImageFile'>
img3: (256, 384, 3)
img3: <class 'numpy.ndarray'>
----------
img4: (256, 384, 3)
img4: <class 'numpy.ndarray'>
----------
img5: (256, 384, 3)
img5: <class 'numpy.ndarray'>
----------
img6: (256, 384, 3)
img6: <class 'numpy.ndarray'>
----------
以上这篇Python OpenCV中的numpy与图像类型转换操作就是小编分享给大家的全部内容了,希望能给大家一个参考,也希望大家多多支持自学编程网。

- 本文固定链接: https://zxbcw.cn/post/201940/
- 转载请注明:必须在正文中标注并保留原文链接
- QQ群: PHP高手阵营官方总群(344148542)
- QQ群: Yii2.0开发(304864863)